Hibernate is a way to power off your system with the full memory saved to a hibernation file named hiberfil.sys. When the PC is turned on again, the content of the hiberfil.sys file is restored into the RAM and this will resume everything (including your opened files and running programs) where you left off. This tutorial will demonstrate you how to enable or disable Hibernate in Windows 10.
Option 1: Enable / Disable Hibernate Using Command Prompt
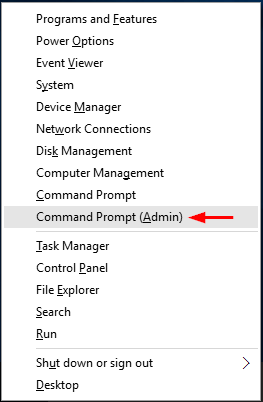
Open an elevated Command Prompt by pressing Win + X and selecting Command Prompt (Admin) from the WinX menu.

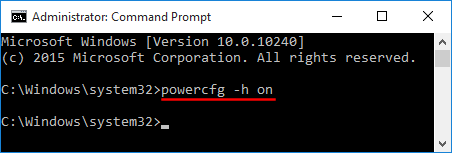
Type the following command and press Enter. This will turn on the Hibernate feature and the system will create a hiberfil.sys file under the root path of your system partition.
powercfg -h on

If you want to disable Hibernate, just type this command and press Enter. The system will delete the hiberfil.sys file automatically.
powercfg -h off

Option 2: Enable / Disable Hibernate Using Registry Editor
Open the Registry Editor by pressing Win + R and typing regedit in the Run box.

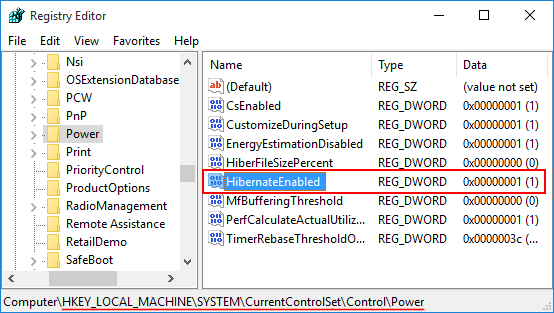
In the left pane of Registry Editor, navigate to the following location:
HKEY_LOCAL_MACHINE\SYSTEM\CurrentControlSet\Control\Power
Double-click on the HibernateEnabled entry in the right pane and change its value. To turn on Hibernate, set the value to 1, or set it to 0 if you want to turn off Hibernate.

Close Registry Editor and restart the computer to apply the changes.