Archive for September, 2024

2 Ways to Enable Auto Adjust Video Brightness based on Lighting in Windows 11

September 27th, 2024 by Admin

It is well known that Windows can automatically adjust the monitor/screen brightness based on the intensity of the ambient light. If you’ve upgraded to Windows 11, you can configure the light sensor to automatically adjust the brightness of the video you’re watching, not changing the brightness of the whole screen. In this tutorial we’ll show you 2 ways to enable auto adjust video brightness based on the surrounding lighting in Windows 11.

Method 1: Enable Auto Adjust Video Brightness based on Lighting via Settings App

  1. Open the Settings App (Win+I). Select Apps on the left side and then click Video playback on the right pane.
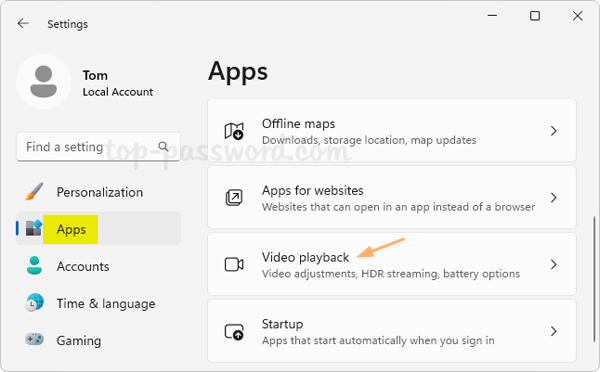
  2. If you can see the option called “Adjust video based on lighting around me“, you most likely have a light sensor. You can turn on this setting to enable auto brightness adjustment for video playback only.

    The last but not the least, make sure you uncheck the “Don’t adjust video based on lighting when on battery” option.

  3. Close the Settings app.

Method 2: Enable Auto Adjust Video Brightness based on Lighting via Registry Editor

  1. Open Registry Editor and navigate to: HKEY_CURRENT_USER\Software\Microsoft\Windows\CurrentVersion\VideoSettings. In the right pane, right-click the empty area and choose New -> DWORD (32-bit) Value.
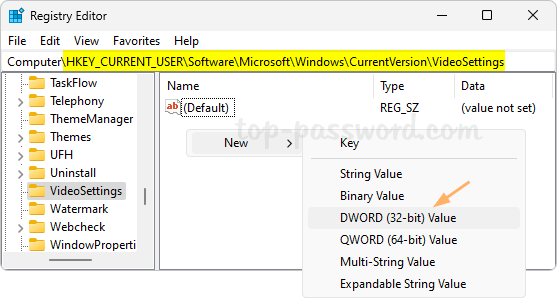
    If the subkey VideoSettings doesn’t exist, you need to create it first.

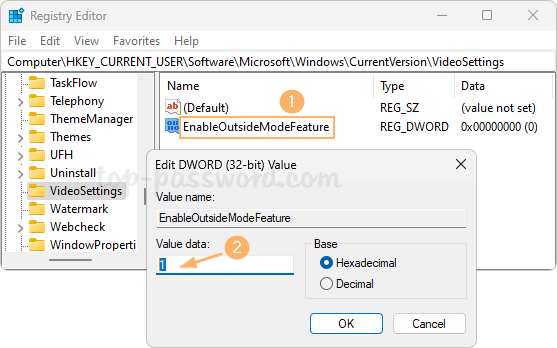
  2. Name the newly-created DWORD EnableOutsideModeFeature, then double-click it and set its value data to 1. This will turn on the “Adjust video based on lighting around me” feature in Windows 11.
  3. Next, create another DWORD DisableAutoLightingOnBattery and leave its value as 0. This will turn off the “Don’t adjust video based on lighting when on battery” option.
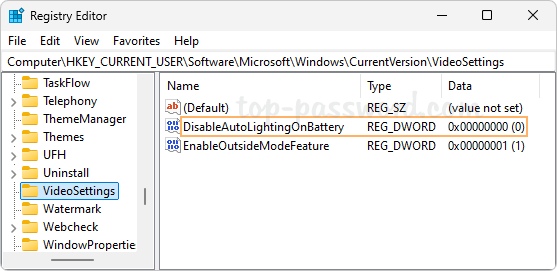
  4. Close Registry Editor. Log out of your account or restart Windows to see the changes.

That’s it!
2 Ways to Turn On Text Cursor Indicator in Windows 11

September 3rd, 2024 by Admin

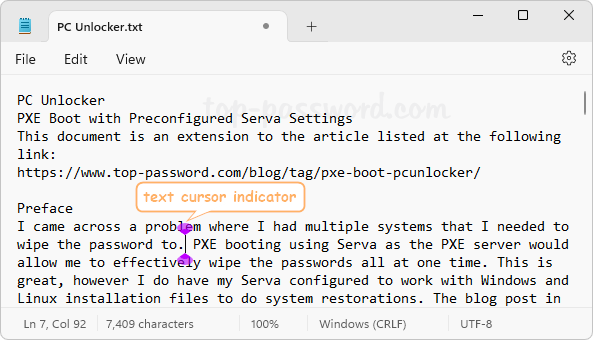
When you’re typing in your text editor, the text cursor appears as a vertical thin line which may make it hard for you to see it in a pile of text. If you experience the difficulty of finding where your text insertion point is located, the most effective method is to enable the text cursor indicator. In this tutorial we’ll show you 2 ways to turn on the text cursor indicator in Windows 11, making your cursor more visible and easier to be seen.

Method 1: Turn On Text Cursor Indicator in Windows 11 via Settings App

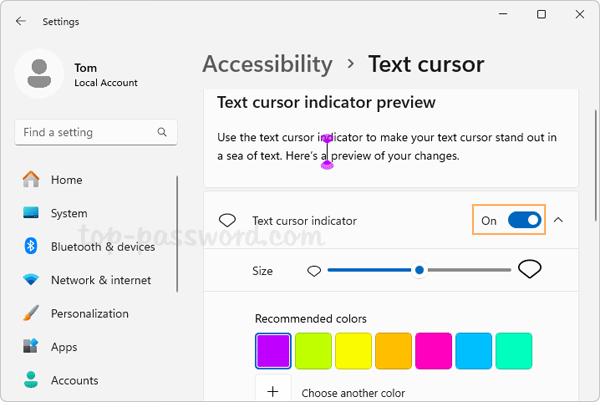
  1. Press the Windows key + I together to start the Settings app. Choose Accessibility on the left side, then click on “Text cursor” on the right pane.

  2. Toggle the “Text cursor indicator” option to the ON position. From there you can also customize the color or size of the cursor indicator to make it stand out more in the sea of text.

  3. Close the Settings app and it will immediately activate text cursor indicator feature on your Windows 11 computer.

Method 2: Turn On Text Cursor Indicator in Windows 11 via Registry Editor

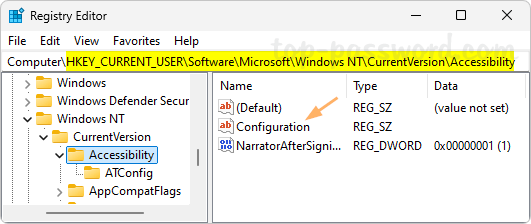
  1. Open Registry Editor and navigate to the location: HKEY_CURRENT_USER\SOFTWARE\Microsoft\Windows NT\CurrentVersion\Accessibility, then double-click the Configuration entry on the right pane.

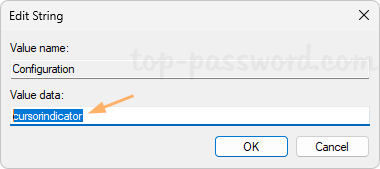
  2. Enter cursorindicator in the value data box and click OK to enable the text cursor indicator.

    Whenever you need to turn off text cursor indicator later, just set the value data to be empty.

  3. Close Registry Editor. You need to log off or restart Windows to make the changes take effect.

That’s it!