Night Light, also known as “Blue Light”, is a new feature introduced since Windows 10 Creators Update, which makes your display use warmer colors at night to help you sleep better and reduce eyestrain. In this tutorial we’ll show you how to enable or disable Night Light mode in Windows 10, even when the Night Light setting is greyed out.
How To Enable or Disable Night Light in Windows 10?
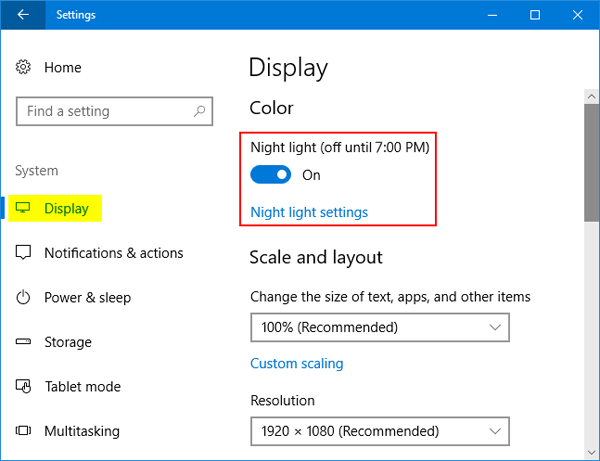
- Press the Windows + I keyboard shortcut to open the Settings app, and then click on the System icon.

- Select the Display tab on the left side. You can then toggle the “Night light” button to On to enable it, or Off to disable it.

- If you enable the Night Light feature, you can configure it further by clicking the “Night light settings” link under the toggle.

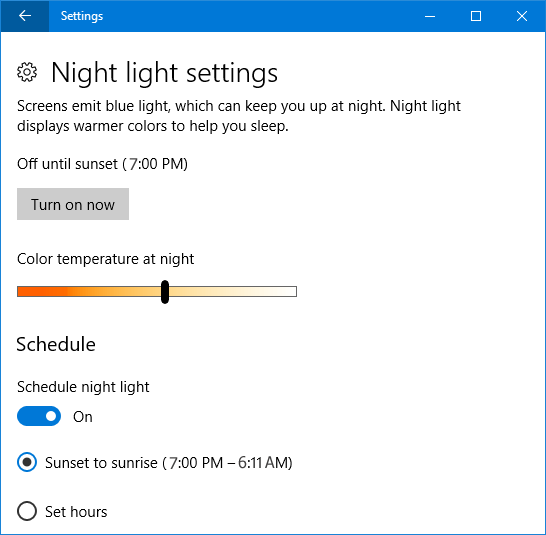
There, you can adjust the color temperature by dragging the slider, and set Night Light to kick in when the sun sets and it will automatically get disabled during sunrise. When it’s done, you can click the “Turn on now” button to immediately enable the Night Light feature.
Can’t Enable or Disable Night Light?
Night Light settings is greyed out and you can’t disable or enable it? Here is a quick workaround to resolve this issue. Follow these steps:
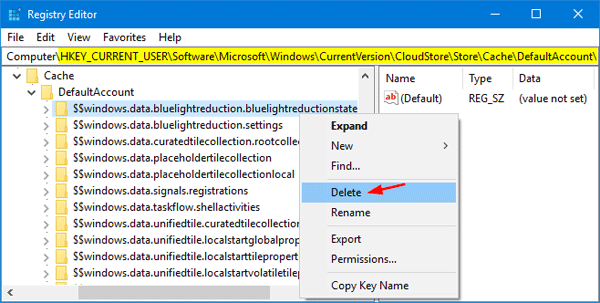
- Open the Registry Editor and navigate to the following key:
HKEY_CURRENT_USER\Software\Microsoft\Windows\CurrentVersion\CloudStore\Store\Cache\DefaultAccount - Expand the DefaultAccount key, then right-click and delete the following two subkeys:
$$windows.data.bluelightreduction.bluelightreductionstate

$$windows.data.bluelightreduction.settings
- When you’re done, close Registry Editor and reboot your computer. Open the Settings app and you should then be able to turn Night Light on or off.