When you delete a file, Windows only marks the file as deleted and it continues existing on your hard drive, even after you empty it from Recycle Bin. The deleted files can be recovered using data recovery software until they’re overwritten. In this tutorial we’ll show you how to use Microsoft’s command-line utility to securely delete, shred and wipe your files in Windows 10, so they can’t be recovered.
Part 1: Securely Delete Specific Folders or Files
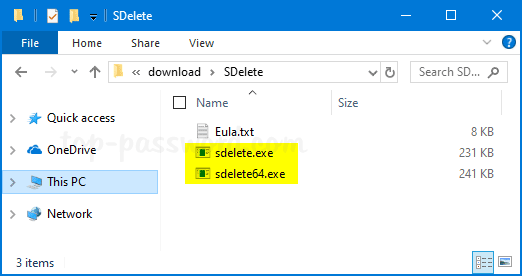
To get started, download the SDelete utility from Microsoft’s website. After extracting the download file, copy the resulting .exe files to the System32 directory: C:\Windows\System32.

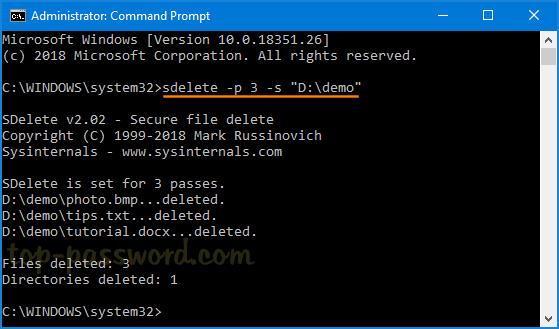
Open the elevated Command Prompt and you can securely and permanently delete any folder or file by running this command:
sdelete.exe -p 3 -s "your_folder_or_file"

By default, SDelete will overwrite the given file only once. You can use the –p option to specify the number of times to overwrite the data.
Part 2: Securely Wipe & Overwrite Free Space on Entire Drive
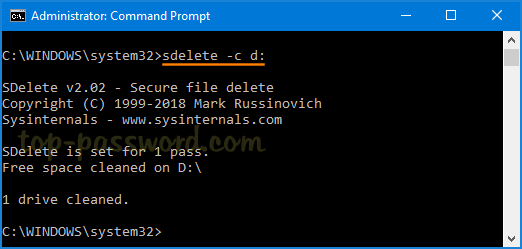
How can I overwrite the files that have been previously deleted without using the SDelete utility? To securely wipe all files and folders you have already deleted, simple run the following command to overwrite all free space on your drive. Replace D with the drive you want to clean up.
sdelete.exe -c:D

This command will only wipe the free space to prevent recovery of deleted files, and it won’t affect any files on your drive, so it’s safe. There is a similar built-in console tool called cipher.exe which also lets you wipe the free disk space, but it’s much slower than SDelete.
cipher /w:D

Conclusion
Using the SDelete utility you can securely delete files and wipe free space in Windows 10 to prevent any sensitive data from falling into the wrong hands. Despite SDelete does not have a graphical user interface, it is still easy for anyone to use.