How do I remove a computer from a domain that no longer exists? Or unjoin and rejoin the domain without resetting user profile? In this tutorial we’ll show you 3 methods to remove Windows 10 computer from domain. Before getting started, you need to log on to Windows 10 with local administrator account instead of domain account. If you couldn’t remember the password, PCUnlocker can be of help.
Method 1: Remove Windows 10 Computer from Domain Using System Properties
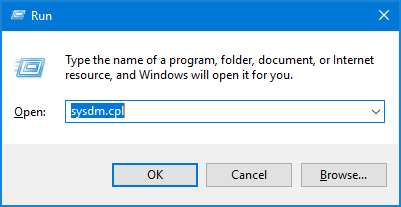
- Press the Windows key + R on the keyboard, then type sysdm.cpl in the Run box and press Enter.
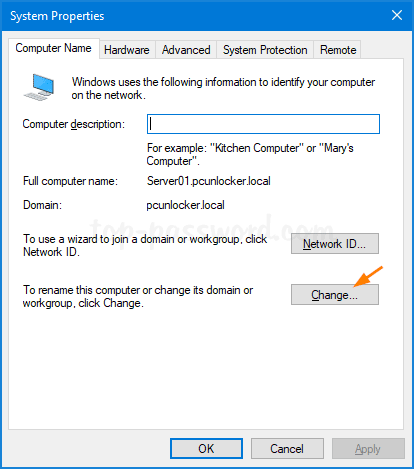
- When the System Properties window opens, click on the Change button at the bottom of the “Computer Name” tab.
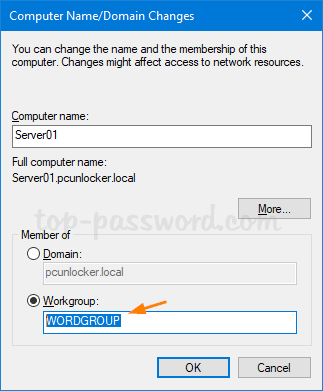
- Select the Workgroup radio button, enter a workgroup name you want to be a member of after unjoining the domain. Click OK.
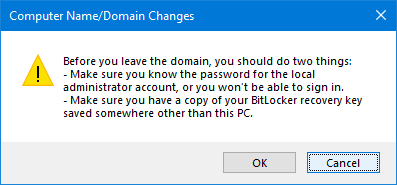
- Click OK when prompted.
You will be asked to restart the computer so that changes can be applied.
Method 2: Remove Windows 10 Computer from Domain Using Settings App
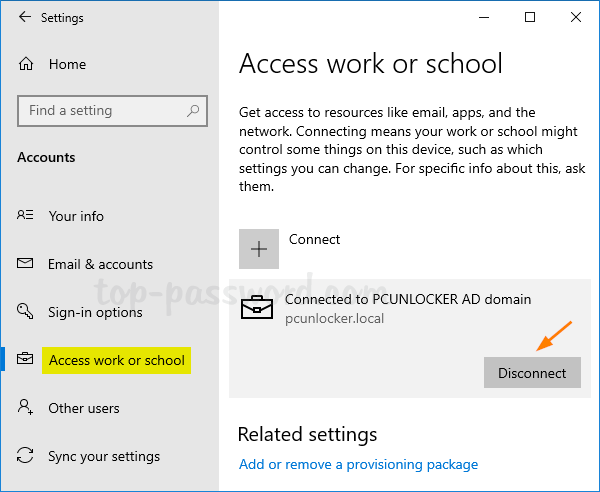
- Open the Settings app and navigate to Accounts -> Access work or school. On the right pane, click the icon labeled Connected to (your domain) AD domain, and then click Disconnect.
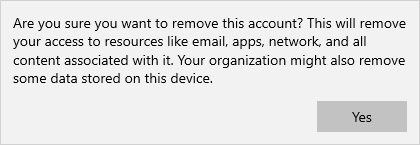
- Click on Yes to confirm.
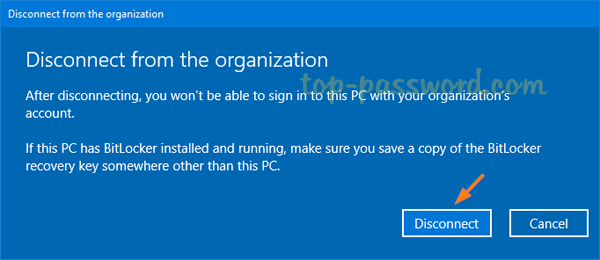
- When the “Disconnect from the organization” prompt appears, click on Disconnect.
- Once restarted, you Windows 10 computer has been unjoined from active directory domain.
Method 3: Remove Windows 10 Computer from Domain Using PowerShell
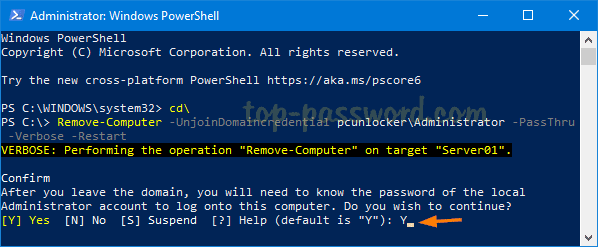
- Open the Windows PowerShell with admin rights, type the following command to unjoin the domain.
Remove-Computer -UnjoinDomaincredential Domain_Name\Administrator -PassThru -Verbose -Restart -Force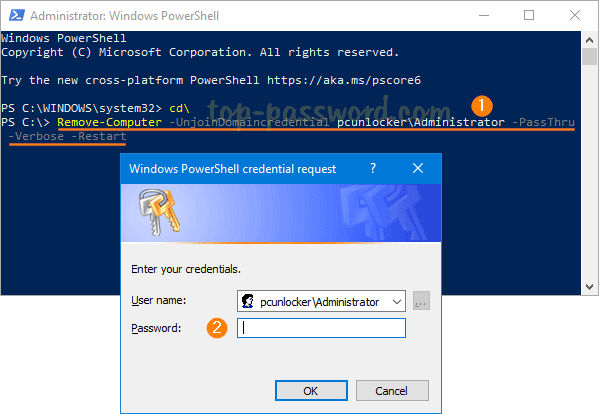
Enter the domain administrator password when prompted, and click OK.
- You’ll see a warning: After you leave the domain you will need to know the password of the local administrator account to log onto this computer. Type Y to continue.
- Restart your computer to complete this unjoin operation.