If you need to frequently use Control Panel, you can add it to the “This PC” section of File Explorer for quick access. In this tutorial we’ll walk you through the steps of adding Control Panel to File Explorer in Windows 10.
How to Add Control Panel to File Explorer in Windows 10
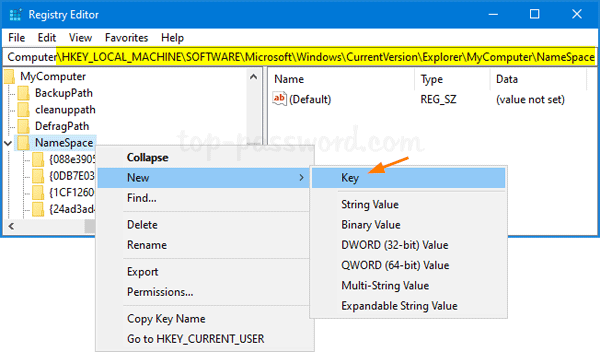
- Open Registry Editor, copy and paste the following path in the address bar and then press the Enter key on your keyboard to get there.
HKEY_LOCAL_MACHINE\SOFTWARE\Microsoft\Windows\CurrentVersion\Explorer\MyComputer\NameSpace
Next, right-click on the NameSpace key and choose New -> Key.
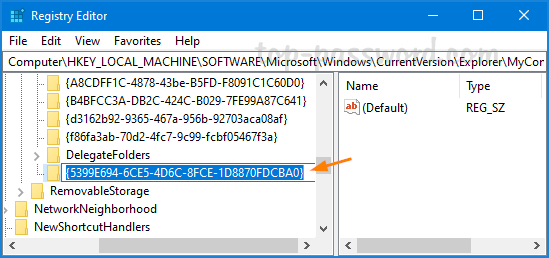
- Rename the newly-created key as {5399E694-6CE5-4D6C-8FCE-1D8870FDCBA0}.

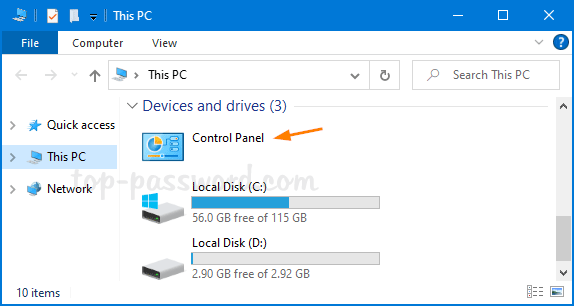
- Close Registry Editor and relaunch File Explorer. The “Control Panel” item will appear under the
Devices and drivessection.
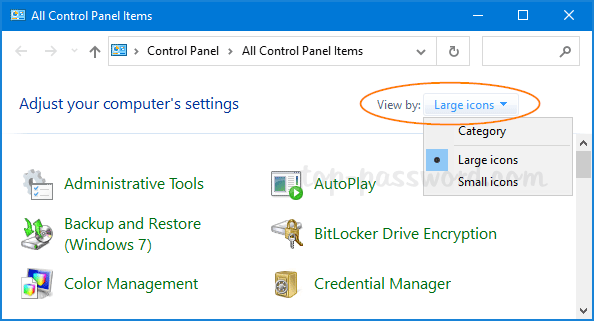
You can click the “Control Panel” item and open it to either Category view or Large/Small icon view.

If you later want to remove Control Panel from the “This PC” section of File Explorer, just open the same registry location and delete the new key you created. That’s it!