Unable to turn on App Execution Aliases for your desired application through the Settings app? Don’t worry! You can make a program alias using a registry tweak. In this tutorial we’ll walk you through the steps of creating an execution alias for any specific app in Windows 11.
How to Create Execution Aliases for Specific Apps in Windows 11
- Open Registry Editor and navigate to:
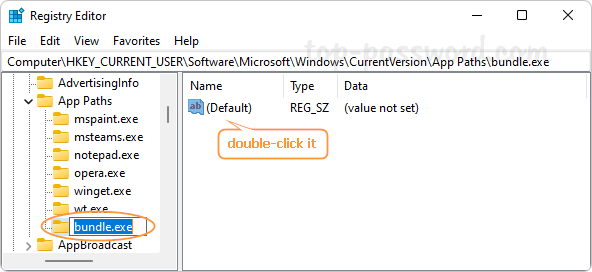
HKEY_CURRENT_USER\Software\Microsoft\Windows\CurrentVersion\App Paths. In the left pane, right-click on the “App Paths” key and select New -> Key.
- Name the new key with a meaningful alias of your desired app. The alias should end with the “.exe” extension. Next, double-click the (Default) value in the right pane.

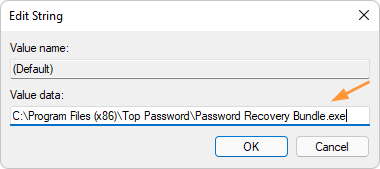
- Enter the absolute filename of your app’s executable file, and click OK.

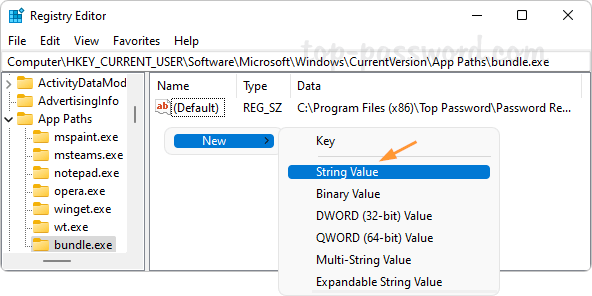
- Next, right-click the blank area in the right pane and select New -> String Value.

- Name the string “path”, and change its value data to the full path (minus the filename itself) of your app.

- Close Registry Editor. Now you can type that alias in the Run command box, Command Prompt or PowerShell to launch your app quickly.
Conclusion
That’s how you can create an execution alias for any specific app in Windows 11. When you need to rename the app alias, just open Registry Editor and browse to: HKEY_CURRENT_USER\Software\Microsoft\Windows\CurrentVersion\App Paths, expand the “App Paths” key in the left pane. Right-click the subkey which is named with your app alias, and rename it with a new alias.