Microsoft Word allows you to create an auto backup every time when you save a document. After turning on automatic backup feature, Microsoft Word will automatically make a copy of the last saved version in the same folder as your original document. When you change your mind about the last edits you made to your document, you can use the recent backup copy.
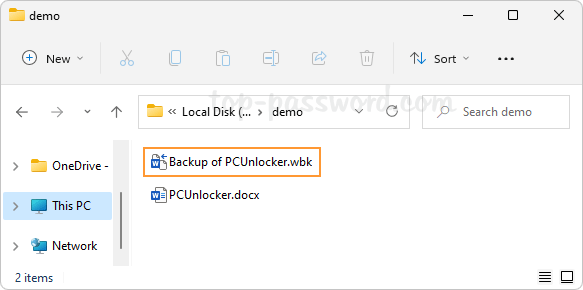
In this tutorial we’ll show you 2 methods to configure Microsoft Word 2021 / 2019 / 2016 to always create backup copy of a document in Windows 11 / 10.
Method 1: Using Word Options to Enable Automatic Backup
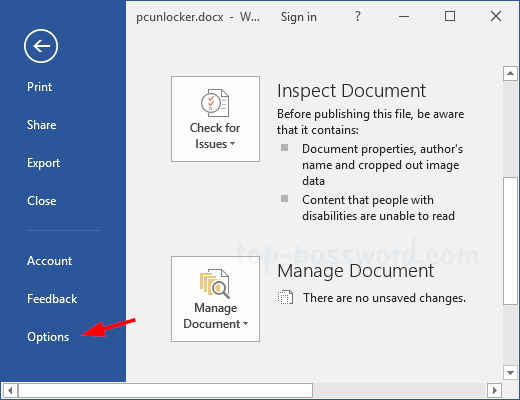
- When using Microsoft Word, click the File tab. Next, click the Options on the left navigation pane.
- It will open the Word Options window. Choose the Advanced tab on the left. On the right side, scroll down to the Save heading and check “Always create backup copy“. Click OK.
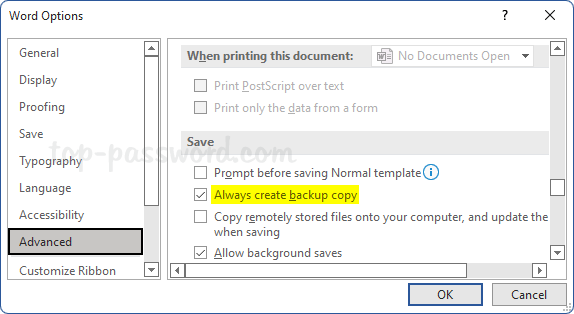
Whenever you want to stop Word automatically saving a backup copy of your document, just uncheck the above option again.
Method 2: Using Registry Editor to Make Word Always Create Backup Copy
- Open Registry Editor and navigate to the following location, then double-click the DWORD BackupDuringSave on the right pane.
HKEY_CURRENT_USER\Software\Microsoft\Office\16.0\Word\Options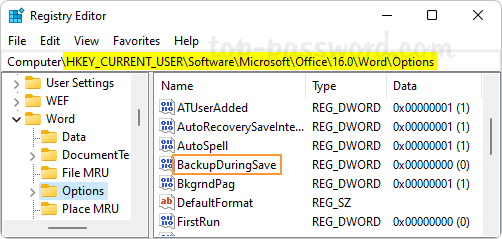
For Office Word 2021 / 2019 / 2016, the version number is 16.0. If you’re using an older version, the version number might be 15.0 or others.
- Change its value data from 0 to 1. Click OK.
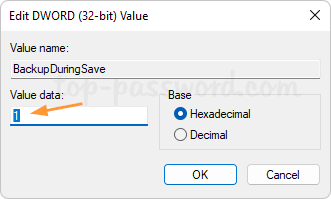
If you want to prevent Word from creating an automatic backup copy, change the value data back to 0.
- Close Registry Editor. Restart Microsoft Word and it will automatically begin backing up all your Word files in .wbk format in the same location where your original Word documents are saved.
That’s it!