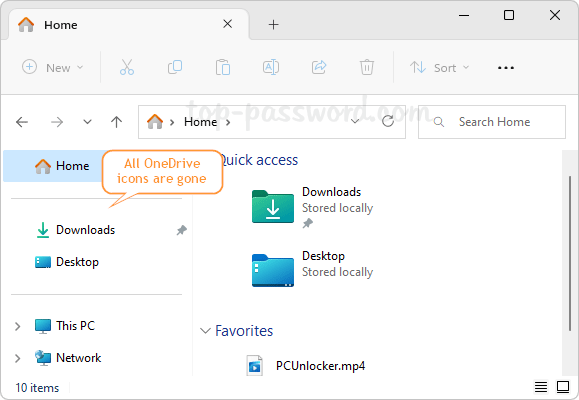
Is there a way to remove “OneDrive – Personal” from File Explorer? After opening File Explorer, you should be able to see two entries for OneDrive in the left navigation pane. In this tutorial we’ll show you how to remove all OneDrive icons from File Explorer navigation pane in Windows 11, without uninstall OneDrive.
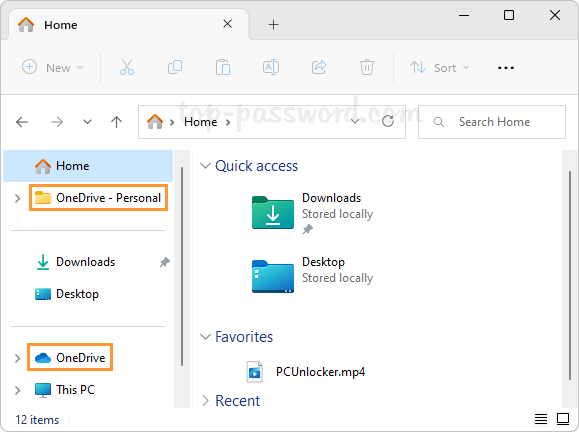
How to Remove OneDrive from File Explorer Navigation Pane in Windows 11
- Open Registry Editor. Copy and paste the following given path in the address bar and hit Enter, then double-click the DWORD System.IsPinnedToNameSpaceTree on the right pane.
HKEY_CURRENT_USER\Software\Classes\CLSID\{018D5C66-4533-4307-9B53-224DE2ED1FE6}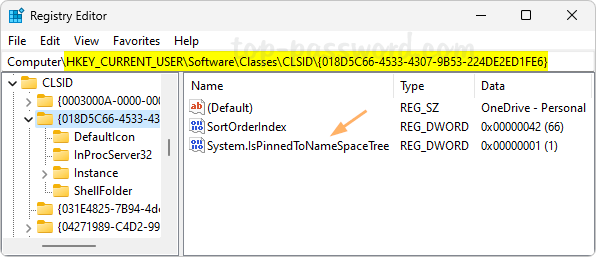
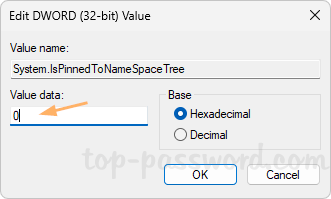
- Change its value data from 1 to 0, click OK.
- If you restart File Explorer, you’ll find that the “OneDrive – Personal” entry will no longer show up in the left navigation pane.
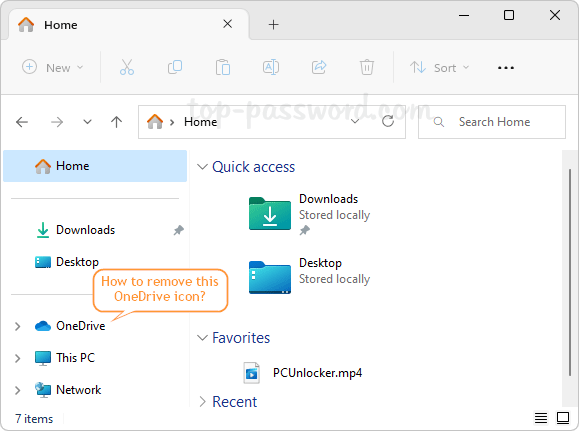
- To remove the second OneDrive entry, open Registry Editor, copy-paste the below path in the address bar and press Enter. In the left pane, right-click on the {04271989-C4D2-9950-BDF1-DD622415241E} key and choose Rename from the pop-up menu.
HKEY_CURRENT_USER\Software\Microsoft\Windows\CurrentVersion\Explorer\Desktop\NameSpace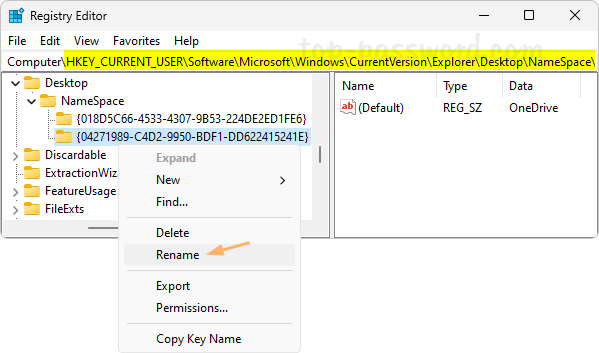
- Simply add a prefix to the key name and press Enter.
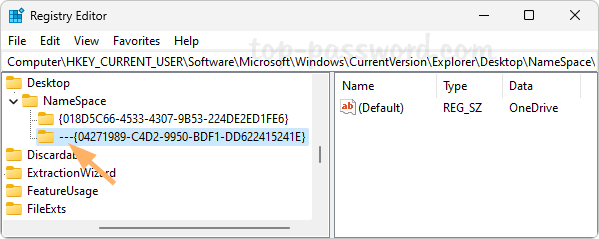
- Close Registry Editor. The second “OneDrive” entry will immediately disappear from the left navigation pane of File Explorer.
That’s it!