Windows Defender is a built-in antivirus software comes with Windows 10 and Windows 8. While Windows Defender provides very baseline protection, it slows down your PC considerably. Users who prefer using third-party security solution like Kaspersky, McAfee or Norton might want to completely disable Windows Defender. Here are 3 ways to turn off Windows Defender in Windows 10 or 8.
Method 1: Permanently Turn off Windows Defender with Group Policy
- Press the Windows key + R to bring up the Run box. Type gpedit.msc and hit Enter.

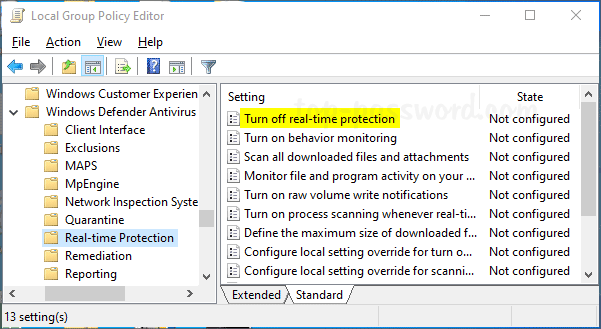
- In the left pane of Local Group Policy Editor, navigate to the following location:
Computer Configuration -> Administrative Templates -> Windows Components -> Windows Defender Antivirus -> Real-time Protection
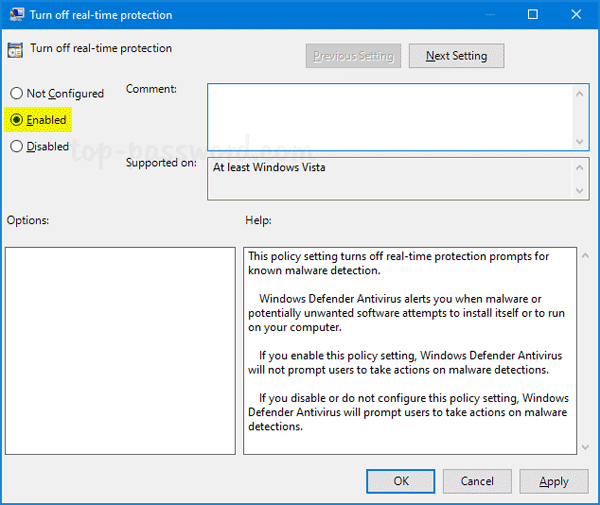
In the right pane you will see a policy labeled “Turn off real-time protection“. Double-click on it to modify.
- Select Enabled. Click Apply and then OK.

- You have to restart the computer to allow this policy to take place. When you try to turn on real-time protection again in Windows Defender, you’ll get a message that saying “This setting is managed by your administrator“.
Method 2: Permanently Turn off Windows Defender with Command Prompt
- Open the Command Prompt as administrator. Type the following command and press Enter.
reg add "HKEY_LOCAL_MACHINE\SOFTWARE\Policies\Microsoft\Windows Defender\Real-Time Protection" /v DisableRealtimeMonitoring /t REG_DWORD /d 1 /f
- Restart your computer to apply the changes, and then Windows Defender should now be disabled.
Method 3: Temporarily Turn off Real-time Protection from Windows Defender
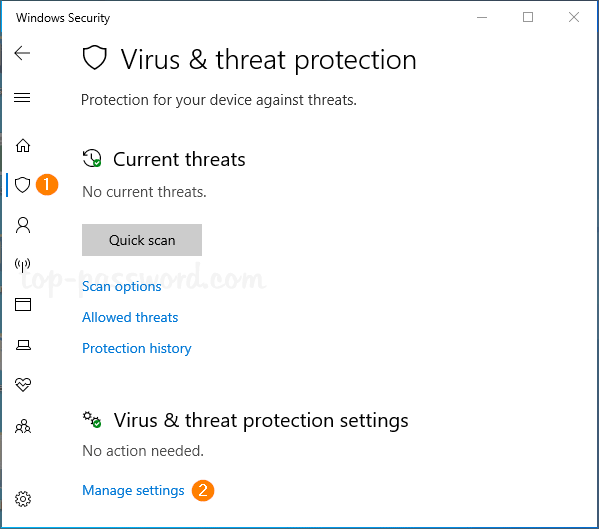
- After opening up Windows Defender, navigate to Virus & threat protection tab. Under the “Virus & threat protection settings” section, click on the Manage settings link.

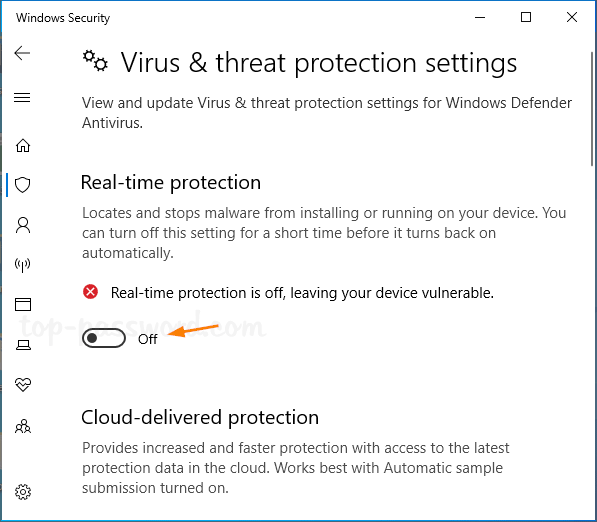
- Turn off the Real-time protection toggle switch.

- Windows Defender will disable its real-time protection temporarily. The next time you restart your computer Windows Defender will re-enable automatically.