Did you mess with the local security policy? Or a certain program changed the security policy that caused some strange issues? Luckily there is a simple way to reset / restore your local security policy settings to default in Windows 10, 8, 7, Vista and XP, if you mess up.
How to Restore Local Security Policy to Default in Windows 10, 8, 7, Vista and XP?
This method uses the default security configuration templates to reset the local policies (including account lockout and password complexity requirements policy). Here’s how to reset local security policy settings to their default values:
- Open an elevated Command Prompt. In Windows 10 and 8, press the Windows + X key combinations to open the Quick Access menu and choose Command Prompt (Admin). In Windows 7 or Vista, click the Start menu, then select All Programs -> Accessories, right-click on Command Prompt and select “Run as administrator”.
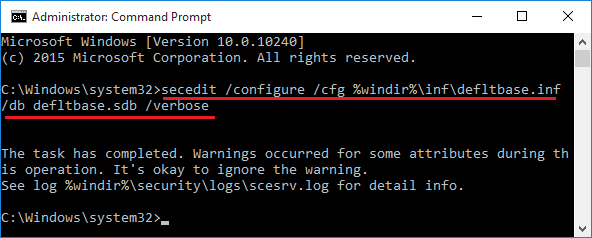
- Now copy and paste the following command into the Command Prompt. Hit Enter.
secedit /configure /cfg %windir%\inf\defltbase.inf /db defltbase.sdb /verboseIf you are running Windows XP and need to reset the security settings to their default values, use this command instead:
secedit /configure /cfg %windir%\repair\secsetup.inf /db secsetup.sdb /verbose
- This will take a few minutes to reset all the policies back to the Windows defaults. you’ll have to restart the computer to see the changes.