Whether you plan to upgrade your Windows 7 machine to Windows 8 or buy a new PC with Windows 8 pre-installed, you can use Windows Easy Transfer to copy all your files and settings from your old machine or old version of Windows to your new machine running Windows 8. In this article, I’ll walk you through the steps of using Windows Easy Transfer and an external USB drive to easily complete the task.
Before we get started, let me clarify exactly what you can transfer using Windows Easy Transfer:
- User accounts
- Documents
- Music
- Pictures
- E-mail (including contacts and e-mail settings)
- Internet Favorites
- Videos
- And more
Part 1: Save Windows 7 Files and Settings to USB Drive
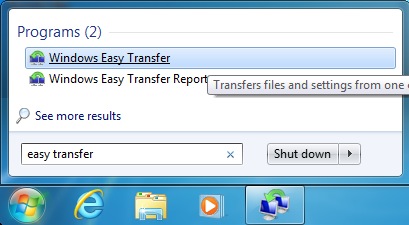
- To get started, you need to open Windows Easy Transfer on your old PC. In Windows 7, just search for Easy Transfer and you’ll see it show up:

- Click on Windows Easy Transfer from the list of programs.
- You’ll be presented with the Welcome to Windows Easy Transfer screen, which gives you an overview of what items you can transfer. Click Next to start.
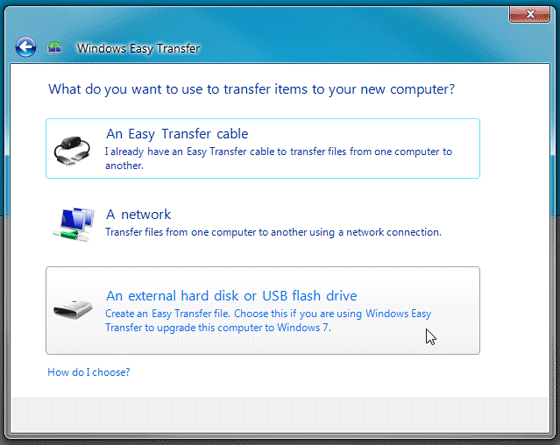
- Select An external hard disk or USB flash drive.

- Now, select This is my old computer option to transfer files and setting from current PC.
- In this step, it shows currently logged-in User Profile and Shared Items options. You can customize the default folder and file section by hitting Customize. The Customize link present in User Profile section lets you pick Documents, Music, Pictures, Videos, Program Settings and Windows Settings, whereas the Shared Items section’s Customize link will open a Shared Items menu, allowing you to choose the shared items that are to be moved.
- Once you’ve selected the files, it will ask you to enter the password to secure the transfer process. Clicking Save will prompt you to specify the USB drive where your files and settings are to be copied.
- When the destination folder is selected, it will start copying the settings and selected folders. The time it takes to complete the copying process depends upon the volume of selected data.
- Window 7 Easy Transfer wizard saves all the settings, user folders, and files from Windows 7 in a MIG file. Now, eject the USB drive, and move to PC running Windows 8.
Part 2: Restore Files and Settings from USB Drive to Windows 8
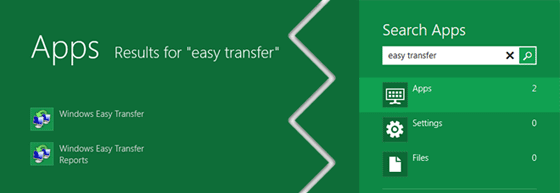
- To get started, open Windows Search from Windows 8 Start hover menu, enter easy transfer in search bar, and then click Apps. Now, launch Windows Easy Transfer utility from main window.

- In Windows Easy Transfer wizard, select An external hard disk or USB flash drive option to restore data and settings saved in MIG file.
- In next step, choose This is my new computer option.
- It will now ask you to plug-in the USB drive where the MIG file is saved. Plug-in the USB drive and select Yes to specify the Windows Easy Transfer file.
- On selecting the MIG file, it will ask you to specify the password. Enter the password to restore the data, and click Next.
- Once access is granted, it will ask you to choose what to transfer from old PC. At this point, you can select the files and settings that are to be transferred to your new PC. Click Customize under User Profile and Shared Items sections to select the folders.
- Once you’ve selected the settings and folders, hit Transfer to begin the settings and data migration process.
- After this has finished you will get a message telling you the transfer is complete. You can also see a list of what files and programs were transferred, or choose close to exit the wizard. Now you have the best of both worlds – all your important old files saved onto your new computer.
Windows Easy Transfer provides 3 options to transfer your files and settings: An Easy Transfer cable, A network and A external hard disk or USB flash drive. The first two options require connecting your new PC to old PC in order to send the files and settings. However, if you’re planning to upgrade your PC to Windows 8, select the third option that moves your system settings along with files to external hard drive.