Tablet mode makes every application (including Start Menu) run in full screen, which provides a more touch-friendly experience. If you have a 2-in-1 tablet, Windows 10 asks you if you want to enter tablet mode when you detach a tablet from its base or dock. In this tutorial we’ll show you 3 simple ways to turn on / off tablet mode, switch between tablet mode and desktop mode in Windows 10.
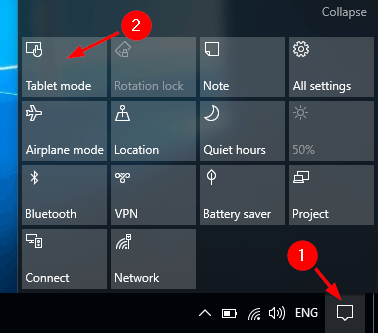
Method 1: Turn On / Off Tablet Mode from Action Center
Click on the Action Center icon in the taskbar notification area. At the bottom of the Action Center, click on the Tablet mode button to toggle it on (blue) or off (gray) for what you want.
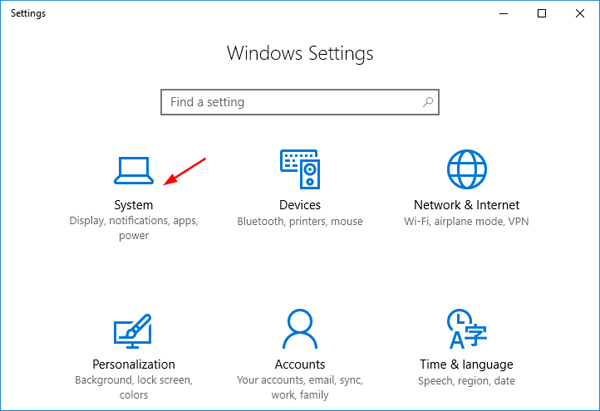
Method 2: Turn On / Off Tablet Mode from PC Settings
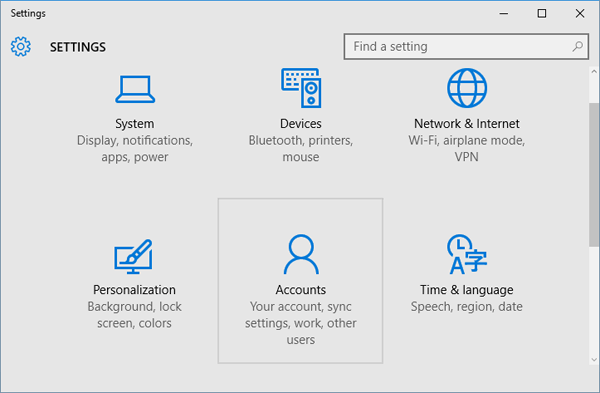
- To open the PC Settings, click the Settings icon from the Start Menu, or press the Windows + I hotkey.

- Select the System option.
- Choose Tablet in the left-hand navigation pane. Click the When I sign in drop-down list, choose Never use tablet mode to enable desktop mode, or select Always use tablet mode to enable tablet mode.
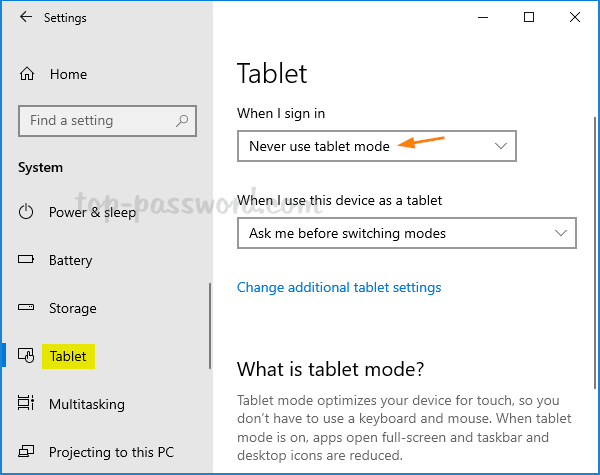
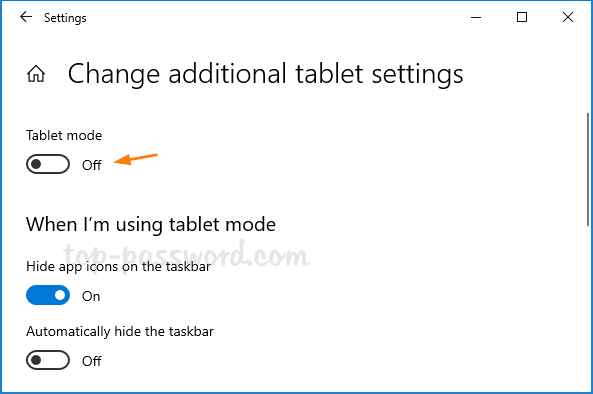
If you need to permanently disable tablet mode, proceed to click the “Change additional tablet settings” link below. In the next window, you can turn off tablet mode completely.
Method 3: Turn On / Off Tablet Mode Using Registry Hack
- Press the Windows key + R to open the Run box. Type regedit and press Enter.

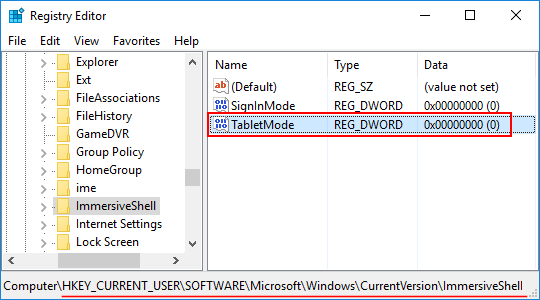
- Navigate to the following key in the Registry Editor:
HKEY_CURRENT_USER\SOFTWARE\Microsoft\Windows\CurrentVersion\ImmersiveShell - In the right pane, you should see a DWORD value named TabletMode. In order to turn off tablet mode, double-click on TabletMode and set it to 0. Or set it to 1 if you want to turn on tablet mode.
- Restart your computer for your changes to take effect.