Author Archive

How to Delete the Windows.old Folder in Windows 10/8/7

March 23rd, 2015 by Admin

When you perform a custom Windows installation or upgrade Windows to a newer version, the old Windows folder is renamed to Windows.old in case you’d like to revert the upgrade. Windows 8 or 10 users might also have seen the Windows.old folder after performing a PC refresh.

Windows.old contains not only your old Windows installation files, but also your old Documents, Settings and Programs. The folder is usually gigantic in size and can take up considerable space in your system partition. So if you are pretty sure that you no longer need any data from Windows.old then it would be a wise decision to delete it.

windows.old-folder

Unfortunately, you can’t remove the Windows.old folder by simply pressing the Delete key because your user account doesn’t have ownership of the folder. Here’s how to take ownership all files and subfolders in Windows.old, so you can then delete the whole folder to reclaim some space.

How to Delete the Windows.old Folder?

  1. Download and install the freeware TakeOwnershipPro on your local computer.
  2. Start the TakeOwnershipPro program and drag the C:\Windows.old folder to the program. Tick the “Include subfolders and files” box.

    take-ownership-pro

  3. Click Take Ownership. The program will begin to take ownership of all files and subfolders in the Windows.old folder. It could take you one or two minutes, depending on number of files and folders it contains.
  4. Once it is done, you can then delete the Windows.old folder without any permission issue.

It’s that simple. Deleting the Windows.old folder can save you quite a large amount of hard disk space and it will not affect the present state of the new OS.

Can’t Delete Files Containing Special Characters in Windows

March 16th, 2015 by Admin

There might be situations where you need to delete some folders or files contains special characters in the filenames. When you try to delete, move or rename such a folder/file from Windows Explorer, you’ll receive the error message “The file name you specified is not valid or too long“.

unable-delete-file

Or get a similar error message “The filename, directory name, or volume label syntax is incorrect” when you try to delete the folders/files from Command Prompt.

filename-syntax-incorrect

I have tried many third-party softwares such as unlocker, 7-Zip File Manager, and other tricks discussed in various forums. But none of them work. This problem is very tricky because a set of special characters can’t be used in filenames, such as
\ / : * ? " < > |

Almost all Windows apps are unable to process these stubborn files. To get around this problem, you need to use a Ubuntu Live CD or Linux distribution. In my example, I boot my computer from Ubuntu Live CD and I can then easily create, open, rename or delete any folders or files with special characters.

ubuntu

Almost anything (only the / character is not allowed) will be allowed in the filename after booting to Linux or Ubuntu. Using this method, you can delete or rename any Windows folders/files located in your hard drive.

Create A Custom Image to Refresh Your Windows 8 or 10 PC

February 28th, 2015 by Admin

PC Refresh and Reset has been available since the first release of Windows 8. In my previous post we’ve showed you how to reset your computer to factory default settings, or refresh your installation while keeping your settings and data files intact. One drawback is that you have to reinstall all your desktop applications after performing a PC reset or refresh.

If you have installed a lot of applications, or misplace the necessary installation discs or product keys, it can be an annoying and time-consuming task to get your computer back up and running. In this tutorial we’ll show you how to use the Windows built-in tool recimg.exe to create a custom image that contains all your desktop applications, so you won’t have to reinstall them after a refresh.

Part 1: Create A Custom Refresh Image in Windows 10 or Windows 8

A custom image will be a snapshot of the current state of Windows 10 / 8 and that will include all desktop applications that are currently installed on your computer. You should create a custom refresh image immediately after setting up your computer the way you want it so it’s clean and customized.

When you have your PC set up just the way you like it, here’s how to create your custom refresh image:

  1. Press the Windows key + X to bring up the Power User menu, and then select Command Prompt (Admin). When the UAC warning appears, click the Yes button.
  2. From the command prompt, run the recimg.exe tool to create a custom image file in your specified folder.

    recimg /CreateImage C:\CustomImage

    Enter the above command will create a new custom refresh image under the directory C:\CustomImage. If the folder doesn’t exist, it will create one for you.

    recimg

  3. It could take at least 30 minutes or more to finish creating the image, depending on how many applications you have installed. Once it’s done, you will see a new CustomRefresh.wim file created under your specified folder. And this .wim file will be set as the default refresh image and will be used next time when you use Refresh your PC operation.

    custom-refresh-image

Note: The recimg.exe tool is not included in the Windows 10 version released on July 29. You can only use it in Windows 10 Insider Builds up to Build 10122 or Windows 8/8.1.

Part 2: Refresh Your Windows 10 / 8 PC with Custom Image

  1. From the Windows 10 or 8 login screen, hold down the SHIFT key and click on the Power icon visible on the bottom right of the screen, then click Restart option.

    windows-8-login-screen

  2. In a moment you’ll see the recovery screen. click on the Troubleshoot option.

    recovery-mode

  3. Now click on the Refresh your PC option.

    troubleshoot

  4. Click Next. The system will reboot and begin preparing to refresh your PC. After Refresh your PC, you will notice all your previous installed application are right back to where they were. But you might lose some personal settings from those applications.

Last but not least, have a look on your C: drive and you’ll find a new folder named Windows.old, contains all the program files and Windows directory from your previous installation. If any of your applications had additional information stored in their installation directory, you can recover it from this folder.

The Windows.old folder could take up a large amount of disk space. Once you’re sure you don’t need anything from it, you can delete it to reclaim free disk space. But you might receive the “Access denied” error when you try to delete this folder. In that case, you need to take ownership of that folder using the freeware TakeOwnershipPro before deleting it.

take-ownership

How to Create Multiple Profiles in Firefox

February 23rd, 2015 by Admin

Firefox stores your personal data – bookmarks, cookies, passwords, user preferences, and everything else – in a directory known as a profile. Each profile stores separate set of user information. You can set up separate profiles for work use, personal use, extension testing, secure browsing – anything you like. In this article we’ll show you how to create multiple profiles in Firefox.

Part 1: Launch The Profile Manager

The built-in Profile Manager can’t be accessed from within Firefox’s GUI interface. To launch the Profile Manager, you need to close Firefox completely if it’s running, and then follow the steps below:

  1. Press the Windows key + R to bring up the Run box.
  2. Type firefox.exe -p and hit Enter.

    start-firefox

  3. You’ll see the Choose User Profile dialog window. By default, you’ll have a single user profile named “default”. From this window you can create a new profile, rename existing ones, and delete them.

    firefox-profile-manager

Part 2: Create New Profile

To create a new profile, click the Create Profile button and go through the wizard. The only important option is the profile name – you can use the default folder location unless you want to store your profile folder elsewhere.

create-firefox-profile

If you don’t want a profile anymore, you can delete it by clicking the Delete Profile button. This wipes all browsing data associated with a specific profile, including its bookmarks, saved passwords and other settings.

Part 3: Switch Between Multiple Profiles

To switch between multiple profiles, just launch the Profile Manager and choose which profile you want to load. If you uncheck the “Use the selected profile without asking at startup” box, Firefox will load the selected profile by default without prompting each time you start it.

choose-firefox-profile

Normally, if you start Firefox when a copy is already running, it’ll just open a new browser window using the current profile. To start a completely separate instance of Firefox, press the Windows key + R, type the following command into the Run dialog that appears, and press Enter.

firefox.exe -profilemanager -no-remote

Restore Dell/HP/Acer/Sony/ASUS/Toshiba Computers to Factory Settings

February 12th, 2015 by Admin

Whether your system has been running slow or caught a virus, just perform a factory reset and everything will come back to normal. This will completely wipe your hard drive and restore the Windows system back to the state when you first bought it.

Most computers don’t come with Windows setup discs any more. Instead PC manufactures create a hidden recovery partition for their PCs. If your computer has a recovery partition, you can run the manufacturer’s recovery tool to restore your PC to factory settings. Here we’ll show you how to restore Dell/HP/Acer/Sony/ASUS/Toshiba/Gateway/Lenovo computers to its original factory shipped state.

Note: Factory reset will remove all your programs, files, passwords and other sensitive information. Make sure you back up all your personal files and gather the programs you’d like to reinstall. If you’ve forgotten the saved passwords or misplace your software license key, you can recover them with Password Recovery Bundle.

DELL: Dell Factory Image Restore
  1. Turn on the computer. When the Dell logo appears on the screen, press F8 several times to open the Advanced Boot Options menu.
  2. Use the Arrow keys to select Repair Your Computer and then press Enter.
  3. Specify the language settings that you want, and then click Next.
  4. Log in as a user who has administrative credentials, and then click OK.
  5. Depending on your configuration, you may need to select Dell Factory Tools and then Dell Factory Image Restore. Click Next to open the Confirm Data Deletion menu.
  6. Select the Yes, reformat hard drive and restore system software to factory condition check box and click Next.
  7. When the restore operation is completed, click Finish to restart the computer.
HP: HP System Recovery or Recovery Manager
  1. Turn on the computer and repeatedly press the F11 key, about once every second, until Recovery Manager opens.
  2. Under I need help immediately, click System Recovery.

    hp-recovery-manager

  3. Before restoring the computer to its original factory shipped condition, the program will prompt you to back up your files. Select Recover without backing up your files and click Next if you’ve already backed up personal files.

    hp-factory-reset

  4. Click OK in the warning that appears.
  5. After the system recovery is complete, click Finish to restart the computer. Complete the setup screens and wait until the computer finishes the setup.
Acer: Acer eRecovery
  1. Once your computer turned on, press and hold Alt key, then continuous press F10 button until you see Acer eRecovery System is running.
  2. Click Restore Operating System to Factory Defaults.

    Acer-eRecovery

  3. Click Next. Your hard drive’s original, factory-loaded contents will be recovered. The entire system restoration process takes about 40 minutes (may be vary for different computer).
Sony: Sony Vaio Recovery
  1. Restart the computer and immediately begin tapping the F10 key until the Edit Boot Options screen is displayed.
  2. At the Edit Boot Options screen, press the Enter key.

    sony-edit-boot-options

  3. Choose Restore C: Drive and click Next.
  4. Tick the checkbox next to I Understand, click Start and confirm with Yes when prompted
  5. The recovery process will continue automatically up to the Welcome to Windows screen. Depending on the model, this process may take extended time to complete, but requires no user interaction until completion.
ASUS:
  1. Turn on your computer, and immediately press the F2 key until you reach the BIOS Setup Utility.
  2. Using the arrow keys, move to the Boot tab, disable the Boot Booster option. Save your changes and exit the BIOS.
  3. Restart the computer. Immediately press the F9 key while the computer is booting up.
  4. Select “Recover Windows to Entire HD” and press Enter.
  5. Press “Y” three times when asked if you are sure that you want to restore. The laptop will restore the factory settings.
Toshiba:
  1. Press and hold the 0 (zero) key on top of the keyboard (not the zero key on the numeric keypad) and at the same time, press the power button once to switch on your computer.
  2. When the Toshiba screen appears; release the 0 key.
  3. If prompted select 32bit or 64bit operating system, click Next.
  4. When prompted by the warning screen; click Yes to continue with the system recovery.
  5. Select Recovery of Factory Default Software, and click Next.
  6. Select Recover to out-of-box state, and click Next again.
  7. Please read and acknowledge this last warning screen. Click Next to start recovery.
Gateway:

Switch on your computer, press the Alt key on your computer keyboard, and then hit the F10 key during the startup process. This will redirect you to the Gateway Recovery Management program.

Next up, you need to click on the Restore System From Factory Default option and then choose the Next button to start out the restoration process. Wait for some time until the process is completed.

Lenovo:
  1. Press on the Novo button at the top of your keyboard, your Lenovo computer should boot up and start the Lenovo OneKey Recovery System.

  2. Choose Restore to factory settings from the screen and proceed for the restoration.

Windows 10 to Add Native Support for FLAC and MKV

February 10th, 2015 by Admin

Microsoft has already confirmed that Windows 10 will come with native support for MKV (Matrsoka Video) and FLAC. FLAC (Free Lossless Audio Codec) is a commonly used lossless audio format that provides a more accurate reproduction of recordings. In other words, it sounds better than other formats, such as MP3, which compress recordings down to a more manageable size but lose quality in the process.

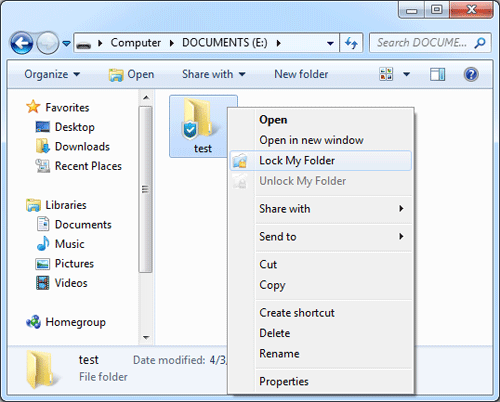
It’s also worth mentioning that MKV and FLAC are currently supported in Windows 10 Technical Preview and that file support will continue on to the final version when it hits the market. Here’s a look at playing some .flac audio files with Windows Media Player on Windows 10 build 9901 (The download is available through the Windows Insider Program website).
windows-media-player

MKV and FLAC are two file formats that have been increasing in popularity over the years. They produce great quality audio and video, are compressed so the files aren’t too large and are feature rich. Windows 8.1 and prior did not provide any supporting software out of the box, requiring end users to download third party apps to convert FLAC/MKV formats, such as the Video Converter Assist. With Windows 10, Windows Media Player will be able to handle those duties.
How to Convert DMG Image to ISO format in Windows

February 8th, 2015 by Admin

Most software on Mac OS X is distributed as a DMG image format. The Mac users can open .dmg files on Mac OS X without using third-party software. But if you are a Windows user, you will be in trouble, since Windows can not recognize dmg format by default. In this article we’ll show you how to convert DMG files to ISO format in Windows using the freeware dmg2img.

How to Convert DMG Image to ISO format in Windows?

  1. First head over to this website and grab yourself a copy of dmg2img by clicking on the win32 binary link. Extract the contents of the downloaded dmg2img-1.6.5-win32.zip file to a new folder.

    dmg2img

  2. Open a Command Prompt and then use the cd command to navigate to the folder where you extracted the dmg2img file.
  3. Now use the following command syntax to convert your DMG file:

    dmg2img.exe {source file.dmg} {destination file.iso}

    In my example I want to convert a Mac installer image called Apple.Mac.OSX.v10.7.Lion.dmg, and save the converted ISO as mac.iso, so my command would be:

    dmg2img.exe c:\Apple.Mac.OSX.v10.7.Lion.dmg c:\mac.iso

    convert-dmg-to-iso

  4. After a few minutes of processing, your DMG will be converted to ISO format. You can then burn the ISO image to your disc or mount it to CD drive for your own purpose in Windows.