Author Archive

Google Chrome Password Recovery Tutorial

November 16th, 2012 by Admin

Google Chrome, like any other web browser has its password manager for remembering the login credentials of websites you visit. If you have forgotten the login credentials (username and password) for a web site, then do not worry – there are lot of ways to recover Chrome password, anyway now you can recover your Chrome browser login and password easily with help of Password Recovery Bundle. Password Recovery Bundle makes it easy to decrypt or recover the login credentials stored by all versions of Google Chrome browser.

How to Recover Google Chrome Password?

  1. First install Password Recovery Bundle on your local computer.
  2. Launch the program, then click Start Recovery button. The program will pop up a drop-down menu that displays all supported password types.
  3. Select the Chrome Password option. The program automatically detect the default Chrome profile path for the current user and displays all saved passwords along with website URLs and logins.

It’s better to copy and save the login credentials to a file for safe keeping. This will be very useful in following cases:

  • To take backup of the login secrets for the stored websites
  • To transfer the secrets from one system to another.
  • To store the website passwords at more secured centralized location
  • To recover the passwords in case Chrome becomes not accessible or non functional.

Reset Windows Password v2.6 Released!

November 15th, 2012 by Admin

Great news for all Windows 8 users! We’ve recently updated this application and more than sure you will like new features we’ve added. What’s new in Reset Windows Password v2.6?

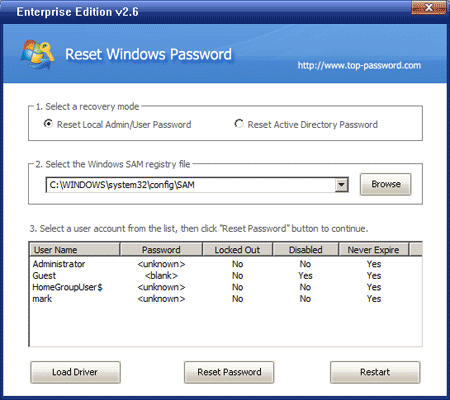
First of all, this update brings full support of Windows 8 so you can now reset lost or forgotten Windows 8 password without any problems or issues. It allows you to reset both local account password and Microsoft account password in Windows 8.

Secondly, Windows Server 2012 64-bit support was also added in this update. You are allowed to reset both local account password and domain user password on Windows Server 2012 in case you lost or forgot the password.

This update is absolutely free for you if you are a registered user of Reset Windows Password utility. For unregistered users, you can try or purchase the software at this link: http://www.top-password.com/reset-windows-password.html.

Switch Local Account to Microsoft Account in Windows 8

November 13th, 2012 by Admin

While installing Windows 8, right before the setup is about to make your PC ready it asks you whether you would like to use a local account or the Microsoft account to log on the computer. If you have chosen local account while configuring Windows, it’s not too late and you can change to use Microsoft account anytime.

In this tutorial I’ll show you how to switch local account to Microsoft account in Windows 8. Before getting started, make sure your computer has internet access so you can connect to your Hotmail or Windows Live account.

How to Switch Local Account to Microsoft Account in Windows 8?

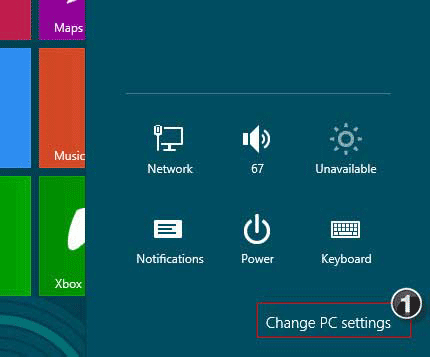
  1. From the Metro UI, click or swipe the upper right corner of the screen to show the Charms menu. Click or tap on the More PC settings link.

  2. Select Users. Then click/tap on “Switch to a Microsoft account”.

  3. Type in your local account password.

  4. And then enter your Live ID or your Hotmail account. If you don’t have one already, you can create one by clicking the link “Sign up for a new email address”.

  5. Answer the security question to confirm your identity. You may receive an SMS message from your mobile phone that shows “Security info was added for xxx”.

  6. Click on Finish. You’ve completed the setup procedure.

  7. Next time you start your computer, you can log on to Windows 8 with Windows Live ID. After logging in, some of your Metro apps will show data e.g. email, photos, and documents associated with your Windows Live ID account.

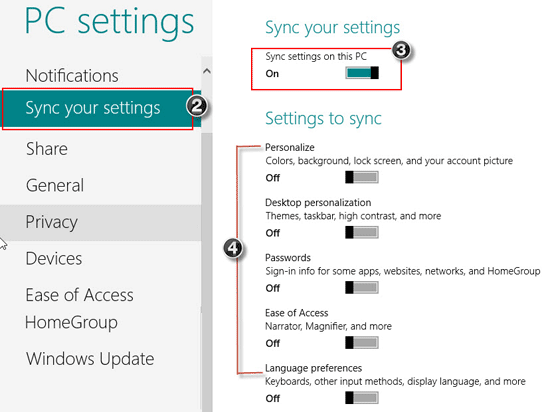
One benefit of signing in to your PC with a Microsoft account is that you can sync info between any PCs you use that are also running Windows 8 or Windows RT. When you sign in with a Microsoft account, your PC is connected to the cloud. This means that many of your personal settings and preferences are stored on Microsoft servers online, and then are synced to any PC that you sign in to.

Set Time Interval to Automatically Check Mail in Outlook 2010

November 7th, 2012 by Admin

Microsoft Outlook 2010 has option to automatically send or receive emails at a specified time interval. By default, the time interval is 30 minutes in Outlook 2010. If you need to keep up with your emails, you might want Outlook to check for new messages every few minutes. Here we’ll show you how to set the time interval to automatically check mail in Outlook 2010.

Tips: If you lost or forgot email account password set up in Outlook 2010, you can reveal the saved email password using Outlook Password Recovery program.

How to Set Time Interval to Automatically Check Mail in Outlook 2010?

In Outlook 2010, click on the File tab then click Options to bring up the Outlook Options window.

Navigate to Advanced tab and scrolled down to Send and receive section. Then click on the Send/Receive button.

In the Send/Receive Groups window, select the group named All Accounts. From bottom of the dialog, there is a list of send/receive options for selected group. If you want to remove any selected group from sending and receiving items, disable the first option. From Schedule an automatic send/receive, enter the desired time interval after which it will automatically schedule send/receive mail.

How to Crack Active Directory Password

November 7th, 2012 by Admin

The bane of an system/network administrator’s life is when Active Directory administrator passwords are lost or simply forgotten. For the unprepared, losing an admin password can cause extensive disruption to work flow and even business processes. Here I’m going to explain the various approaches that can be taken when faced with this problem.

There are essentially two approaches to recovering Active Directory passwords: cracking by brute force and resetting passwords. Various tools exist for both approaches. The brute force approach involves a dictionary attack against the Active Directory database (ntds.dit). There are many best well-known password cracker tools available on the net, which could be used to crack Windows local admin/user password, but they are unable to extract password hash from Active Directory database. So they are useless when you forgot Active Directory password.

However, you can easily reset the Active Directory password you’ve lost. Using a Live CD is the only option to access the Active Directory database offline so you can reset the password hash for a given Active Directory user account. Password Recovery Bundle is the right software which can help you reset Active Directory admin/user passwords quickly and easily.

Just launch Password Recovery Bundle and click on the Windows Password button, it allows you to create a Live CD/USB which can be used to boot your domain controller and reset your lost Active Directory password in just a few mouse clicks!

How to Remove Lost Administrator Password in Windows 8

November 4th, 2012 by Admin

I installed Windows 8 right when it was released and have just one account, i.e administrator account. Its been 2 weeks now I didn’t used my system and now when I came back I forgot my admin password. I tried many passwords that I remember but none of them worked. As I said above, there is no other Admin account so that I can reset my password. Could you guys please help me know how can I reset or recover my password? Any help will be appreciated.

Lost or forgot your administrator password in Windows 8? Windows 8, as the latest operating system which has just been released by Microsoft, there are few tricks and tips you can use to recover or remove the login password on it. Fortunately, there is a powerful utility which can work with Windows 8 and allows you to remove lost administrator password easily – Password Recovery Bundle.

How to Remove Lost Administrator Password in Windows 8?

  1. First you need to download Password Recovery Bundle program on another computer. After installing and running the program, click the Windows Password button, which allows you to create a password removal bootdisk in 3 steps. Insert a blank CD/DVD or USB drive into the computer and click Start Burn to create a bootdisk.

  2. Insert the password removal bootdisk you’ve created into the computer which locked you out of it. Turn on the computer and hold down F2 or whatever the setup key is shown as during the initial boot screen. This should bring up the BIOS.

    In the BIOS look for the Boot Device Priority option, set CD/DVD as the 1st boot device if you want to boot from CD. You can either set Removable Device as the 1st boot device if you want to boot off USB drive. Save your changes.

  3. Restart the computer and now it will boot from the password removal bootdisk. After one or two minutes the bootdisk will launch the Reset Windows Password utility. Choose the administrator account, and then click Reset Password button. The program will remove your lost administrator password instantly.

  4. Now remove the password removal bootdisk and restart the computer, you can then quickly log on Windows 8 system without being asked for a password.

Password Recovery Bundle could also be used to remove lost administrator password in Windows 7/Vista/XP. It can save you lots of time and frustration in case you lost or forgot Windows 8 administrator password.

How to Reset Lost Domain Admin Password in Windows Server 2012

November 3rd, 2012 by Admin

In my previous post I’ve shown you how to install Active Directory in Windows Server 2012. During the procedure of promoting your server to a domain controller, you’ll be prompted to set a strong password for the administrator account in case the password is blank. What to do if you forgot the domain administrator password after installation?

As system/network administrator, you are usually confronted with the problem of forgetting domain admin password. Even if you don’t have to reset a password now, you should get acquainted with this issue. In this tutorial we’ll show you the easiest way to reset a lost domain administrator password in Windows Server 2012.

How to Reset Lost Domain Admin Password in Windows Server 2012?

  1. Download and install Password Recovery Bundle on another computer that you can log in.
  2. Prepare a blank CD and insert it into the computer.
  3. Launch Password Recovery Bundle and click on Windows Password button, it will display the ISO burning dialog.
  4. Choose the CD you’ve plugged in and then click on Start Burn button to create a Live CD.
  5. After you have the Live CD, put it into the CD drive of your locked server PC whose password you want to reset.
  6. Turn on the server and have it boot from the Live CD. You may need to go into BIOS and set CD/DVD as the first boot device.
  7. After booting from the Live CD, it will load the Windows PE operating system inside the Live CD and start the Reset Windows Password program.
  8. Choose the Active Directory NTDS.dit database, it will display a list of domain user accounts inside the NTDS.dit database.
  9. Choose the administrator account from the list, then click on Reset Password button, the program will replace the forgotten/unknown administrator password with the new password: Password123.

Reject the Live CD and restart the server. You can then log in to the domain administrator account with the new password. It’s so easy to reset a lost domain admin password in Windows Server 2012!

How to Install Active Directory in Windows Server 2012

November 3rd, 2012 by Admin

Similar to previous versions of Windows Server, there are two steps to install Active Directory: First you need to add the Active Directory Domain Services Role to your computer, then run the dcpromo commmand to promote your server to a domain controller. However, in Windows Server 2012, the dcpromo command has been deprecated.

So what replaces dcpromo in Windows Server 2012? There are now two ways to promote your server to a DC: One, through PowerShell and other is Server Manager. Here we will show you how to install Active Directory through Server Manager.

This tutorial can be divided into 2 steps. Before installing Active Directory, please assign a static IP address to your server and set a strong password for the built-in administrator account.

Part 1: Install Active Directory Domain Services

  1. Open Server Manager, then click on Add Roles and Features link.
  2. Click Next on the Before you begin window.
  3. Select Role-based or feature-based installation and then click Next.
  4. Click Select a server from the server pool, click the name of the server to install Active Directory Domain Services to, and then click Next.
  5. Click Active Directory Domain Services. When the Add Roles and Features Wizard dialog box opens, select Add Features, then Next.
  6. On the Active Directory Domain Services page, review the information and then click Next.
  7. On the Confirm installation selections page, click Install.
  8. After the installation has completed, the server will restart.

Part 2: Promote the Server to a Domain Controller

Once above step is completed and all required features have been installed, now is the time to promote the server to a Domain Controller by following the below steps.

  1. Back in Server Manager, you will notice that AD DS has been added to the left navigation tree. Click on it and then click on More on the right navigation pane where it states that Configuration is required for Active Directory Domain Services.
  2. You will now be presented with the All Servers Task Details window, in which you will click on Promote this server to a domain controller under Action.
  3. The Deployment Configuration screen appears and we will select Add a new forest as this is the first domain controller. Enter your Root domain name and then click Next.
  4. On the Domain Controller Options page select your Forest and Domain functional levels, for this demo will leave the defaults of Windows Server 2012 for both, Enter a desired DSRM Password, click Next.
  5. On the DNS Options page, click Next.
  6. The NetBIOS domain name will then be inputted automatically. In the event of a conflict, it will suggest an alternative by appending the original name with a 0. Click Next.
  7. On the Paths page verify the desired locations of the Database, Log files and SYSVOL folders, change the locations is required, click Next.
  8. On the Review Options page, click Next.
  9. The wizard will perform a Prerequisite check before the installation can continue. After the check is completed successfully click Install.
  10. The server will restart once the configuration has completed, the server is now a domain controller for the newly formed domain. Upon restart, you should be able to login using your domain administrator account.