Nearby Sharing is a new feature in Windows 10 that lets you effortlessly transfer files to nearby devices using Bluetooth or Wi-Fi, without having to use network file sharing or even a USB drive. It works much similar to Apple’s AirDrop. In this tutorial we’ll show you 3 simple ways to turn on or enable Nearby Sharing in Windows 10.
Method 1: Turn on Nearby Sharing via Action Center
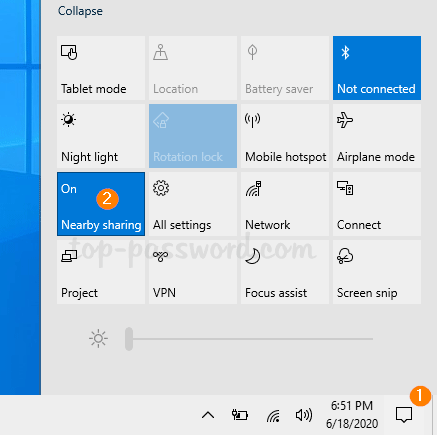
Click the Action Center icon in the right corner of your taskbar, and you can then click the “Nearby sharing” tile to toggle it on. If you don’t see this tile, click the Expand option to show the entire quick actions.
Method 2: Turn on Nearby Sharing via Settings App
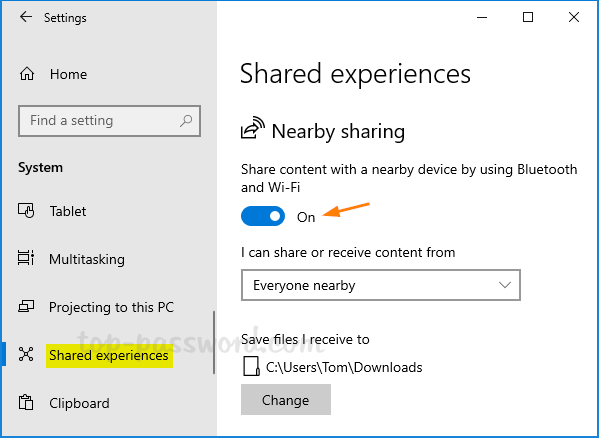
Use the keyboard shortcut Windows + I to open the Settings app, and then click on the System category and select Shared experiences. On the right side, you can turn on the “Nearby sharing” toggle.
Method 3: Turn on Nearby Sharing via File Explorer’s Context Menu
In File Explorer, right-click any file and select the Share option from the pop-up context menu.
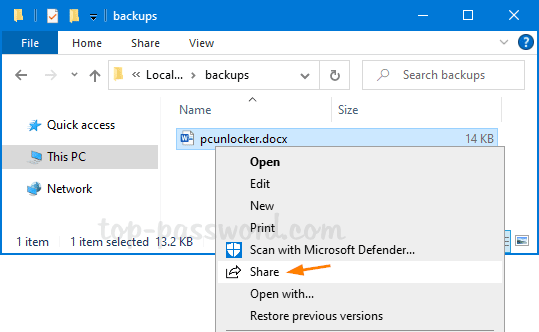
When the Share dialog box pops up, click the “Select to turn on nearby sharing” option to enable Nearby Sharing and it will show all the nearby PCs.

That’s it!