When you try to open a program as administrator, the User Account Control (UAC) dialog will pop up as normal but the Yes button might be missing or greyed out.

This problem usually happens when there is no other administrator account exists in the system and your account no longer has the admin rights. In this tutorial we’ll show you an easy way to fix such UAC privileges problem.
How to Fix: UAC YES Button is Gone or Grayed out in Windows 10
- Open a Command Prompt window without admin privileges. Type the following command and hit Enter.
SHUTDOWN /R /O -T 00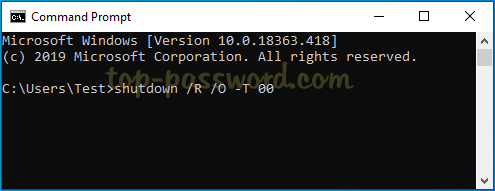
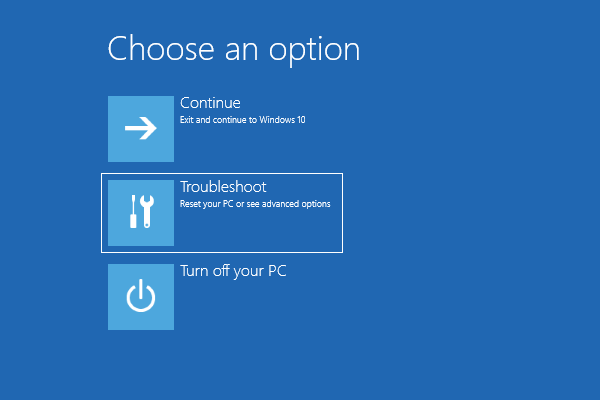
- The computer will log you off and bring up the Choose an option screen. Click on Troubleshoot.
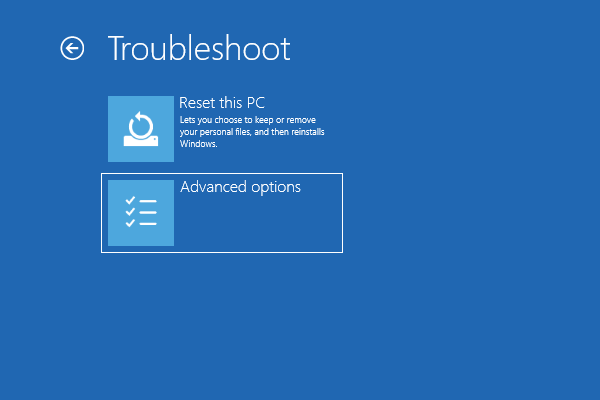
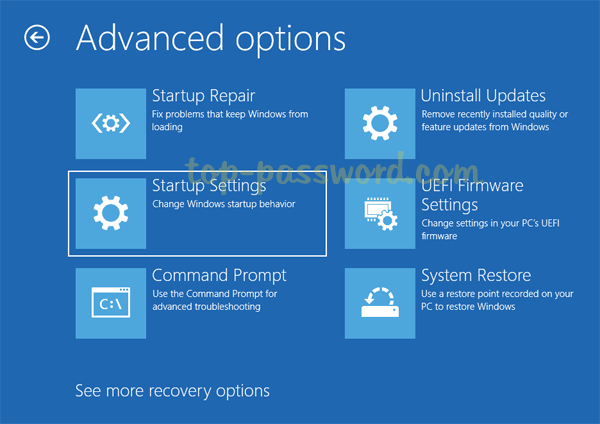
- Select Advanced options.
- On the next screen, click on Startup Settings.
- From the Startup Settings window, click on Restart.
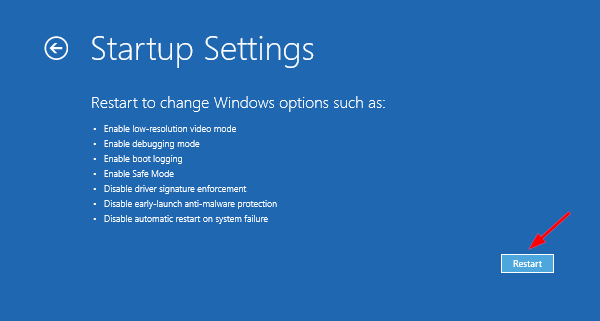
- Once Windows restarts to the Startup Settings screen again, press 6 or F6 to choose “Enable Safe Mode with Command Prompt“.

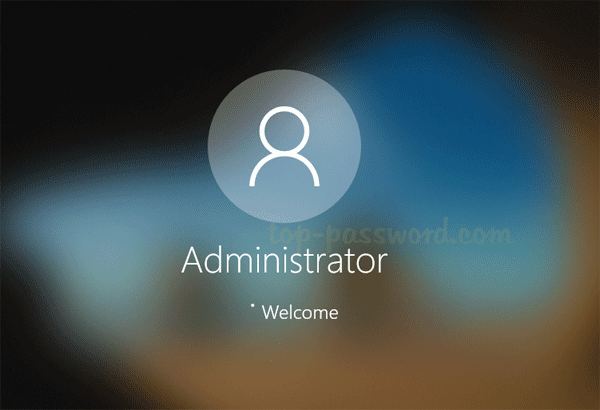
- Although the built-in Administrator account is disabled and hidden, it will still show up on Safe Mode login screen. You can click it to login without a password.
- Once logged in, the Administrator Command Prompt will open. To fix the problem of “Yes button missing or grayed out in UAC”, type the following commands one by one to change your password, prompt your account to administrator and make it active.
net user YOUR_USER_NAME  YOUR_NEW_PASSWORD

net localgroup Administrators YOUR_USER_NAME /add

net user YOUR_USER_NAME /active:yes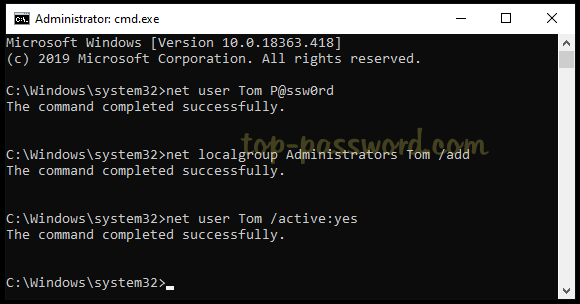
- Reboot your computer as normal and everything should be good to go.
If you have previously set a password on the built-in Administrator account and you can’t remember it, the above method won’t work and you can use PCUnlocker to reset your password and account settings, which will also make the “Yes” button in UAC dialog become accessible.