Windows 10 shutdown sound not playing? Starting with Windows 8, sounds for the logon, logoff and shutdown events have been disabled completely, but the sound files remain in the system location: C:\Windows\Media. In this tutorial we’ll show you how to make Windows 10 play shutdown sound using Task Scheduler.
How to Make Windows 10 Play Shutdown Sound
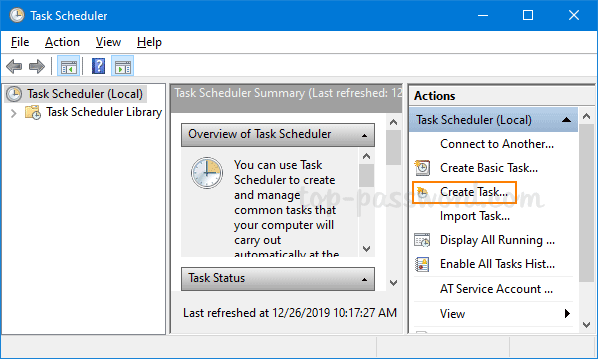
- To get started, open Task Scheduler and click on the Create Task link in the right Actions pane.
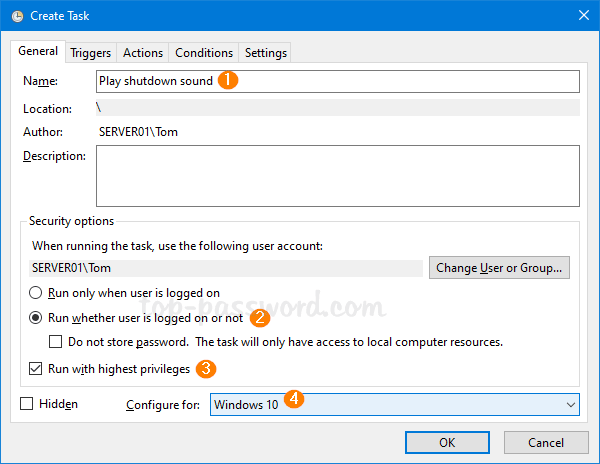
- When the Create Task dialog opens, give the task a proper name like “Play shutdown sound“. Choose “Run whether user is logged on or not” and check the “Run with highest privileges” option. Next, click the “Configure for” drop-down and select Windows 10.
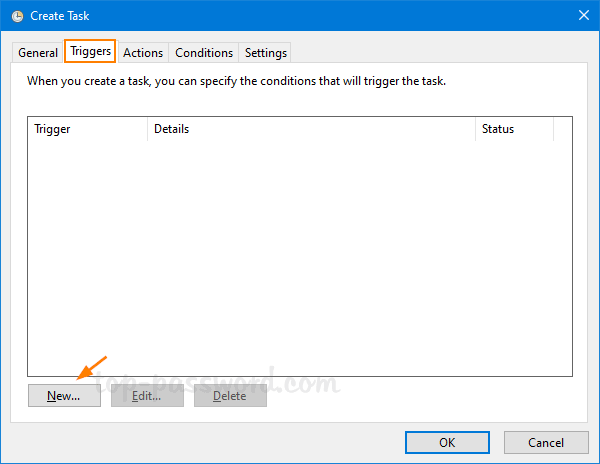
- Switch to the Triggers tab and click on the New… button.
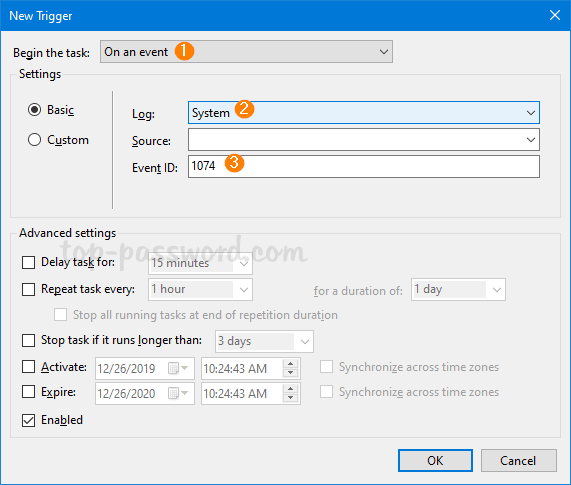
- Select On an event in the “Begin the task” drop-down. Click the Log drop-down to select System, enter 1074 (user initiated shutdown) in the Event ID text box and click OK.
- Move to the Actions tab and click on the New… button.
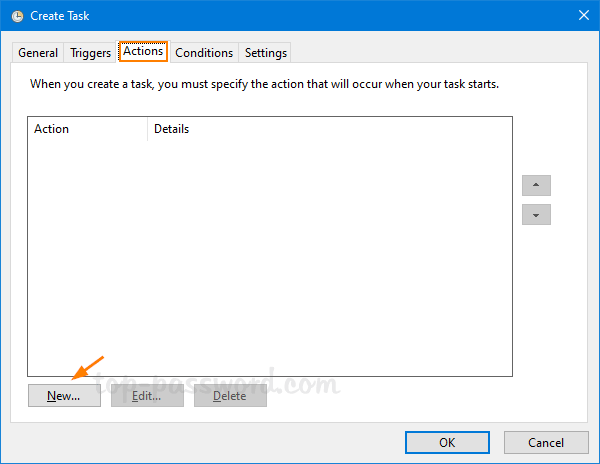
- Set the action type to Start a program. Type PowerShell in the Program/script text box. Copy and paste the following command into the “Add arguments” text box. Click OK.
-Command "(New-Object Media.SoundPlayer 'C:\Windows\Media\Windows Shutdown.wav').PlaySync()"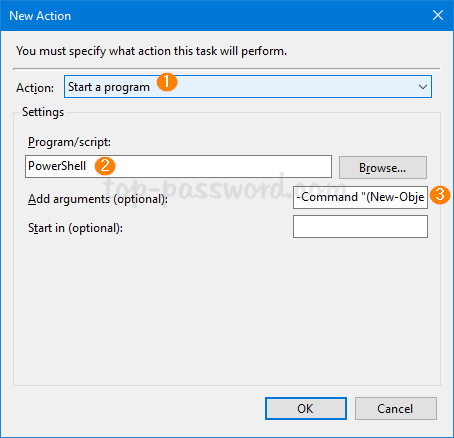
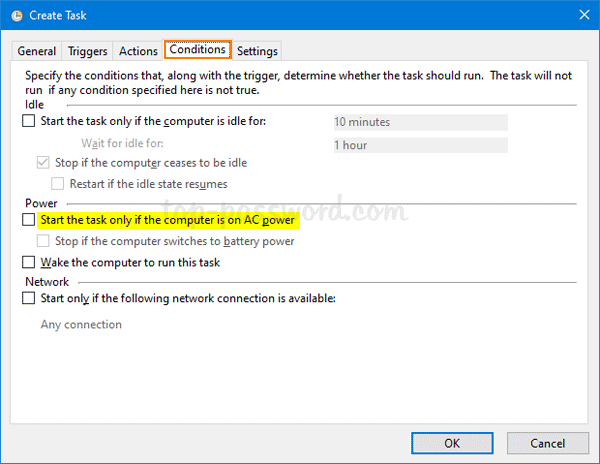
- Go to the Conditions tab, uncheck the option “Start the task only if the computer is on AC power” and click OK.
- You will be prompted to enter your current Windows password. Once it’s done, Windows 10 will play a sound every time you shut down your computer.

If you don’t like the default shutdown sound which comes with Windows 10, you can change it to any other WAV file located in C:\Windows\Media. That’s it!