Windows 10 desktop icons too wide? How can I adjust the spacing of icons on the desktop with Windows 10? Is there a way to increase or decrease the horizontal and vertical spacing for desktop icons? In this tutorial we’ll show you a registry tweak to change desktop icon spacing in Windows 10 / 8 / 7.
![]()
Tips: If you want to make your desktop icons bigger or smaller, see this article on how to change taskbar & desktop icon size in Windows 10 / 8 / 7.
How to Change Desktop Icon Spacing in Windows 10 / 8 / 7
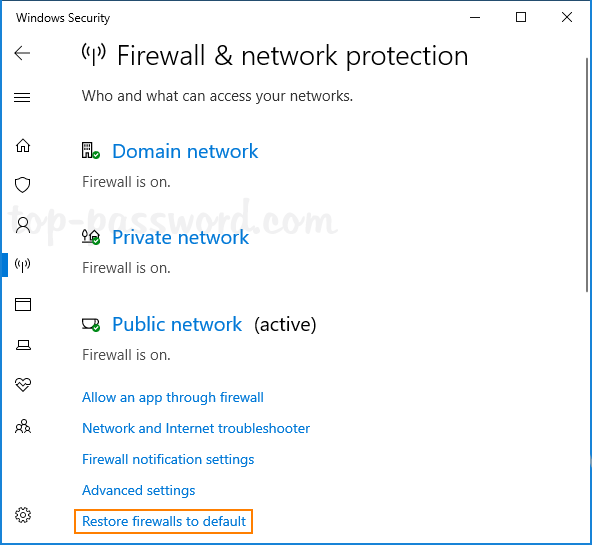
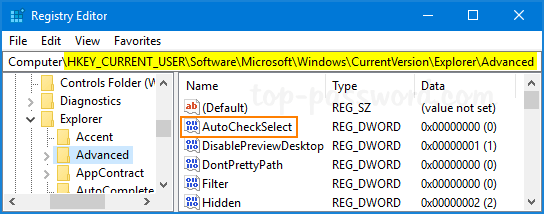
- Open Registry Editor and navigate to the following key:
HKEY_CURRENT_USER\Control Panel\Desktop\WindowMetrics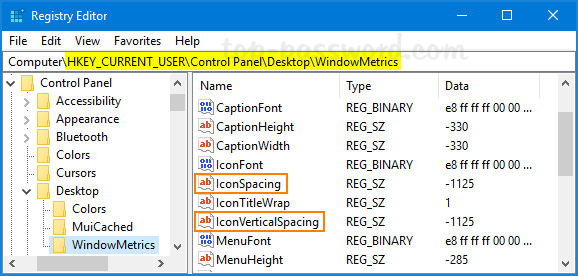
You’ll see two DWORD values named IconSpacing and IconVerticalSpacing on the right pane. The IconSpacing value lets you adjust the horizontal desktop icon spacing, while the IconVerticalSpacing value can control the vertical spacing between desktop icons. If you want to customize the horizontal spacing, double-click on IconSpacing to modify it.
- The default value is -1125. You can change it to anything between -480 and -2730, where -480 represents the minimum spacing and -2730 represents the maximum spacing.
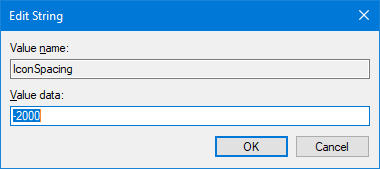
- Click OK to save changes and close Registry Editor. After logging off or restarting your system, you can see the changes made to the icons on the desktop.
That’s it!