How can I USB boot a VM in VMware Workstation 9? Since VMware’s BIOS doesn’t natively support booting from USB stick, you have to do it with the help of Plop Boot Manager. But Plop Boot Manager only works in legacy BIOS mode. In this tutorial we’ll show you another way to boot VMware Workstation / Fusion / ESXi virtual machine from USB stick, by mounting USB stick as virtual hard disk.
How to Boot a VM in VMware from USB Stick
Before getting started, make sure your bootable USB stick is already attached to your host machine.
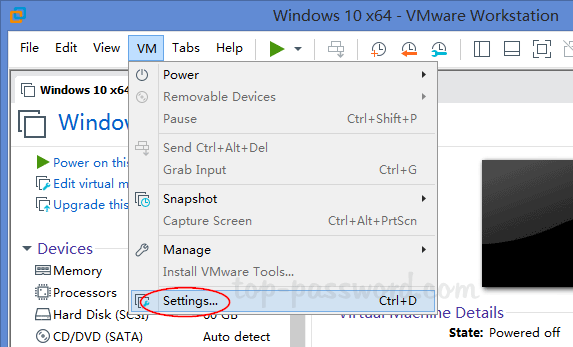
- Open VMware Workstation and go to any existing virtual machine. Click on the VM menu and select Settings.
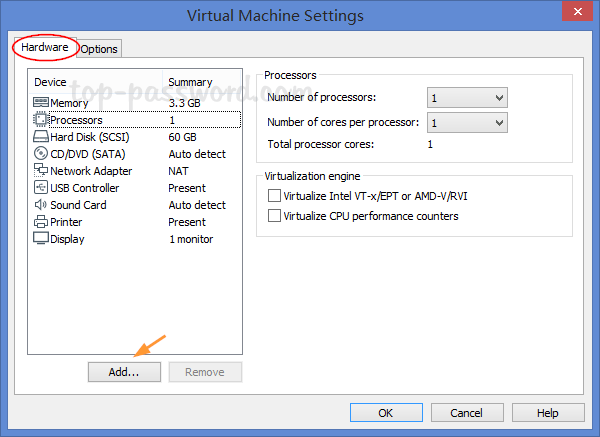
- In the Hardware section, click on the Add button.
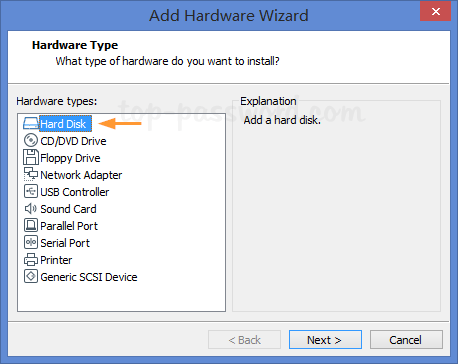
- Select Hard Disk as the hardware type, and click Next.
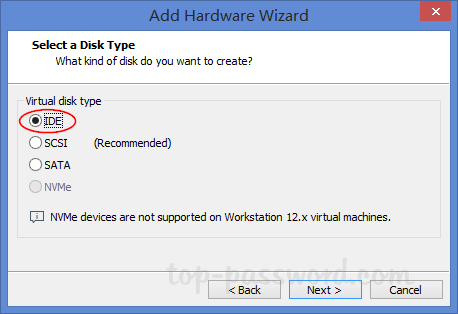
- I would recommend you select IDE disk type other than the default one.
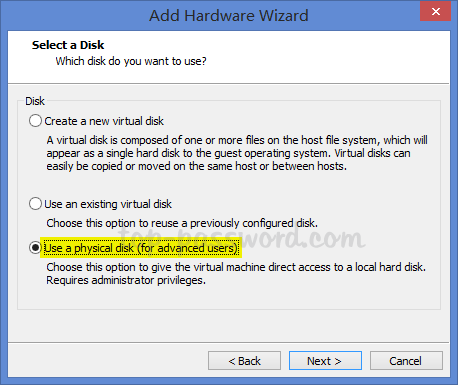
- Choose Use a physical disk (for advanced users) and then click Next.
- Select your USB stick (PhysicalDrive1) from the drop-down list and click Next. PhysicalDrive0 is your first physical disk.

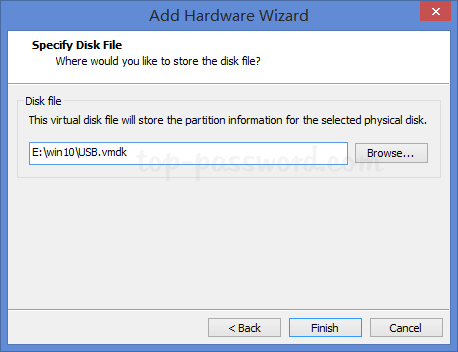
- Enter the filename and location for the new virtual disk, and click Finish.
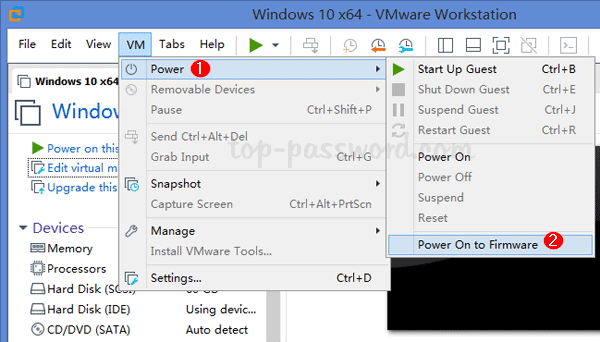
- Now, your USB stick will appear as an IDE hard drive to the virtual machine. To turn on your machine, click on the VM menu and select Power -> Power On to Firmware.
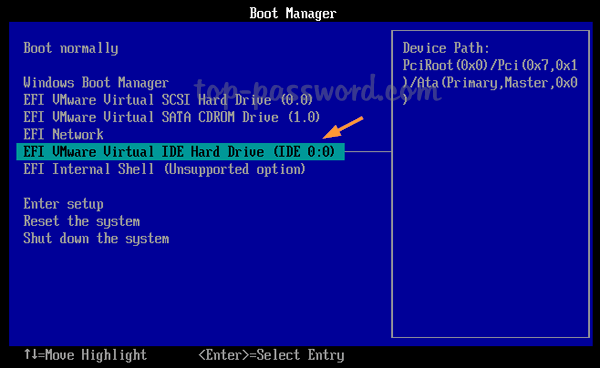
- If your virtual machine uses UEFI firmware, it will boot to the Boot Manager screen. From there you can simply select IDE drive to boot from your USB stick.
If your virtual machine uses BIOS, it will boot to the BIOS Setup Utility. Go to the Boot tab and select the Hard Drive and press Enter. Use the + key to move the virtual IDE drive to the top position.

Finally press F10 to save your changes and exit.
- Within a few seconds you will be booted into the USB stick.