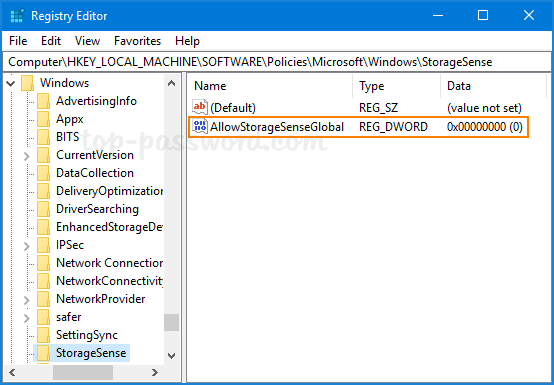
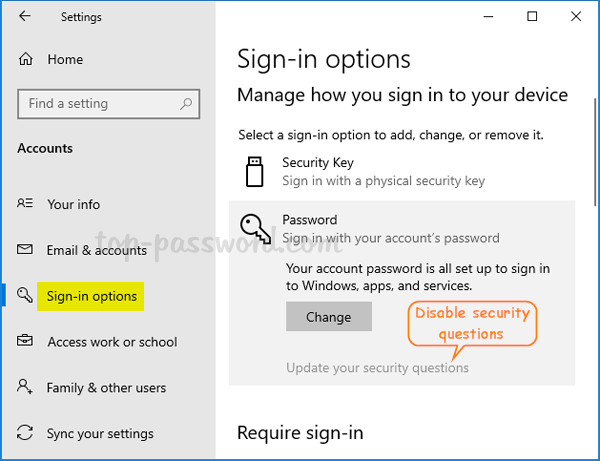
Firefox stores all your settings (including home page, bookmarks and passwords) in a profile folder that keeps your personal information separate from the Firefox program. When Firefox keeps crashing or your PC can’t boot, your information won’t be lost (at least your Firefox saved passwords could be recovered). In this tutorial we’ll show you 2 ways to find your Firefox profile location in Windows 10 / 8 / 7.
Method 1: Find Your Profile Folder When Firefox is Running
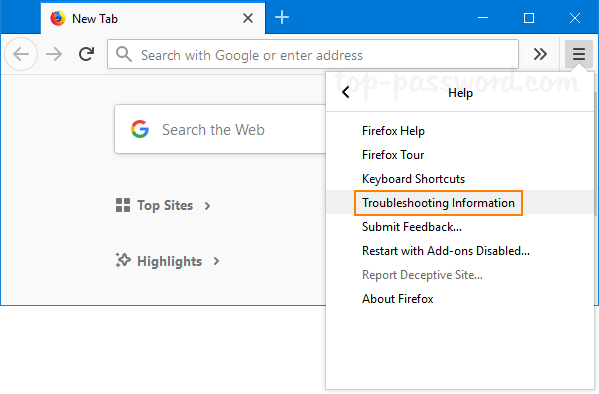
- After opening Firefox, click on the Menu button (the icon with three lines) in the upper right side of the address bar, and then select Help.
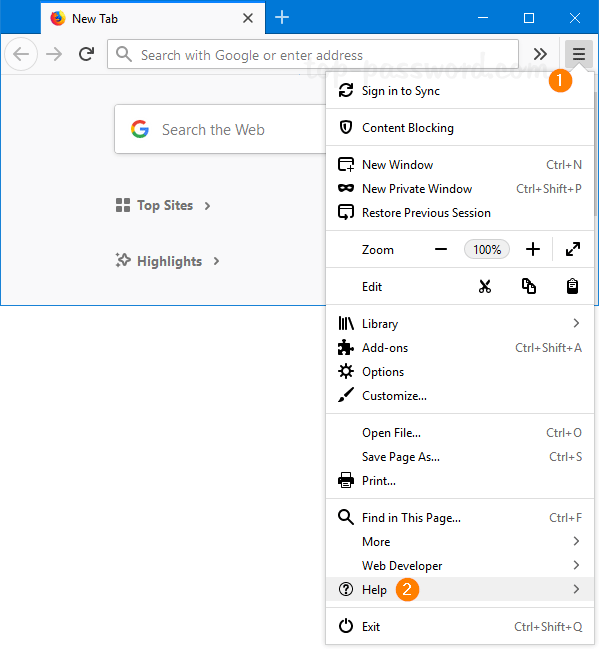
- Select Troubleshooting Information.
- When the Troubleshooting Information tab appears, click on the Open Folder button under the Application Basics section.
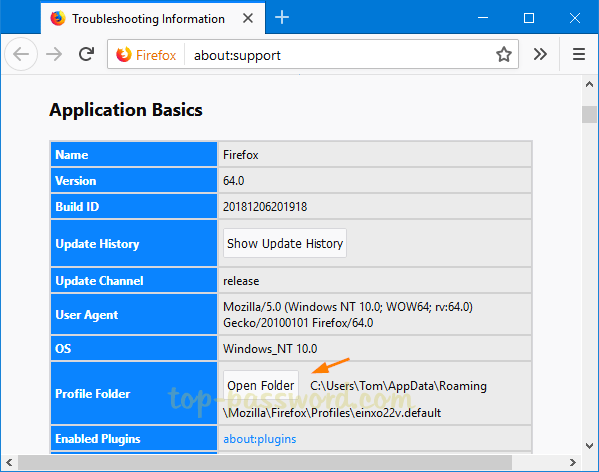
- This will launch Windows Explorer and display your current Firefox profile directory.
Method 2: Find Your Profile Folder without Opening Firefox
- Press the Windows key + R to open the Run command. Type the following and press Enter.
%APPDATA%\Mozilla\Firefox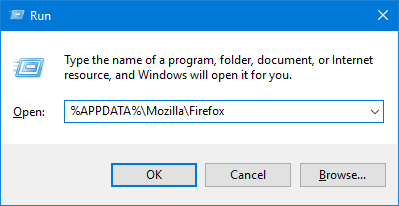
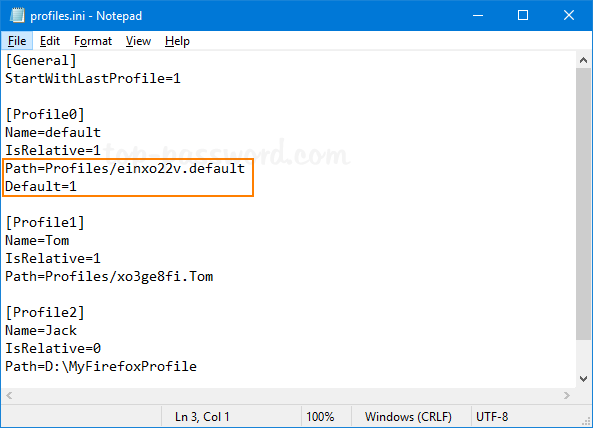
- After Windows Explorer opens to that directory, double-click on the profile.ini file to open it with Notepad or other text editor.
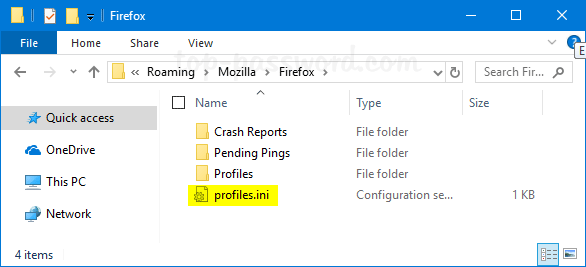
- You can view the relative or absolute path for all your Firefox profiles. But there is only one default profile. In my example, the default profile is located under the directory: %APPDATA%\Mozilla\Firefox\Profiles\einxo22v.default.
That’s it