How to get back the missing start bar in File Explorer? The status bar sits at the bottom of File Explorer, and it lets you see brief information about the currently selected files and switch the folder layout. In this tutorial we’ll show you 2 simple ways to show or hide status bar in File Explorer in Windows 10.

Method 1: Show or Hide Status Bar in File Explorer Using Folder Options
- Open up File Explorer, and move to the Ribbon Menu. Click Options under the View tab to launch Folder Options.
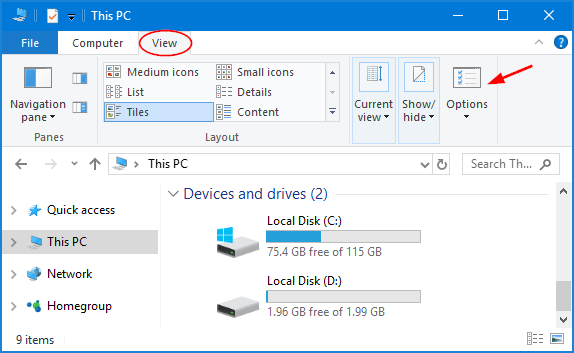
- Go to the View tab. Under the Advanced settings section, check or uncheck the “Show status bar” option depend on whether you want to enable status bar or not.
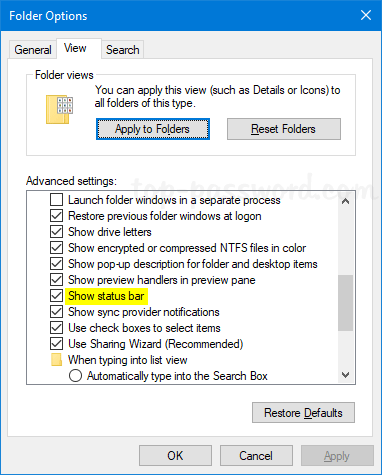
- Click OK. You can see the change immediately.
Method 2: Show or Hide Status Bar in File Explorer Using Registry Editor
- Open Registry Editor. Simply paste the following registry path in the address bar and press Enter.
HKEY_CURRENT_USER\Software\Microsoft\Windows\CurrentVersion\Explorer\Advanced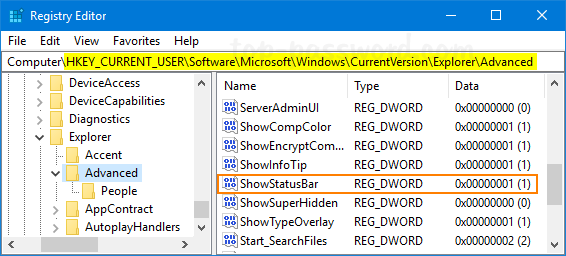
- Double-click on the 32-bit DWORD ShowStatusBar in the right pane, change its value to 0 to disable status bar. To enable it, you need to set its value to 1.
- Close Registry Editor. Open the File Explorer and this registry tweak should take effect immediately.