By default, Windows 10 will automatically create a restore point when you install a device driver or Windows update, so you can later reverse system changes if Windows 10 becomes unstable.
Restore points could take up a lot of disk space, so if your PC is running well, there’s not much sense in keeping many old restore points. In this tutorial we’ll show you 3 ways to delete one or more system restore points to save disk space in Windows 10.
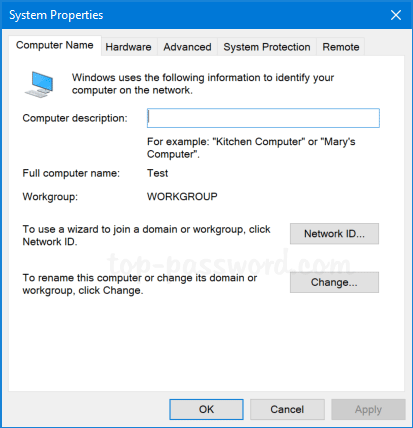
Method 1: Delete All System Restore Points in System Protection
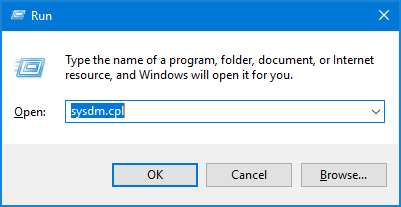
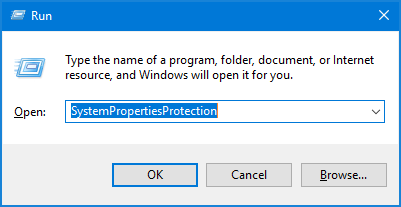
Use the Windows key + R keyboard shortcut to open the Run command. Type SystemPropertiesProtection and press Enter.
This will open the System Protection page in the System Properties window. Now select a drive you want to delete all old restore points from, and click on Configure.
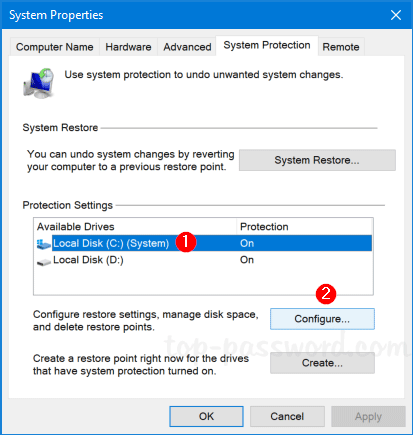
Click on the Delete button. When the warning dialog pops up, click Continue to confirm.

Method 2: Delete All But the Most Recent Restore Point via Disk Cleanup
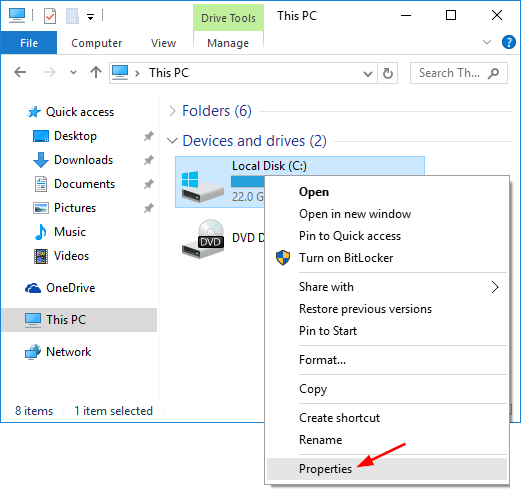
Right-click on a local drive and then select Properties from the context menu.
Under the General tab, click on Disk Cleanup.

Next, click on Clean up system files.

Go to the the More Options tab, click on the Clean up button under the “System Restore and Shadow Copies” section.
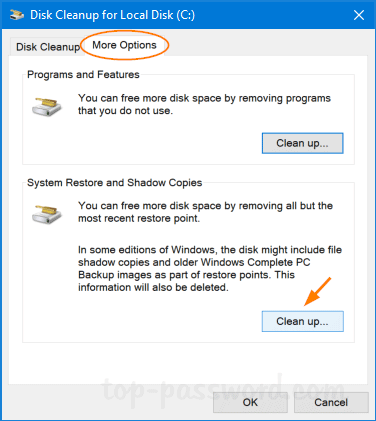
When the Disk Cleanup confirmation box opens, click on Delete and Windows 10 will delete all your restore points while keeping the most recent one.

Method 3: Delete Individual System Restore Point via Command Line
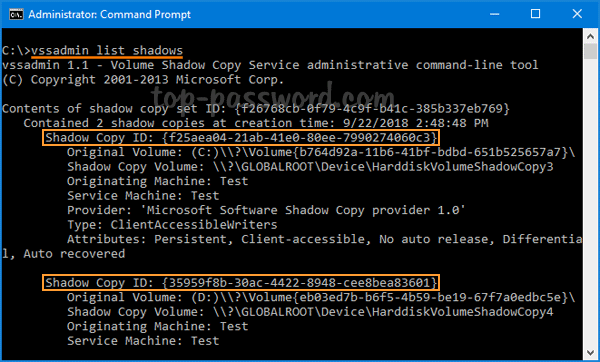
Open the Administrative Command Prompt. Execute the following command to list all system restore points created for all drives on your computer. Keep an eye on the creation date and shadow copy ID for each system restore point.
vssadmin list shadows
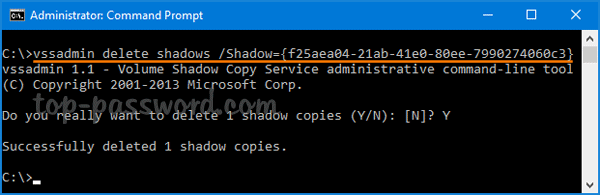
To delete a specific restore point, type the following command and press Enter.
vssadmin delete shadows /Shadow={shadow copy ID}
If you want to delete all restore points for all your drives, just run this command instead:
vssadmin delete shadows /all
That’s it!