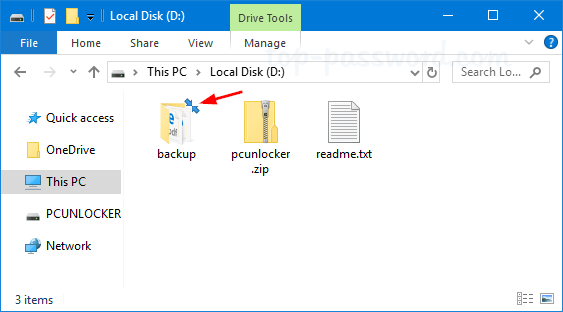
What are the double blue arrows that sometimes appear on my desktop icons and pictures and how can I get rid of them? When a folder or file is compressed with NTFS to save space, Windows 10 will add a double blue arrows overlay at the top right corner to show compression status of the folder/file. If you’re annoyed by this odd and inconsistent behavior, here are 2 simple ways to remove double blue arrows on compressed folders/files in Windows 10.
Method 1: Remove Double Blue Arrows for All Compressed Folders/Files
All you need to do is put a blank icon file somewhere on your PC, then make a small registry change to make Windows display this blank image instead of the blue double arrows icon.
- First of all, download blank_icon.zip and extract the blank.ico file to C:\Windows.
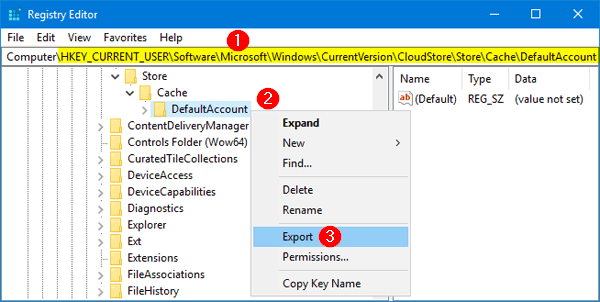
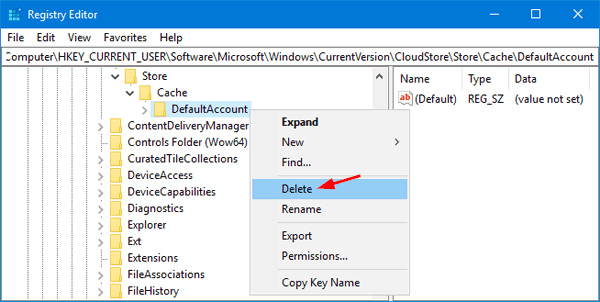
- Press the Windows key + R keyboard combination to open the Run box. Type regedit and press Enter to open Registry Editor.

- Now Navigate to the following location:
HKEY_LOCAL_MACHINE\SOFTWARE\Microsoft\Windows\CurrentVersion\Explorer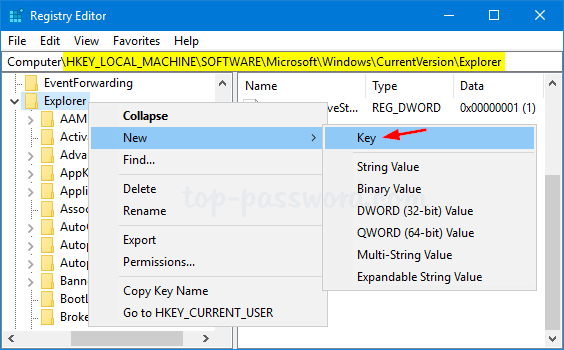
Right-click on the Explorer subkey on the left pane, and select New -> Key.
- Name the new key “Shell Icons“, and then right-click it and select New -> String Value.

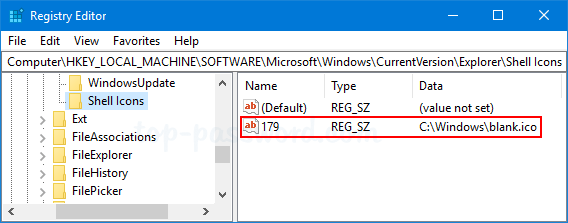
- Name the new string “179“, and then double-click it to set its value data to C:\Windows\blank.ico.
- Close Registry Editor. Log off or restart Windows 10 for the change to take effect.
Method 2: Remove Double Blue Arrows for Certain Folders/Files
If you just want to remove double blue arrows for a certain folder or file, just decompress it to turn off NTFS compression.
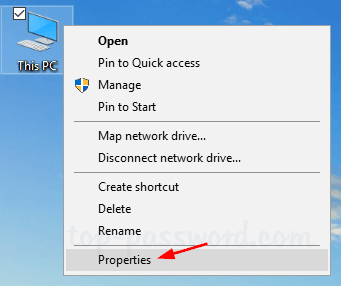
- Open File Explorer and browse to the folder or file with double blue arrows overlay, right-click on it and select Properties from the context menu.
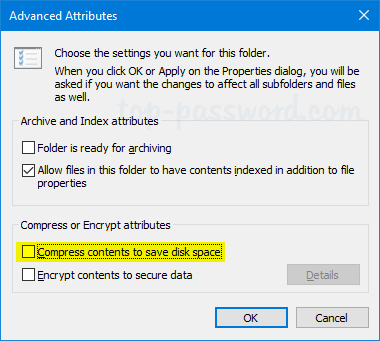
- Under the General tab, click the Advanced button.
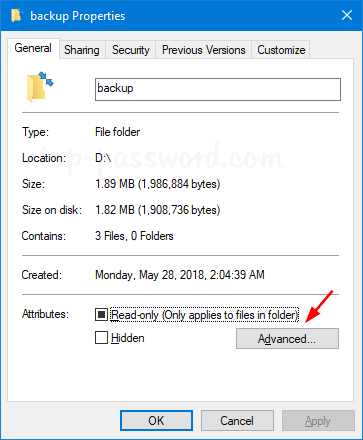
- Tick the checkbox for “Compress contents to save disk space“. Click OK.
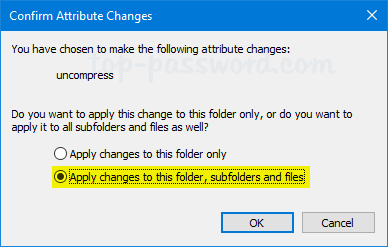
- If you selected a folder, then you will be prompted to tick “Apply changes to this folder, subfolder and files” and click OK. It will take some time to decompress all its subfolders and files.
- At this point you should see the double blue arrows has disappeared from your folder/file icon. That’s it!