How can you make a right-click on a Windows 10 tablet without mouse? Just use your finger or touch pen to press and hold on the screen, it will bring up the right-click context menu. In this tutorial we’ll show you 2 ways to enable / disable the press and hold for right-clicking feature in Windows 10.
Method 1: Turn on / off Press and Hold for Right-clicking Using Control Panel
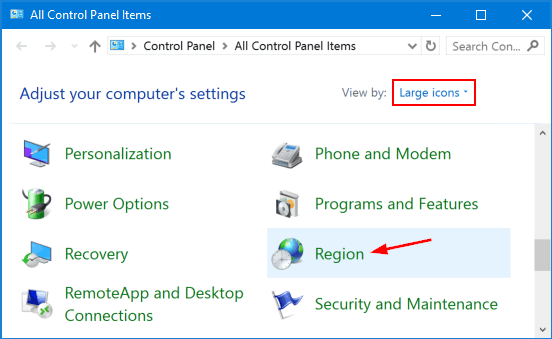
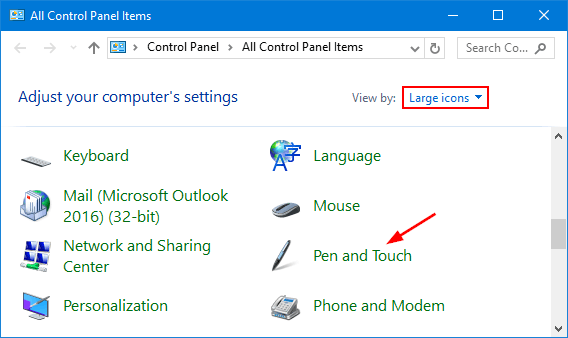
Open the Control Panel and set the View by option to Large icons. Click Pen and Touch.
The Pen and Touch dialog box will open. Select either Pen Options tab or Touch tab. Once the Press and hold option is highlighted in the list, click Settings.
- Pen Options – Select this tab if you want to enable or disable “press and hold for right-clicking” on your touch pen.
- Touch – You can also use your finger to press and hold on a touch screen. Choose this tab if you want to turn on or off right-click for a finger press and hold.

In the Press and Hold Settings window, check or uncheck the “Enable press and hold for right-clicking” option, and click OK.

Now you’ve enabled or disabled the press and hold for right-clicking feature in Windows 10.
Method 2: Turn on / off Press and Hold for Right-clicking Using Registry Editor
- Press the Windows key + R together to open the Run box. Type regedit and press Enter.

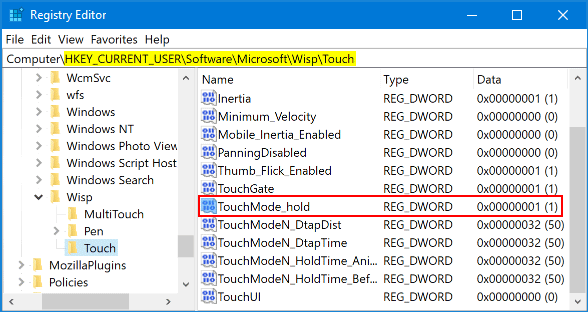
- When the Registry Editor opens, navigate to the following location:
HKEY_CURRENT_USER\Software\Microsoft\Wisp\TouchIf you do not have this key, then just create it.
- Double-click the 32-bit DWORD value named TouchMode_hold on the right pane, and change its value data to turn on or off the “press and hold for right-clicking” feature for your touch screen. 1: turn on; 0: turn off.
- Close Registry Editor and reboot your computer for the changes to take effect.
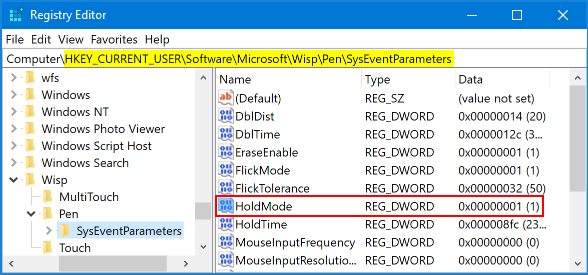
If you also want to turn on / off the press and hold for right-clicking feature for a touch pen, open Registry Editor and navigate to: HKEY_CURRENT_USER\Software\Microsoft\Wisp\Pen\SysEventParameters, and then change the HoldMode value (1: turn on; 3: turn off).
That’s it!