To turn on or disable screen saver, you have to open the Screen Saver Settings dialog. Windows 10 has buried it where you might not be able to find it. It certainly isn’t in any obvious place, so here we’ll show you 4 ways to open Screen Saver Settings in Windows 10.
Method 1: Open Screen Saver Settings by Right-clicking the Desktop
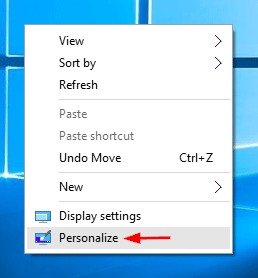
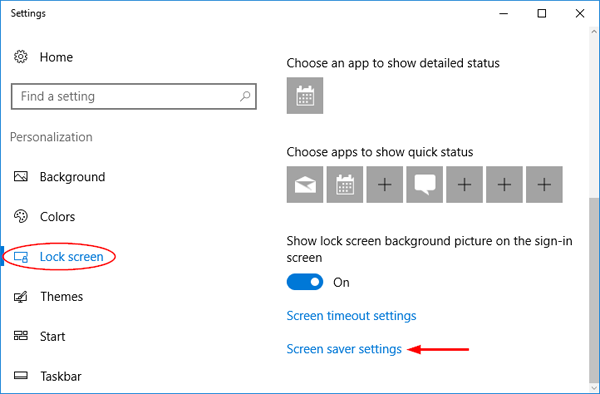
Right-click on any empty space of your desktop, and select Personalize from the context menu.
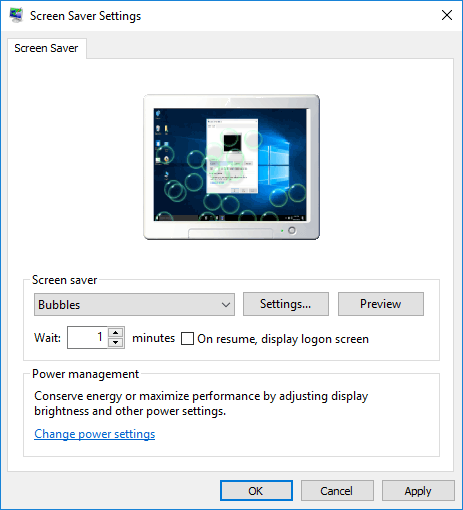
When the Settings app launches, select Lock screen on the left side. Click the Screen saver settings link on the right side at the bottom.
Method 2: Open Screen Saver Settings from Run or Command Prompt
Press the Windows key + R to open the Run box. Type the following command and press Enter.
control desk.cpl,,@screensaver
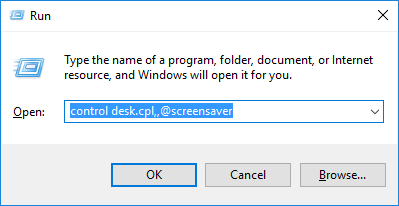
Or run the above command at the Command Prompt, it will also open Screen Saver Settings dialog in Windows 10.
Method 3: Open Screen Saver Settings Using Windows 10 Search
Click the Cortana Search box at the taskbar. Type in Screen Saver.
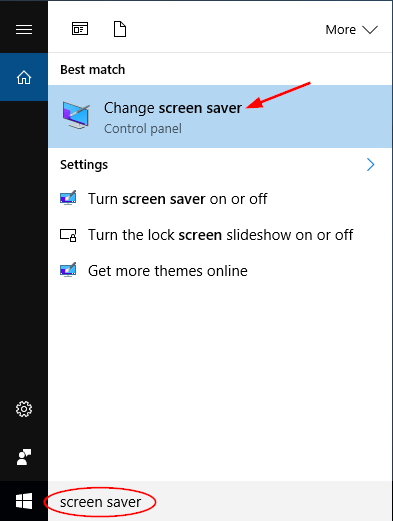
Click on “Change screen saver” and it will take you to the Screen Saver Settings right away where you can turn on or off screen saver in Windows 10.
Method 4: Open Screen Saver Settings from Control Panel
Open the Control Panel in Windows 10. You’ll see a Search box in the upper right corner. Type Screen Saver and press Enter.
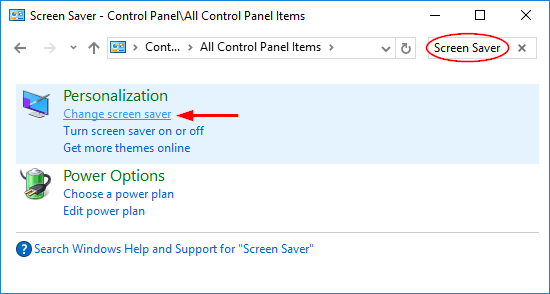
Click on “Change screen saver” from the search result. This will open the Screen Saver Settings dialog immediately.


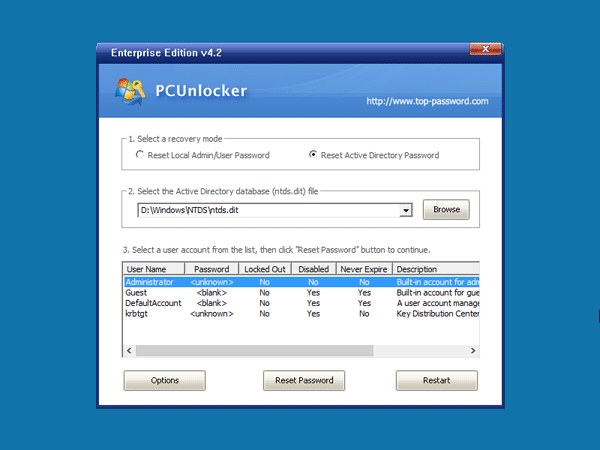
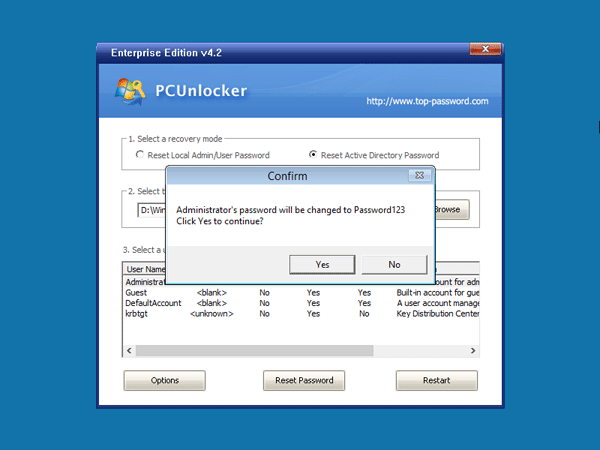
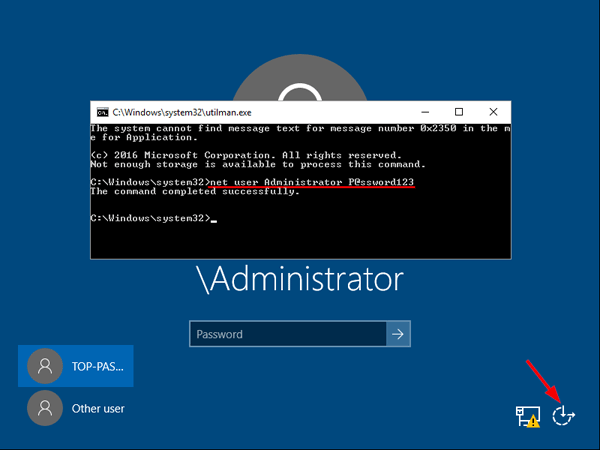 This will set the password for the Administrator to be P@ssword123 (case sensitive).