Rather than seeing a background image at the login screen, you can choose to disable the login screen background and see a single, flat-color background — just as Windows 8 used. Here is a simple registry tweak to turn off background image and change Windows 10 login screen to a custom solid color background.
How to Change Windows 10 Login Background to Solid Color?
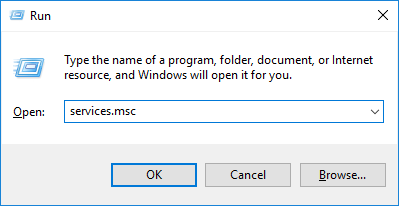
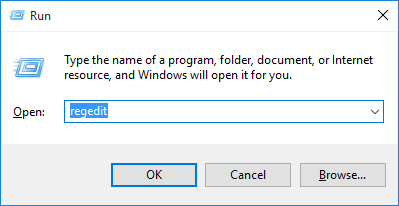
- Press the Windows key + R to open the Run box. Type regedit and press Enter.
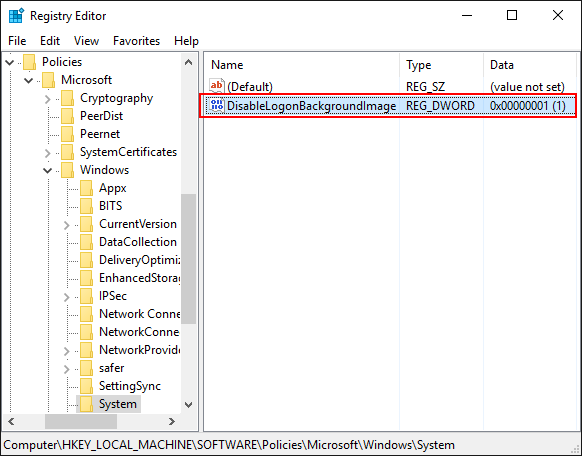
- When the Registry Editor opens, navigate to following key on the left pane:
HKEY_LOCAL_MACHINE\Software\Policies\Microsoft\Windows\System - Right-click anywhere in the right pane and select New -> DWORD (32-bit) Value.
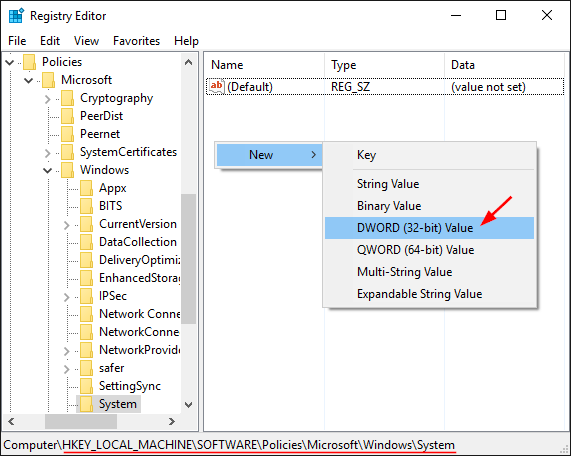
- Name the newly create value DisableLogonBackgroundImage. Double-click on it and set its value to 1.
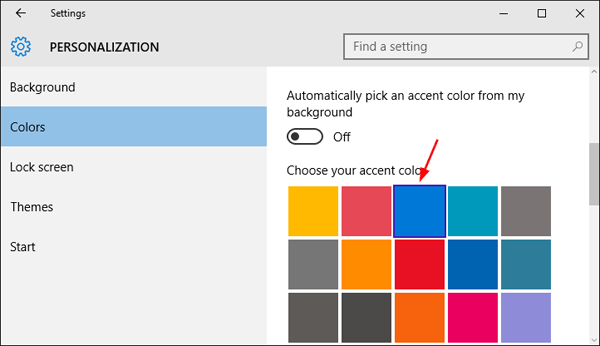
- Now you’ve successfully disabled the login screen background image. To set a flat color as your login screen background, press the Windows key + I to open the Settings app.
- Next go to Personalization -> Colors. Disable the “Automatically pick an accent color from my background” option and pick a new accent color that will be used as your login screen background color.