Archive for the ‘Mac’ category

How to Create Windows-Compatible ISO Image from CD / DVD / USB in Mac OS X

June 28th, 2019 by Admin

How can I make an ISO file from your physical disc on macOS Mojave? By default, macOS just uses its platform’s native file system HFS for ISO image. If you need to share the resulting ISO image with friends who use Windows, Linux or Ubuntu, then you have to save it in ISO-9660 format. In this tutorial we’ll walk you through the steps to create a Windows-compatible ISO image from CD, DVD or USB in Mac OS X.

How to Create ISO Image from CD / DVD / USB in Mac OS X

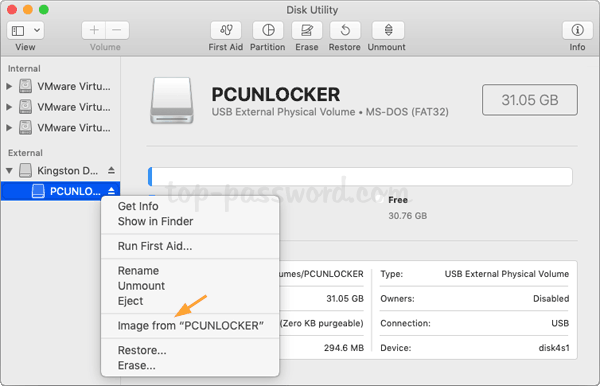
  1. Insert the CD/DVD or USB you want to create an ISO image from into your Mac and then launch Disk Utility. When your CD/DVD or USB appears in the left sidebar of Disk Utility, right-click on it and select Image from.
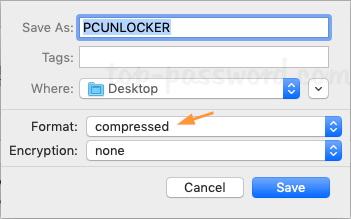
  2. In the Save As dialog, select Desktop as your destination and choose the compressed image format, then click on Save.
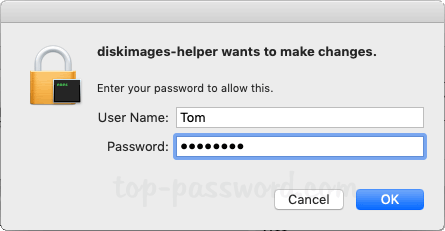
  3. When prompted that diskimages-helper wants to make changes, type your Mac password and click OK.
  4. Disk Utility will create a disk image with the .dmg extension and you can find it on your Desktop. Next, in order to convert the resulting .dmg to a Windows-compatible ISO file, open the Terminal and type this command:
    hdiutil makehybrid -iso -joliet -o ~/Desktop/filename.iso ~/Desktop/filename.dmg

  5. When the process is complete, you can distribute the ISO image to your friends who use Windows, Linux, Ubuntu, Mac or other operating systems. Happy burning!

How to Convert Disk Image Between .DMG and .ISO Format on Mac OS X

June 27th, 2019 by Admin

So you downloaded an .iso image, and now you want to convert it to .dmg format? How can I convert .dmg to a Windows-compatible .iso on Mac? Don’t bother downloading any third party software, you can easily convert .dmg to .iso or .iso to .dmg format using the Terminal or Disk Utility on Mac OS X.

Method 1: Convert Between .DMG and .ISO Using Terminal

Mac OS X has a command line tool called hdiutil which allows you to create, mount and convert different types of disk image with ease. Here’s how to convert .dmg to .iso format using the Terminal:

  1. Just press Ctrl + Alt + T on your keyboard to open the Terminal.
  2. Enter the following command into the Terminal window, assuming that you’ve put the .dmg file on your desktop.
    hdiutil makehybrid -iso -joliet -o ~/Desktop/filename.iso ~/Desktop/filename.dmg

    When the process finishes, you’ll get an ISO image that is compatible with Windows, Linux, Ubuntu and Mac.

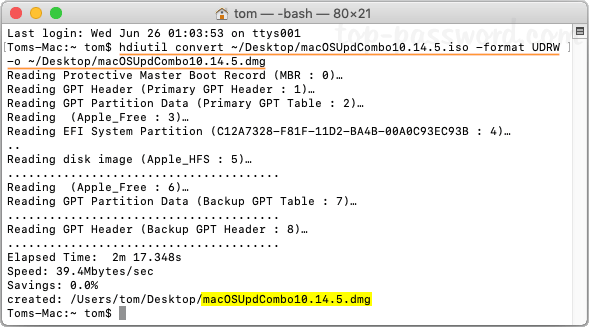
If you need to convert a disk image from .iso to .dmg, just execute the following command in the Terminal window:
hdiutil convert ~/Desktop/filename.iso -format UDRW -o ~/Desktop/filename.dmg

Sit back and wait for the process to complete.

Method 2: Convert Between .DMG and .ISO Using Disk Utility

  1. Just launch Disk Utility (in /Applications/Utilities). In the menu bar at the top of the screen, select Images -> Convert.

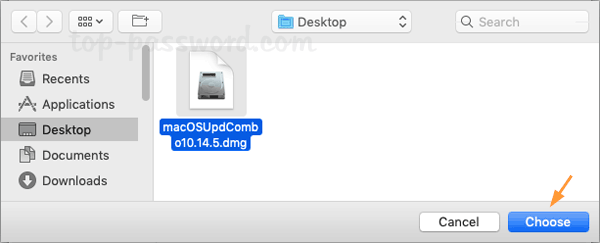
  2. Browse to the .DMG or ISO file you would like to convert, select it and click on the Choose button.

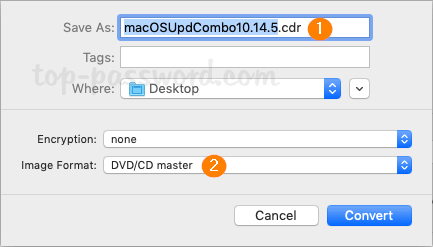
  3. In the pop-up window, select Desktop as your destination. In order to convert .dmg to .iso, make sure to choose DVD/CD master as the Image Format. Click on Convert.

    If you want to convert .iso to .dmg, set the Image Format to “compressed” instead. Click on Convert and you’ll have a .dmg file ready to use.

  4. Simply rename the converted .cdr file to .ISO and you’ll get a Mac-compatible .ISO image. However, a renamed file won’t work on Windows or Linux. To make a Windows/Linux/Mac compatible .ISO file, you have to convert the .cdr file to .iso format using this command:
    hdiutil makehybrid -iso -joliet -o ~/Desktop/filename.iso ~/Desktop/filename.cdr

Conclusion

DMG is a disk image format commonly used by Mac OS X, but it’s practically unusable on Windows or Linux platform. After converting .dmg to .iso on your MacOS, you can copy it to any Windows or Linux computer for burning or mounting.

How to Change Other User Password on Mac OS X

March 26th, 2019 by Admin

How can I reset a forgotten Mac password with another admin account? If you have more than one user account on your Mac, try signing in with a different admin account and you can change other user password with ease.

Method 1: Change Other User Password on Mac from Users & Groups

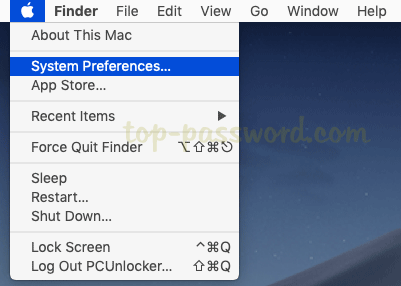
  1. Click the ‘Apple’ logo in the menu bar, and then select System Preferences.

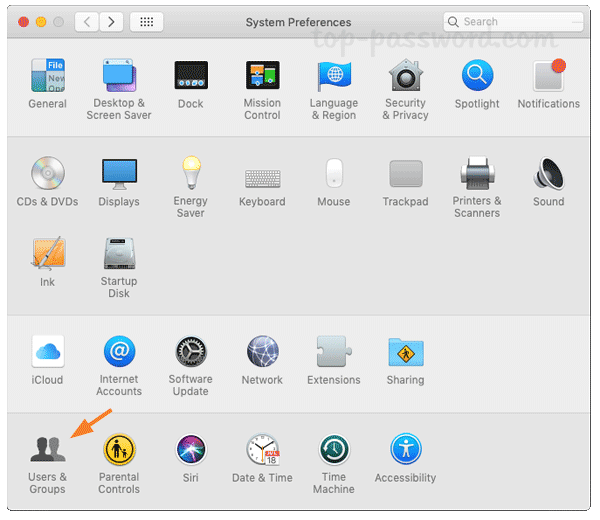
  2. When the System Preferences window opens, click on the Users & Groups icon.

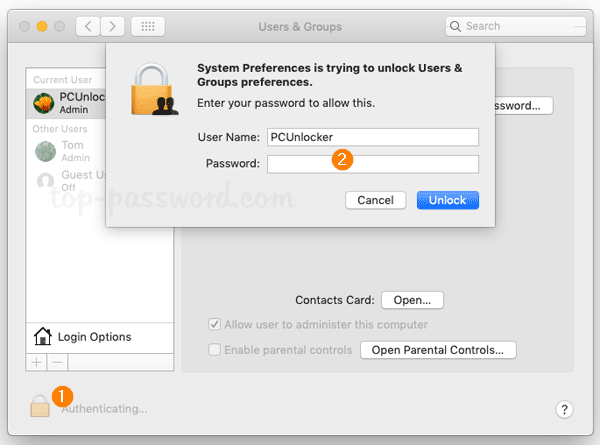
  3. Click the lock icon in the bottom left corner to unlock the settings. Enter your current Mac account password and click Unlock.

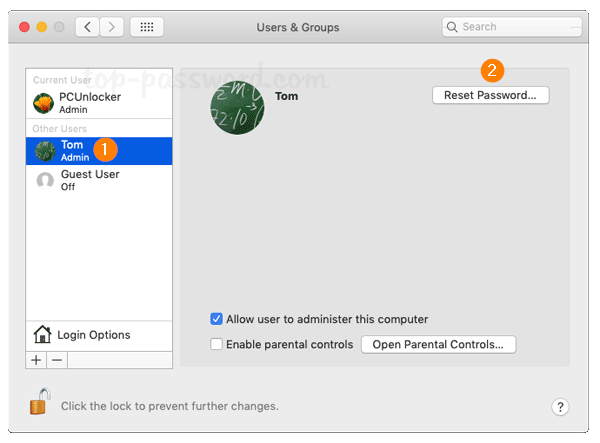
  4. From the list of users on the left side, select the account you’ve forgotten the password for and then click on Reset Password button.

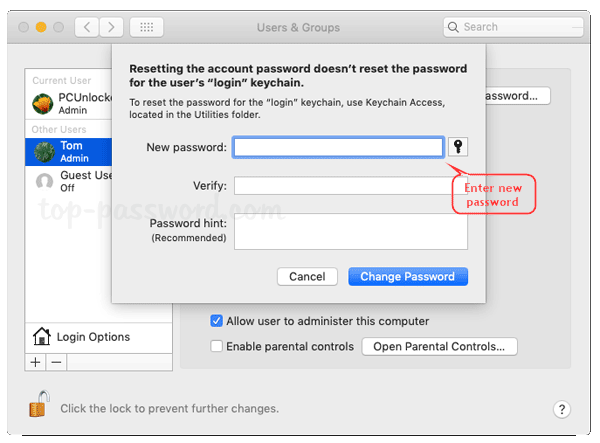
  5. Fill in the new password twice and set up a password hint, and then click on Change Password.

  6. Now you can log in to your locked Mac account with the new password.

Method 2: Change Other User Password on Mac Using Terminal

Using the terminal you can change other user password without old password on macOS High Sierra or earlier versions. However, since macOS 10.14 Mojave the terminal still requires you to provide the old password.

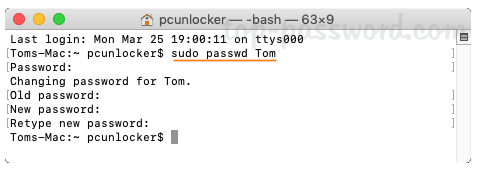
  1. Open up the Terminal window and type the following command:
    sudo passwd account_name

  2. Once pressing Enter, you’ll firstly be prompted to enter the password of the current admin account you’re logging into. After that, you need to enter the new password twice for your target account. If you’re running macOS Mojave, the old password is required before you can set a new password.

3 Ways to Open and Mount ISO File on Mac OS X

March 25th, 2019 by Admin

Looking for a way to open an .ISO file on your Mac? ISO files are often used to distribute bootable utilities for DOS, Windows, Linux or other operating systems. In this tutorial we’ll show you 3 easy ways to open and mount ISO file on macOS High Sierra.

Method 1: Open and Mount ISO file on Mac with DiskImageMounter

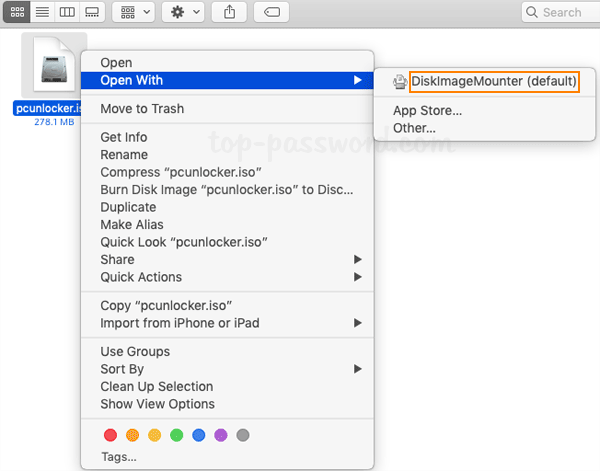
  1. To start, open a Finder window and navigate to the location of your ISO file, then right-click on it and select “Open With” -> “DiskImageMounter (default)“.

  2. A new drive will now appear on your desktop. You can double-click it to open the drive and view the contents of your ISO image.
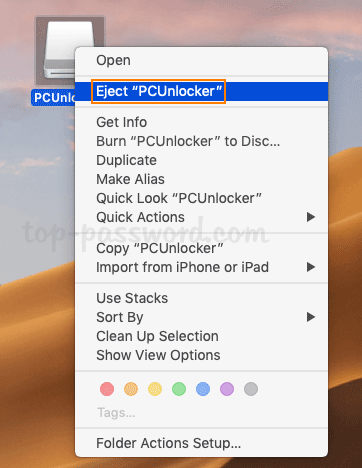
  3. When you no longer need to access the mounted drive, just right-click on it and select Eject.

Method 2: Open and Mount ISO file on Mac Using Disk Utility

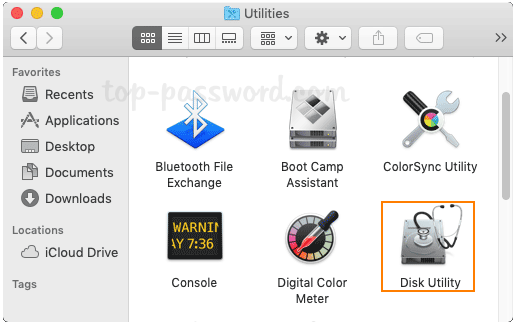
  1. Click the “Finder” icon in the dock. select Applications in the sidebar, then double-click the Utilities folder and then double-click Disk Utility.

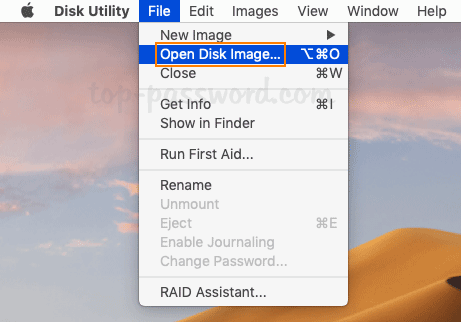
  2. Once Disk Utility is open, click the File tab on the menu bar and then select Open Disk Image.

  3. Next, select any ISO image you want to mount, and click Open.

Method 3: Open and Mount ISO file on Mac Using Terminal

  1. Open up a Terminal window and you can mount an ISO image by executing the following command. Note down the name of the destination mount point (e.g. /Volumes/PCUnlocker) as we need to use it to unmount the disk.
    hdiutil mount ~/PathToYourISO/filename.iso

  2. When you no longer need to work with the ISO, here’s how to unmount it:
    hdiutil unmount /Volumes/mount-point

That’s it!