I changed the administrator password and then when I tried to log in again, I forgot it. It’s an ASUS laptop and I do not have a password reset disc. How can I recover or reset the administrator password without wiping out the hard drive?
Forgot the administrator on your ASUS laptop? Need to reset lost password in an ASUS notebook running Windows 7, Vista or XP? Losing an administrator password can render Windows system useless and the situation arises frequently. Luckily there is an easy way to unlock your ASUS laptop by resetting your forgotten administrator password, so you can log back in to Windows without reinstalling.
How to Unlock ASUS Laptop if I Forgot the Administrator Password?
To unlock the administrator password on your ASUS laptop, we need to use a software called Reset Windows Password. It is password recovery program which needs to be burned to a CD or USB thumb drive. Boot your locked ASUS laptop from the CD/USB drive and you can reset the administrator password easily. Just follow these simple instructions:
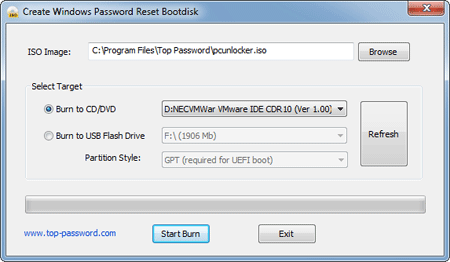
- To get started, download the .zip archive of Windows Password Reset utility which contains a bootable ISO image. Unpack the .zip file and you’ll get the ResetWindowsPwd.iso file. Burn it to a CD (or USB thumb drive) using ISO2Disc, BurnCDCC or other CD burning program.
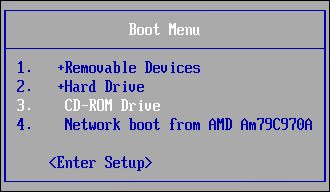
- After the boot CD is created, take it out from the CD drive and then insert it into your locked ASUS laptop. Turn on or restart the laptop and press ESC when the Asus logo is on screen to access the Boot Menu. Choose the CD-ROM from the bootable device list and press Enter.
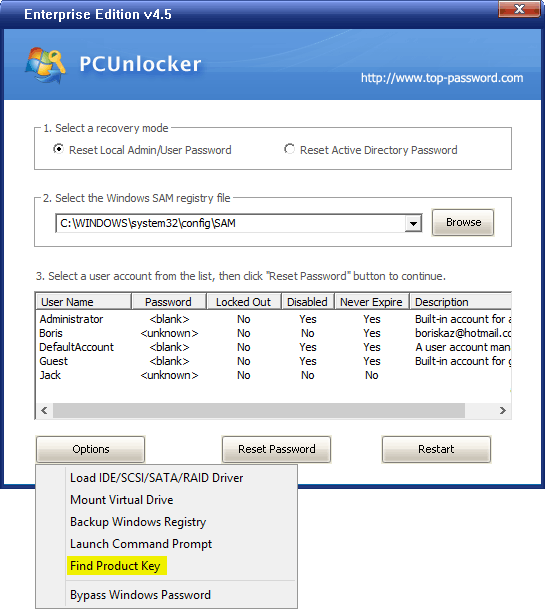
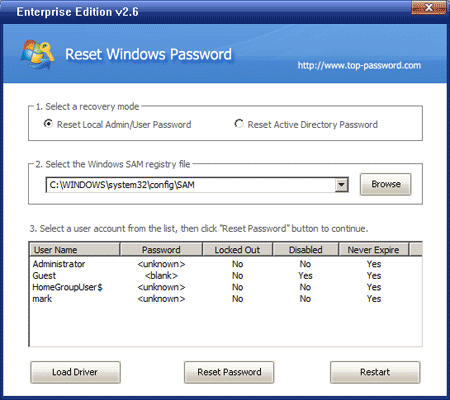
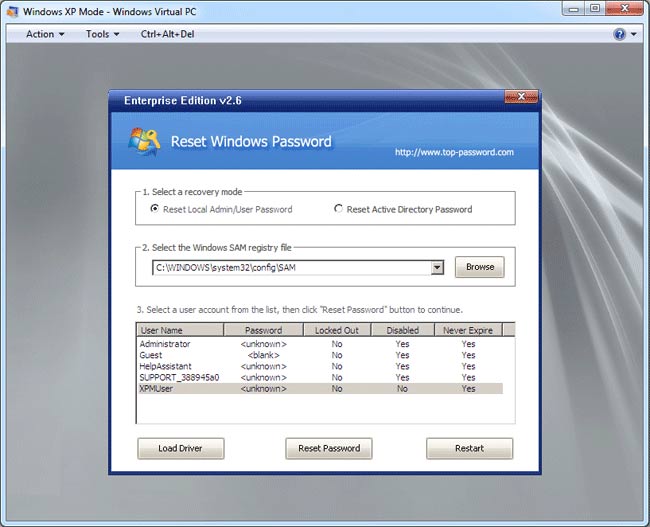
- The system will boot from the CD and open up the Reset Windows Password program after a while. The program automatically analyzes your Windows SAM registry hive and shows you a list of local user accounts.
- Choose the administrator account and click on “Reset Password” button, the program will reset the password and unlock the administrator account if it was disabled, locked out or expired.
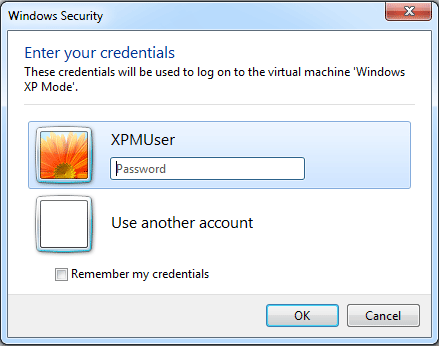
Remove the CD and restart your ASUS laptop. Now you should be able to log in to the administrator account without being asked for a password. Quickly unlock your ASUS laptop without losing any files on your computer. You can use this method to reset lost or forgotten administrator password on any ASUS laptop running Windows 8, 7, Vista or XP.