Archive for the ‘Others’ category

Turn On / Off Automatically Pause OneDrive Sync on Metered Network

August 13th, 2019 by Admin

By default, OneDrive will automatically pause file syncing if a metered connection is detected. But sometimes you may need to make OneDrive continue to sync files no matter if metered or not. In this tutorial we’ll show you 2 simple ways to turn on or off automatically pause OneDrive sync on metered network in Windows 10.

Method 1: Turn on / off Pause OneDrive Sync on Metered Network via OneDrive Settings

  1. Click on the OneDrive icon in your system tray, then click on the More button and choose Settings.

  2. Under the Settings tab, just check or uncheck the option “Automatically pause sync when this device is on a metered connection” and click OK.

  3. Relaunch your OneDrive app to apply your changes.

Method 2: Turn on / off Pause OneDrive Sync on Metered Network via Registry Editor

  1. Open Registry Editor and navigate to: HKEY_CURRENT_USER\Software\Microsoft\OneDrive. On the right panel, you have to create a 32-bit DWORD value UserSettingMeteredNetworkEnabled.

  2. In order to make OneDrive automatically pause sync on a metered connection, just double-click on UserSettingMeteredNetworkEnabled and set its value data to 1. Otherwise, change the value to 0 if you would like OneDrive to keep syncing regardless of the connection type.

  3. Close Registry Editor and reboot your system to apply.

2 Ways to Hide or Show Desktop Background Image in Windows 10

August 13th, 2019 by Admin

Looking for a way to remove desktop background wallpaper in Windows 10? To avoid the distraction from a wallpaper or a slideshow, you can turn off the background image on your desktop. In this tutorial we’ll show you 2 easy ways to hide or show desktop background image in Windows 10.

Method 1: Hide or Show Desktop Background Image via Control Panel

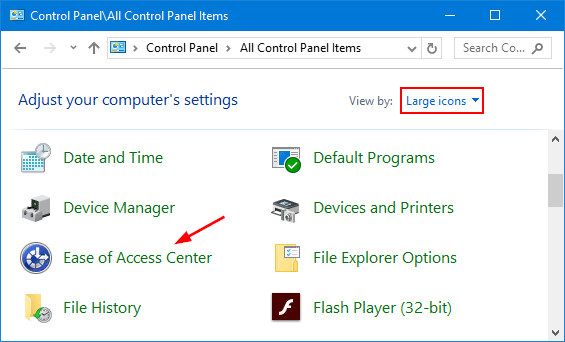
  1. Open the Control Panel with Large icons view, and then click on Ease of Access Center.

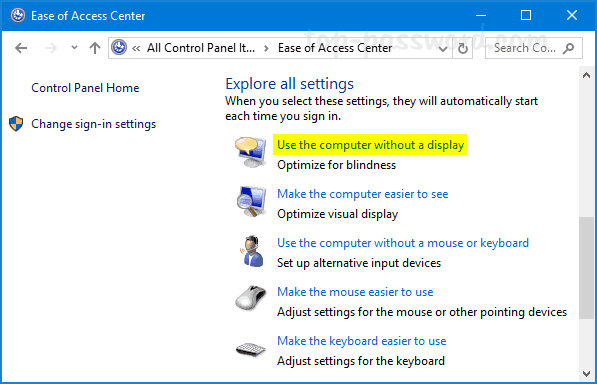
  2. Under the “Explore all settings” section, click the “Make the computer easier to see” link.

  3. Scroll down to the “Make things on the screen easier to see” section, check the “Remove background images (where available)” box and click OK. You’ll get a black desktop background. Or uncheck that box to make the desktop background image show up again.

  4. When your desktop background image is turned off, all the desktop background settings are locked down and the Settings app will display a warning message “Your background is currently turned off by Ease of Access settings“.

Method 2: Hide or Show Desktop Background Image via the Settings App

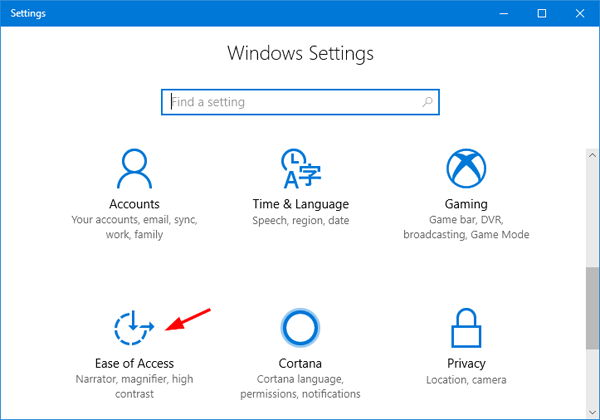
  1. Open the Settings app and click on the Ease of Access category.

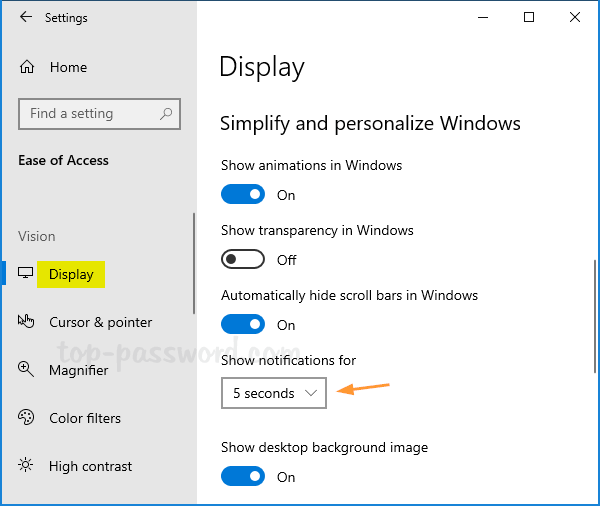
  2. Select Display from the left-side menu. On the right, you can toggle on/off the setting called “Show desktop background image“.

Conclusion

If you’re using a picture or a slideshow as your background, turning off desktop background image will give you a black desktop background. When you prefer to use a different color other than black, just set your desired solid color as your background before turning off desktop background image.

How to Save Spotlight Images Appeared on your Windows 10 Lock Screen

August 5th, 2019 by Admin

Spotlight is a new feature included in Windows 10 which automatically downloads beautiful images and display them on your lock screen. If you find the Spotlight images are really nice, you may want to save them for later use. In this tutorial we’ll show you the easiest way to save Spotlight images appeared on your Windows 10 lock screen.

How to Save Spotlight Images Appeared on Windows 10 Lock Screen

  1. Press the Windows key + R to open the Run dialog box. Type the Spotlight images location and hit Enter:
    %userprofile%\AppData\Local\Packages\Microsoft.Windows.ContentDeliveryManager_cw5n1h2txyewy\LocalState\Assets

    Sometimes, the Spotlight images might be saved in a different location:
    %userprofile%\AppData\Local\Packages\4484Ram6ler.SpotlightWallpapers_a1cxeyfetfvyt\LocalState\Wallpaper

  2. It will open a new File Explorer window and you’ll see a bunch of files, all with with meaningless file names and no extensions. Just select all of these files and copy them to a new folder where you can easily find them.
  3. After that, hold down the SHIFT key and right-click the blank space of the new folder, then select Open PowerShell window here.

  4. In order to add the .jpg extension to all these files, run the following command in the PowerShell window:
    Dir | rename-item -newname { $_.Name +".jpg" }

    If you’re at the Command Prompt window, type this command instead:
    Ren *.* *.jpg

  5. Right-click inside the new folder and select View -> Large Icons. You should be able view all the images used by Windows Spotlight. Delete any images you don’t want.

That’s it!

Fix “Something happened and your PIN isn’t available” in Windows 10

August 2nd, 2019 by Admin

Unable to login to your computer as it is saying “Something happened and your PIN isn’t available” or “Your PIN is no longer available due to a change in the security settings on this device“? Windows Hello PIN is backed by a Trusted Platform Module (TPM) chip, so any changes with the TPM chip will result in the above error. If you see such error message while signing in to Windows 10, then you can follow this tutorial to resolve it.

How to Fix “Something happened and your PIN isn’t available” in Windows 10

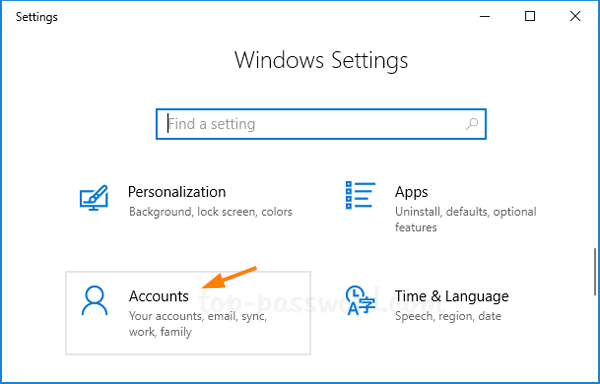
To get started, just click on the Sign-in options beneath the error message “Something happened and your PIN isn’t available. Choose another sign-in option and set up your PIN again by going to Settings > Accounts > Sign-in options“.

Next, click on the key icon and try to log in to your local account or Microsoft account with a password. If you’ve forgotten your Windows 10 password, PCUnlocker Live CD can help.

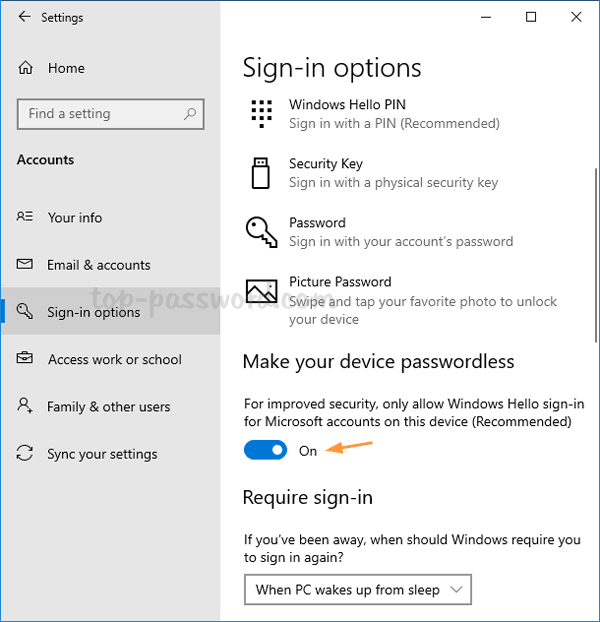
After logging into Windows 10, open the Settings app and navigate to Accounts -> Sign-in options. Just select the Windows Hello PIN option and click on Remove.

Click on Remove again to confirm.

Enter your current password and click OK. This will remove your current PIN sign-in option immediately.

Reboot your computer. The next time you sign into Windows 10, just open the Settings app again and add a new PIN. The PIN sign-in option should be working now.

That’s it!

Easy Ways to Fix “Enter Network Credentials” Error in Windows 10

July 31st, 2019 by Admin

Can’t access shared resources on the network and the “Enter Network Credentials” dialog keeps saying the username or password is incorrect? If you are having problems entering network credentials in Windows 10, here are easy ways to fix it.

Method 1: Add Network Credentials to Credential Manager

Open the Control Panel and set View by option to Large icons, then click on Credential Manager.

Make sure that Windows Credentials is highlighted, and click on Add a Windows credential.

Fill in the IP address, user name and password of the network computer which you’re trying to access. Click OK to save your credentials. Note: You need to enter both IP address (or PC name) and the user name in the User name text box.

Now you should be able to access the shared resources from the network computer without being prompted to enter network credentials.

Method 2: Turn off Password Protected Sharing

Sometimes you might be able to fix the “Enter network credentials error” by turning off password protected sharing on your network computer. When you’re in a safe network environment, you can disable password protected sharing so that anyone on the local network will be able to access your shared resources without entering network credentials.

Method 3: Network Reset & Change Network to Private

If none of the above methods work, a network reset might fix the “Enter network credentials error”. Check out the following article and you can reset the network settings to default with different ways.

How to Reset or Reinstall Network Adapter in Windows 10

Or change your network connection type from Public to Private, and see if it works.

3 Ways to Change Network Location to Public or Private in Windows 10

That’s all.

3 Methods to Hide All Desktop Icons in Windows 10

July 23rd, 2019 by Admin

When you need to give a presentation or capture screenshots, it’s good idea to temporarily hide all desktop items so others can’t see what’s on your desktop. In this tutorial we’ll show you 3 easy ways to hide all shortcuts, folders and files from your desktop in Windows 10.

Method 1: Hide All Desktop Icons via Desktop’s Context Menu

Right-click any blank area on your desktop, and choose View from the resulting context menu, then uncheck Show desktop icons. This will hide all icons, folders and files from your desktop immediately.

Method 2: Hide All Desktop Icons via Group Policy

  1. Open the Local Group Policy Editor and navigate to: User Configuration -> Administrative Templates -> Desktop. On the right panel, double-click on the policy called Hide and disable all items on the desktop.

  2. Select the Enabled option. Click Apply and then OK.

  3. After rebooting your PC, all the desktop icons will disappear and you’re unable to right-click on the desktop any longer. If you need to unhide the desktop icons later, just change the group policy setting back to Not Configured.

Method 3: Hide All Desktop Icons via Registry Tweak

  1. Open Registry Editor and browse to the following key:
    HKEY_CURRENT_USER\Software\Microsoft\Windows\CurrentVersion\Policies\Explorer

    If the Explorer key doesn’t key, you have to create it manually.

  2. Next, right-click on the Explorer key in the left-side panel, and select New -> DWORD (32-bit) Value.

  3. Name the DWORD NoDesktop and set its value to 1.

  4. Finally, close Registry Editor and reboot Windows 10 to apply the changes.
Conclusion

Using the above methods you can hide everything on your Windows 10 desktop with ease. If you need to hide certain desktop shortcuts, files or folders but allow others to remain visible on the desktop, try the third-party program – Protect My Folders, which lets you hide any confidential stuff on your desktop with a password.

How to Add Text or Image Watermark to PDF Document

July 22nd, 2019 by Admin

Watermark is mainly used to claim ownership of a document or a photo, which helps prevent illegal distribution. There are plenty of apps that can help you add watermark to PDF files. This step-by-step tutorial will show you how to add text or image watermark to your PDF document using Adobe Acrobat.

How to Add Text or Image Watermark to PDF Document

Open your PDF document using Adobe Acrobat, and then click the Edit PDF option in the Tools panel on the right side of your screen.

A new toolbar with a wide variety of editing tools will appear at the top, and you can choose Watermark -> Add.

Now, you can customize the watermark. First of all, type the text you want to use for the watermark in the box, or select a watermark image file (.jpg or .bmp). Then, you need to adjust the angle, opacity, scale and position of the watermark.

If you want to apply the watermark to any specific pages of your PDF document, click the Page Range Options link in the top right corner of the dialog box.

Select whether to add the watermark to all pages or a specified page range, and click OK.

Finally, save your changes by choosing File -> Save.

Easy Ways to Delete Blank Page in Word 2019 / 2016 Document

July 21st, 2019 by Admin

Is there a way to remove empty pages at the end or in the middle of a Word document? How to avoid printing blank pages out? In this tutorial we’ll show you 3 easy ways to delete blank page in Word 2019 / 2016 document.

Method 1: Delete Blank Page in Word Document Using Navigation Pane

Click the View tab on the Ribbon, and then check the box next to Navigation Pane in the Show group. A sidebar will appear on the left and the Pages tab will give you thumbnails of all the pages in your document.

Just select the thumbnail of any blank page in the left panel, and you can then press the Delete key to remove it.

Method 2: Delete Blank Page in Word Document By Removing Page Break

Blank pages are most often caused by manual page breaks. Page breaks are non-printing characters that are hidden by default, and you can make page breaks visible by clicking the Paragraph Markers icon on the Home tab in Microsoft Word. A page break looks like this:

To get rid of it, just double-click the page break so that it’s selected, and then press the Delete key.

If you need a quick way to remove all manual page breaks in a Word document, follow these steps:

  1. Select the Home tab in the Ribbon and click on Replace in the Editing group.

  2. When the Find and Replace dialog box appears, type ^m in the Find what box and then click on Replace All.

  3. It will remove all manual page breaks from your current Word document at once.

Method 3: Remove Extra Blank Page at the end of Word Document

Blank pages can appear at the end of your Word document because of non-printing characters. To delete those unnecessary characters, select the Home tab and click on the Paragraph Markers icon.

You may see a long list of formatting marks at the end of your document. Just select all of them and hit the Delete key. The extra blank pages will go away.

That’s it!

Easy Ways to Remove Header and Footer in Word 2019 / 2016

July 16th, 2019 by Admin

How can I remove footers from a Word document prior to printing? This header takes up too much space and you need to delete it? In this tutorial we’ll show you easy ways to remove header and footer in Microsoft Office Word 2019 / 2016.

Method 1: Remove Header or Footer in Word via Right-click

After opening your Word document, right-click on the footer at the bottom of any page. Next, click on the Edit Footer button that appeared.

Under the Header & Footer tab of the Ribbon, you will see the Header item and Footer item in the sub-item list. Just click on Footer and then choose Remove Footer from the drop-down menu.

Now, all text or other stuff in the footers section should disappear. You can use the similar methods to remove the headers from your Word document.

Method 2: Remove Header or Footer in Word Using Document Inspector

Open your Word document and go to the File tab of the Ribbon. From the Info pane, click on Check for Issues and then select Inspect Document from the pop-up menu.

When the Document Inspector dialog box appears, uncheck all boxes except Headers, Footers, and Watermarks. Click on Inspect.

Simply click on Remove All to delete all headers, footers and watermarks in your document. When you’re finished, close the Document Inspector dialog and save your changes.
That’s it!