By default, moving your mouse or pressing the keyboard will wake up your computer from sleep / hibernation mode. But, the slightest movement of the mouse or even a cat walking on the keyboard can cause Windows to wake up. That could be really annoying. In this tutorial we’ll show you how to stop mouse or keyboard from waking computer in Windows 10.
How to Stop Mouse / Keyboard from Waking Computer in Windows 10?
- Open the Control Panel in Large icons view, and then click on Mouse. If you want to prevent keyboard from waking computer, click on Keyboard instead.

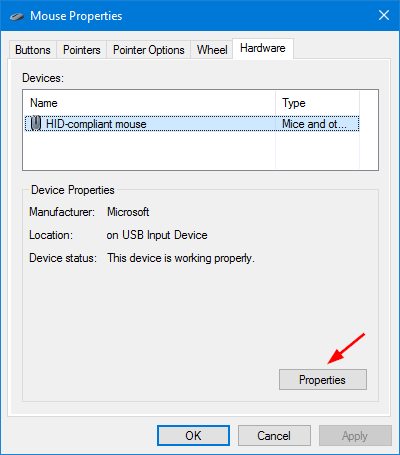
- In the Mouse (or Keyboard) Properties window, switch to the Hardware tab. Select the mouse you want to control from the list and then click on Properties.
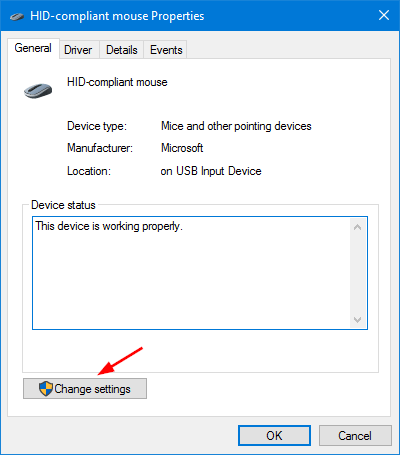
- Under the General tab, click the Change settings button.
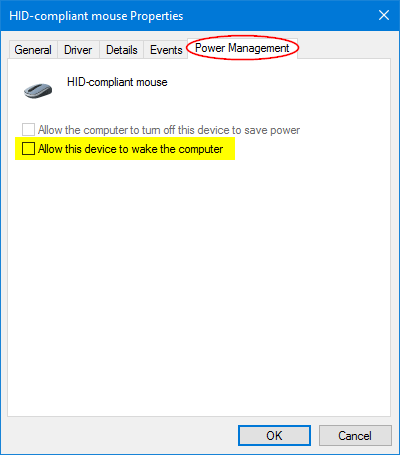
- Select the Power Management tab, and uncheck the box next to Allow this device to wake the computer. Click OK.
- That’s it. Now neither your mouse or keyboard will wake your Windows 10 system from sleep mode. You’ll need to press the computer’s Power button to wake it.