Can’t remember the password for your login account which is a Microsoft online account? How can I change Microsoft live account back to a local account from Windows 10 sign-in screen? There are two main ways to get back into Windows 10 if you forgot your Microsoft online / live account password.
Method 1: Reset Microsoft Live Account Password from Live.com
If you’ve forgotten your Microsoft live account password, you can reset it online via the live.com or outlook.com website. This method requires you to know either the alternate email address or phone number you previously added to the account. Follow these steps:
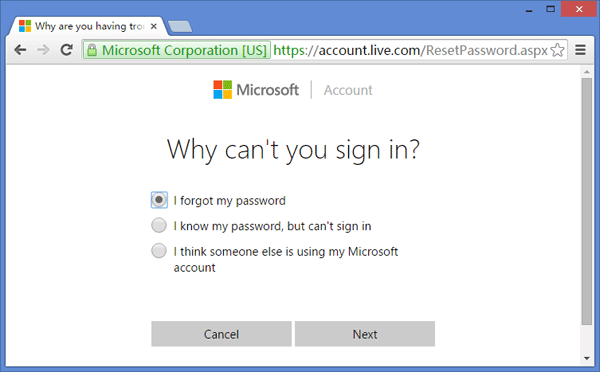
- Use any device that is connected to the Internet and visit the Microsoft online password reset page. When you’re asked why you’re having difficulty accessing your account, click “I forgot my password“.
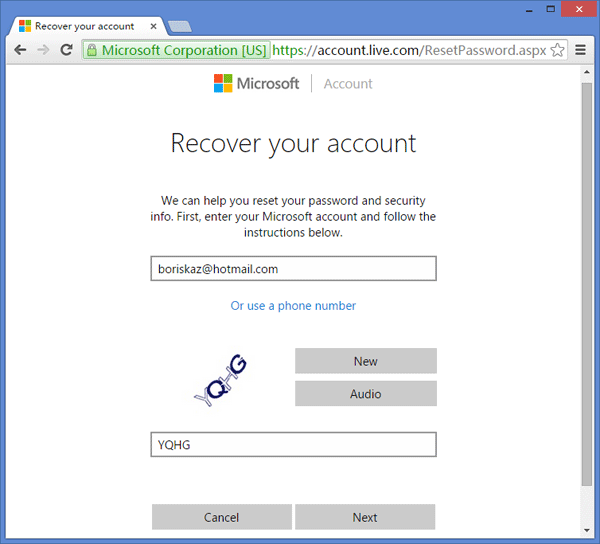
- On the next screen, enter the email address for the Microsoft live account you’re trying to recover.
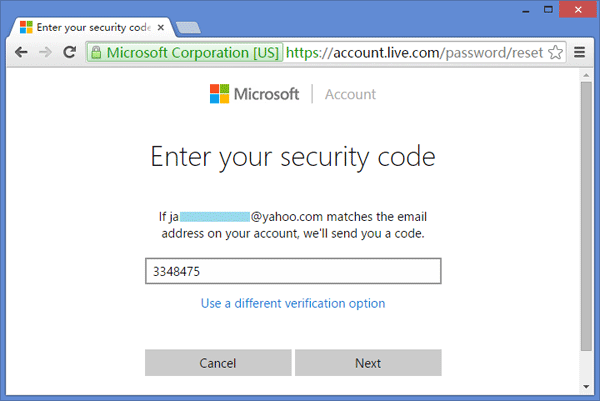
- Microsoft will send you a security code to validate that you are the owner of the live account. When you select your contact method, type the missing information and click Send code.

- Enter the security code you just received via the contact method you selected and then click Next.
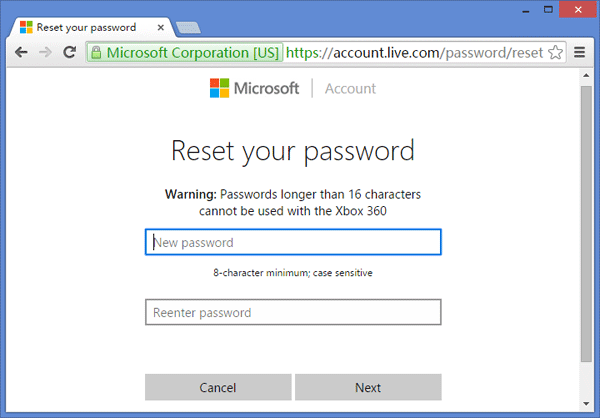
- Now it’s time to set a new password for your Microsoft live account. When it’s done, you can then log back into your Windows 10 computer with the new password.
Method 1: Switch Microsoft Live Account to Local Account
If you forgot identification information you entered when you initially set up your live account, Microsoft is unable to validate your account ownership. To regain access to your locked computer without losing files, you can consider switching Microsoft live account to local account using PCUnlocker.
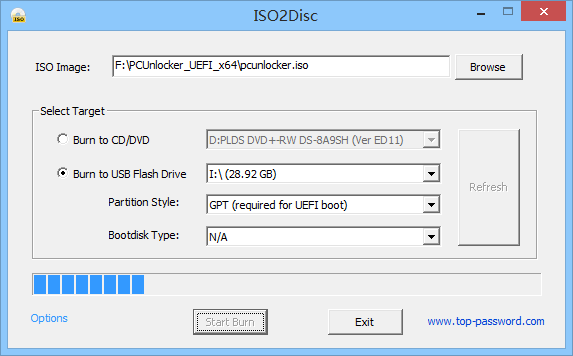
- First you need to create a PCUnlocker USB drive from another computer you know the admin password. Download the ISO image of PCUnlocker and then install it to USB flash drive using the freeware ISO2Disc.
- Boot your Windows 10 computer from PCUnlocker USB drive. In order to do this, you need to change the boot order in the BIOS, or access the boot menu on startup.
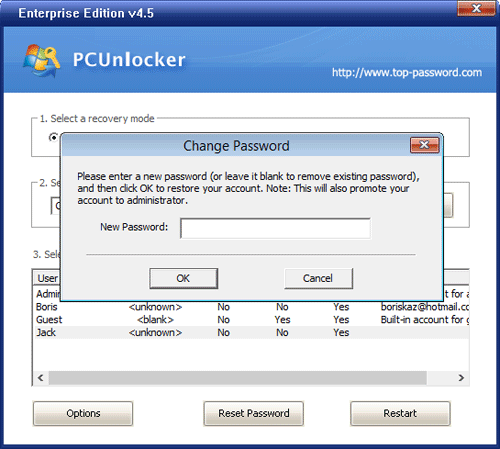
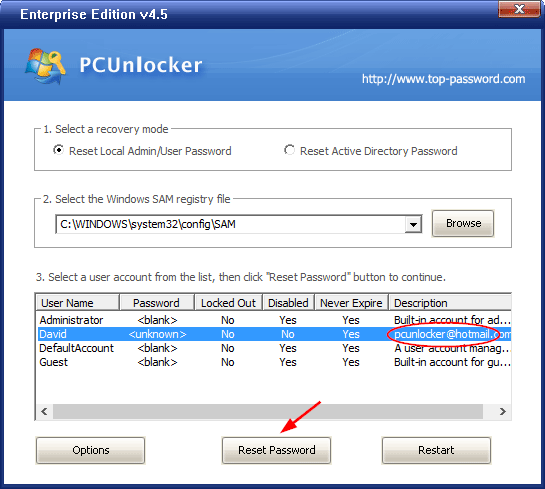
- When PCUnlocker opens up, you can see a list of local accounts on the screen. Check for your Microsoft online email account under the “Description” column of the list, select that account and click on Reset Password.
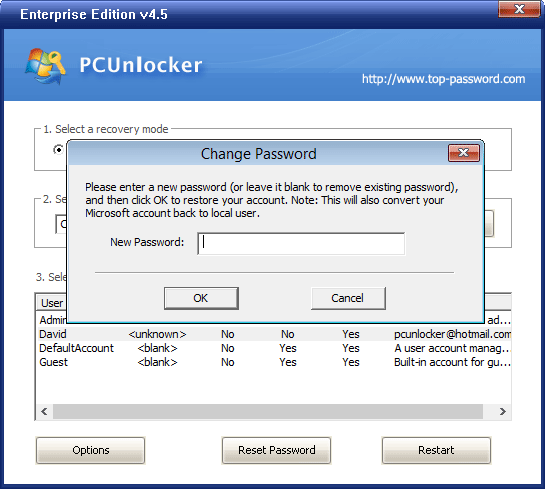
- A popup window will ask you if you want to change your Microsoft live account to local account and clear the password. Click Yes to confirm.
- Now you’ve successfully switched Microsoft live account to local account. Reboot your computer normally without USB drive, you can then see the converted local account on Windows 10 sign-in screen, click it and you can login without password!