Each time you connect to a new Wi-Fi network, Windows will create a wireless profile that contains the SSID, security key (password) and other related information. In this tutorial we’ll show you a simple way to backup or transfer Wi-Fi profiles and passwords, when you need to reinstall Windows 11 or import Wi-Fi profiles to another computer.
How to Backup or Transfer Wi-Fi Profiles and Passwords in Windows 11
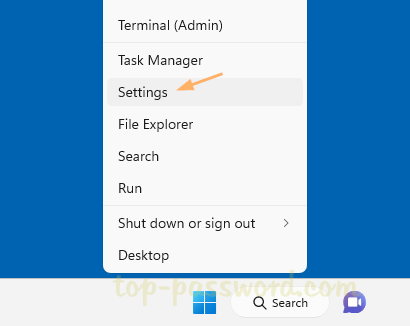
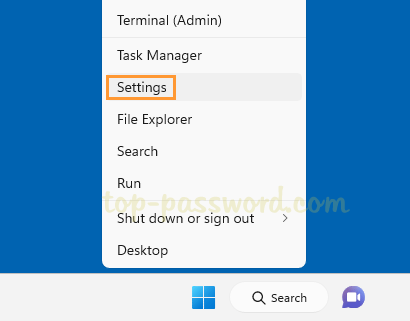
- Right-click the Windows button in the taskbar and choose “Terminal (Admin)“.

- Type the following command and press Enter to export all wireless profiles on your system. Remember to replace “
D:\wifi_backup” with an existing folder location where you want to store the backup.netsh wlan export profile key=clear folder="D:\wifi_backup"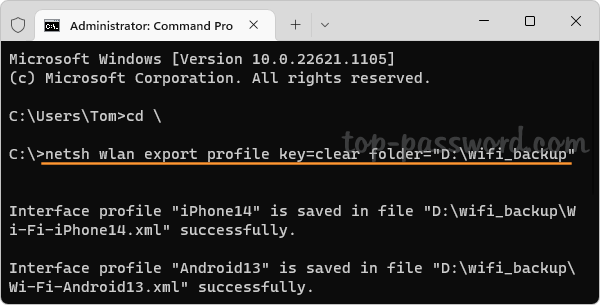
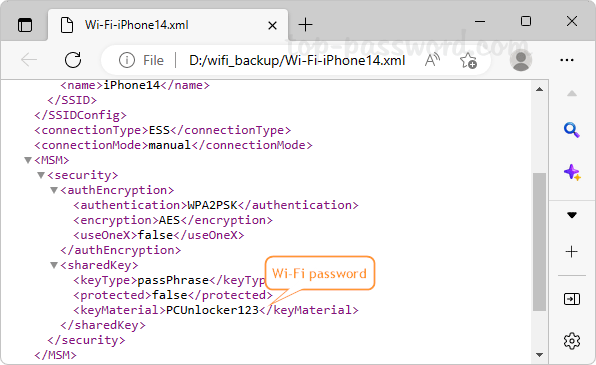
- The above command will create a separate .XML file for each wireless profile. If you open any XML file using your Web browser, you can see that the Wi-Fi password is displayed in clear text within the keyMaterial tags.
- Now, you can transfer the profiles you’ve already backed up into USB or another computer. When you need to import a wireless profile, run this command.
netsh wlan add profile filename="full_path_of_xml_file"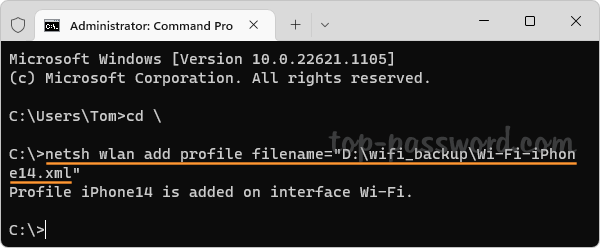
Replace “
full_path_of_xml_file” with the path of the XML file associated with the Wi-Fi network you want to restore. - Use the same method to import every wireless profile you want to connect to. Once you complete the above steps, your computer should be able to connect to the Wi-Fi without asking for a password.
That’s it!