Need to copy some files out of a Hyper-V virtual machine? Or looking for a way to view the contents inside a VHD or VHDX image? The most common method is to attach the VHD/VHDX file in Disk Management, so you can then browse all files of your virtual hard disk in Windows Explorer.
How to Mount A VHD or VHDX Image in Windows Server 2012?
Before getting started, make sure your virtual machine is powered off. Press Windows key + X together to bring up the Power User Menu, and then click on Computer Management.
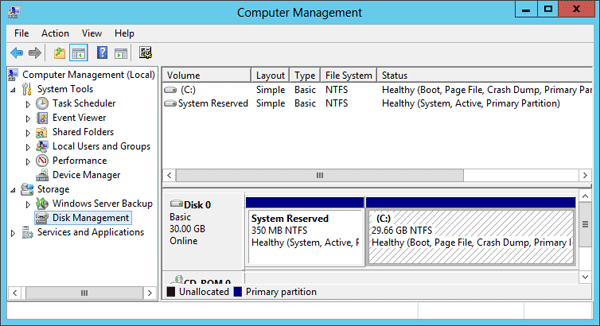
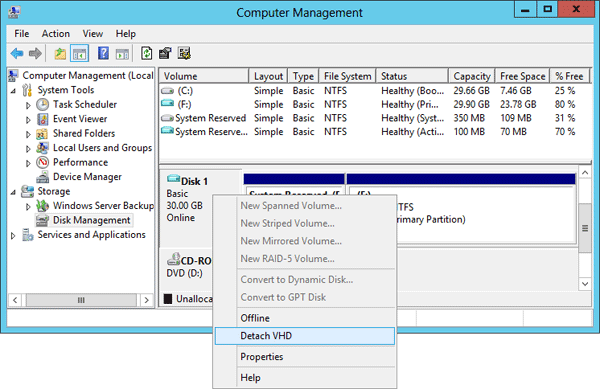
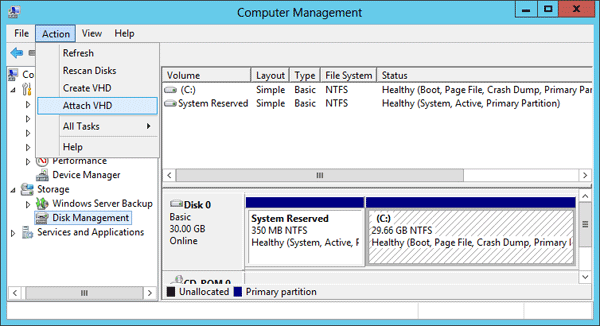
Under the Storage folder in the left pane, select Disk Management. Click on the Action menu and select Attach VHD.
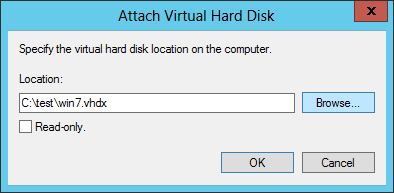
Browse to the location of the desired VHD or VHDX file, then click OK. If you don’t know where is the .vhdx image for your Hyper-V virtual machine, you can search for all files with a particular file extension, such as .vhdx.
Once your VHD/VHDX image is attached, your virtual hard disk will be available in Windows Explorer, which can be accessed just like a physical disk. You can now copy any files out or into your virtual hard drive.
When you have the files you need, go back to Disk Management and right-click on the lower window where it says your disk number. Then select Detach VHD to unmount your virtual hard drive.