Archive for the ‘Tips & Tricks’ category

How to Unlock Password Protected Laptop

July 30th, 2013 by Admin

Forgetting or losing administrator password will prevent use of your password protected laptop. This problem can be resolved by using a bootable PCUnlocker CD that will help you unlock password protected laptop by resetting the admin password. Save yourself the headache of fighting to get back into your computer!

This method is fast and easy! Just download the PCUnlocker software, burn it to a CD, insert the CD into the password protected laptop and all the current passwords will be removed so you can get back into Windows and get to work.

How to Unlock Password Protected Laptop?

  1. First you need to make a PCUnlocker CD using another computer. Once you’ve downloaded the zipped ISO image of PCUnlocker, unzip the download file and you’ll get the pcunlocker.iso file. Burn the ISO image to CD using ISO2Disc program.
  2. Place your PCUnlocker CD in the CD-ROM of your password protected laptop. Power on the machine and set CD/DVD-ROM as the first boot device in BIOS, so your laptop should boot into the CD drive instead of your normal operating system.
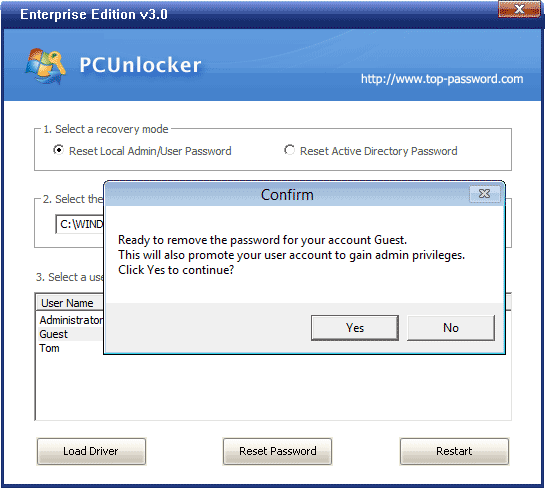
  3. Once booting from the PCUnlocker CD, it will load the WinPE operating system and finally start the PCUnlocker program itself. The program detects your Windows installations and displays a list of Windows user accounts.
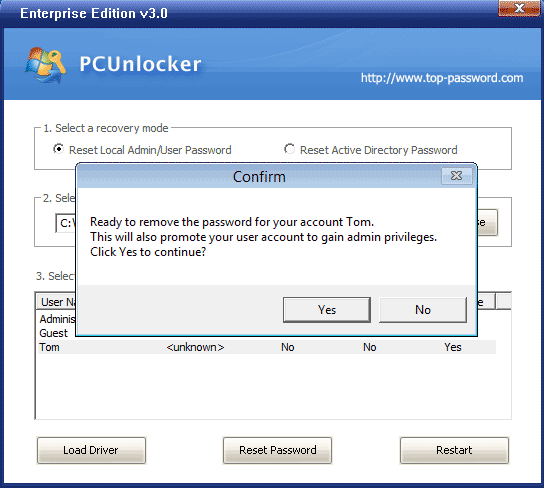
  4. Choose a user account and click on “Reset Password” button. It will unlock your user account and remove the forgotten password immediately.
  5. Reboot the machine and remove the PCUnlocker CD. You can then get into Windows without a password! You’ve successfully unlocked a password protected laptop.

How to Recover Windows 2003 Password with PCUnlocker

July 25th, 2013 by Admin

Forgetting your Windows 2003 password is not really something that happens too often, but it can happen. This is especially true if you are administering several computers that all are protected with difficult-to-remember passwords. Years ago this may have been a serious issue and could have resulted in formatting the hard drive, but these days it’s not too much of a problem.

In this article we’ll walk you through how to recover Windows 2003 password with PCUnlocker. If you don’t have a PCUnlocker Live CD, you can create on using another computer. Boot up your locked PC from PCUnlocker Live CD and it enables you to recover passwords for both local administrator and domain administrator on Windows 2003.

How to Recover Windows 2003 Password with PCUnlocker?

  1. First of all, you need to create a PCUnlocker Live CD using another computer. Click here to download PCUnlocker and save it on the computer. Once downloaded, extract the ISO file from the ZIP file. Burn the ISO image file to a CD using ISO2Disc, BurnCDCC, ImgBurn or other burning software.
  2. After burning the PCUnlocker ISO image to disc, go to the Windows 2003 computer that you’re trying to gain access to. Insert the PCUnlocker Live CD into your CD/DVD drive and then restart the computer. You’ll probably need to make changes to the boot order in BIOS in order to get the computer to boot from PCUnlocker Live CD.
  3. PCUnlocker program will start once the boot process is complete. It automatically locates the local user accounts on your Windows 2003 system by default. If you want to recover a lost domain password, you need to click on the “Reset Active Directory Password” option and it will then display your Active Directory user accounts.

  4. Select a user account and click on “Reset Password” button. The program will unlock / reset your lost Windows 2003 password in seconds.
  5. Restart the computer and take out PCUnlocker Live CD from the CD/DVD drive. Now when you boot the machine the password for that user should be gone!

How to Recover Windows 2008 Local Administrator Password

July 23rd, 2013 by Admin

I have forgotten the local administrator password of Windows 2008. That is the only account and I can’t login now. There are critical data on the server that we can’t afford to lose. How can I recover Windows 2008 password?

Nowadays we have so many passwords to remember, it wouldn’t be surprising if you forget your password every once in a while. So what to do if you forgot Windows 2008 local administrator password? With PCUnlocker Live CD you can recover lost or forgotten Windows 2008 local administrator password easily.

How to Recover Windows 2008 Local Administrator Password?

  1. First of all, you need to create a PCUnlocker Live CD using another computer. Click here to download PCUnlocker and save it on the computer. Once downloaded, extract the ISO file from the ZIP file. Burn the ISO image file to a CD using ISO2Disc, BurnCDCC, ImgBurn or other burning software.
  2. After burning the PCUnlocker ISO image to disc, go to the Windows 2008 computer that you’re trying to gain access to. Insert the PCUnlocker Live CD into your CD/DVD drive and then restart the computer. You’ll probably need to make changes to the boot order in BIOS in order to get the computer to boot from PCUnlocker Live CD.
  3. PCUnlocker program will start once the boot process is complete. It automatically locates the Windows SAM registry file which contains the encrypted user account information, and displays a list of local user accounts existing on your Windows 2008 system.
  4. Select the local administrator account and click on “Reset Password” button. The program will remove your Windows 2008 local administrator password in seconds.
  5. Restart the computer and take out PCUnlocker Live CD from the CD/DVD drive. When Windows logon screen appears, you can log into the local administrator account without a password!

Besides recovering Windows 2008 local administrator password, PCUnlocker could also be used to recover local administrator passwords on Windows 8, 7, Vista and XP. It supports both 32-bit and 64-bit Windows operating systems.

How to Disable the Sticky Keys in Windows 8/7/Vista

July 22nd, 2013 by Admin

If you’ve ever pressed the Shift key five times in quick succession, intentionally or accidentally, you’ve no doubt seen the Sticky Keys dialog box.

sticky-keys

Sticky Keys is designed for people who have difficulty holding down two or more keys simultaneously. Suppose you want to launch Windows Explorer via the keyboard shortcut. Normally that means holding down the Windows key and tapping E. After enabling Sticky Keys, you can open Windows Explorer by pressing Windows key, releasing it and then pressing E. You don’t have to press two keys simultaneously.

However, the Sticky Keys dialog box can be a minor annoyance to users who do not need them. It also opens up a security hole which lets unauthorized users to access your computer by resetting Windows 7 password using Sticky Keys trick. In this article we’ll show you how to disable the Sticky Keys features in Windows 8, 7 and Vista.

How to Disable the Sticky Keys in Windows 8/7/Vista?

Open the Control Panel. Under View by, choose the Small icons to view a list of all Control Panel items. Click the Ease of Access Center item and click the link Make the keyboard easier to use.

ease-of-access

Once you are there, uncheck the Turn on Sticky Keys option. But that does not prevent Windows from asking if you want to turn on the features if you happen to press the Shift key five times. To turn off the dialog box and thus relieve the annoyance, you will have to dig a bit deeper.

turn-off-sticky-keys

Click on the Set Up Sticky Keys link to reach the configuration screen. On this screen, you want to uncheck the Turn on Sticky Keys when SHIFT is pressed five times box. That will prevent Windows from asking if you want to turn the feature on.

set-up-sticky-keys

Click OK button to save your changes, and you should no longer see the Sticky Keys popup warning you that the feature has detected your key presses and decided to activate itself.

How to Disable Ease of Access Button in Windows 8 Logon Screen

July 20th, 2013 by Admin

If you have been using Windows 8, you may have noticed the small Ease of Access button on the bottom left corner of Windows logon screen. This button allows you quickly access Ease of Access features such as narrator, magnifier, high contrast, on-screen keyboard right from the logon screen. In this tutorial we’ll show you how to disable the Ease of Access button in Windows 8 logon screen.

How to Disable Ease of Access Button in Windows 8 Logon Screen?

Press Windows + X key combination to bring up the Power User menu, and then click/tap on Command Prompt (Admin) option. It will open up the Command Prompt immediately.

Enter the following command and press Enter. This will modify the ACL on the utilman.exe file so everyone doesn’t have permission to execute this program.
cacls %windir%\system32\utilman.exe /C /D Everyone

utilman

You will be prompted with a Y/N just type Y and hit Enter and close the Command Prompt. If you receive the “Access Denied” error, you need to change the owner of Utilman.exe from Trustedinstaller to Administrators before running the command above.

change-file-owner

Tips: If you don’t know how to change the owner, please refer to this article: How to Take Ownership & Grant Full Control Permissions to Files & Folder in Windows 8/7/Vista.

After disabling the Ease of Access button, log off your user account. Now you’ll get nothing anytime you click on the Ease of Access button from Windows 8 logon screen.

How to Restore Your Windows 8 Computer to Factory Settings without Logging in

July 19th, 2013 by Admin

There are many situations that we need to restore Windows 8 computer to factory settings. For example, the computer starts becoming laggy, the system doesn’t respond properly and experiences unexpected system crashes, or you need to remove your personal information in Windows 8 before selling or donating your PC.

In this tutorial we’ll show you how to restore your Windows 8 computer to factory settings without logging in. This is also useful in case you are unable to log on your computer for performing system restore, such as forgot Windows 8 password.

How to Restore Your Windows 8 Computer to Factory Settings without Logging in?

Before getting started, please make a backup of all important files on your computer. It’s also recommended to use Password Recovery Bundle to retrieve software license keys, recover passwords stored in your web browser or email client, and then backup them in a safe place. Now let’s walk you through the steps of restoring your Windows 8 computer to factory settings:

Turn on your computer and wait until it boots into the Windows 8 login screen. If the computer logs on to your user account automatically, you need to manually log off in order to bring up the login screen.

windows-8-login-screen

Hold down the SHIFT key and click on the Power icon visible on the bottom right of Windows 8 login screen, then click Restart option. In a moment you’ll see the recovery screen. click on the Troubleshoot option.

recovery-mode

Now click on the Reset your PC option.

troubleshoot

Click Next. The system will reboot and begin preparing to reset your PC.  This will remove everything that you might have had – apps, personalization, files and all – and bringing your machine to a completely original factory state. This is more usable in scenarios where you either want to start a new re-installation, or when you’re selling your PC or laptop, for instance.