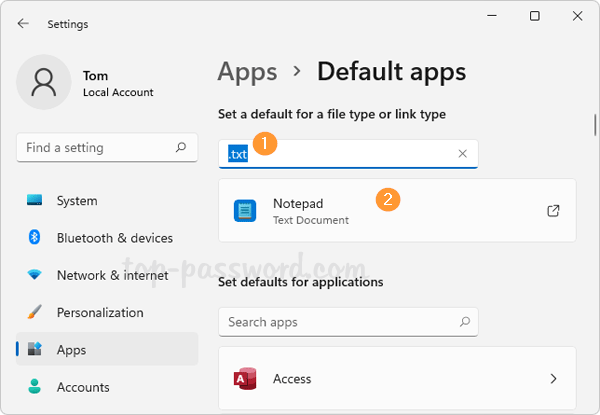
How do I update password on saved Wi-Fi connection? Looking for a way to change the Wi-Fi password on your router to improve the network security? In this tutorial we’ll walk you through the steps to change Wi-Fi password from your Windows 11 / 10 computer or router.
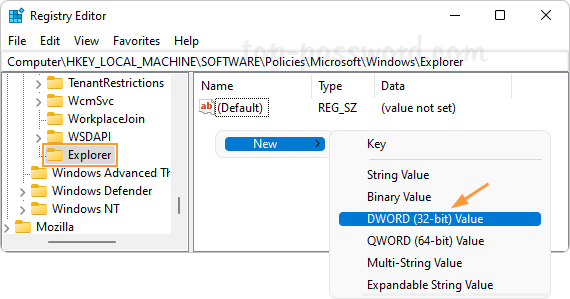
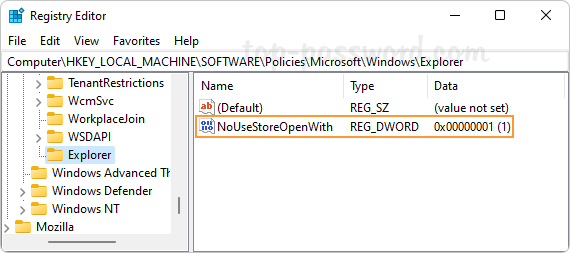
Part 1: Change Saved Wi-Fi Password on Windows 11
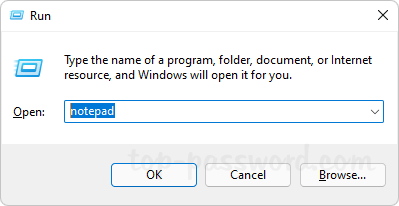
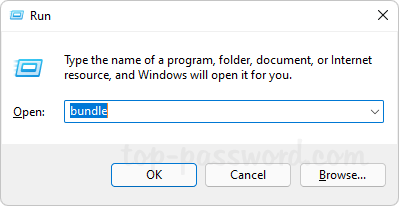
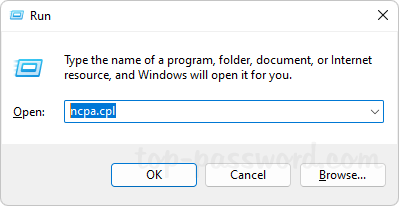
- Press Win + R key combination to open the Run command box. Type ncpa.cpl and hit Enter.
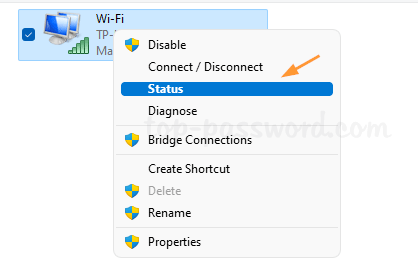
- It will launch the Network Connections window listing all the available network adapters. Right-click your wireless network adapter and choose Status from the pop-up menu.
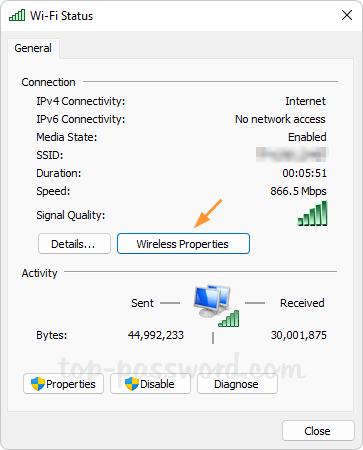
- Click the Wireless Properties button.
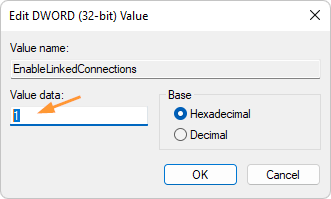
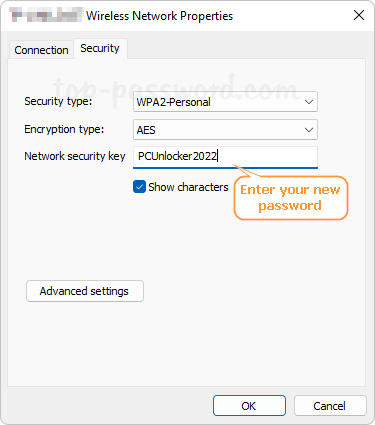
- Go to the Security tab. Enter your new Wi-Fi password in the Network security key field and click OK. Of course, you can tick the “Show characters” checkbox to view the old saved password before changing it.
Additionally, you can also choose to delete the saved Wi-Fi networks so it will ask you to enter new password before connecting.
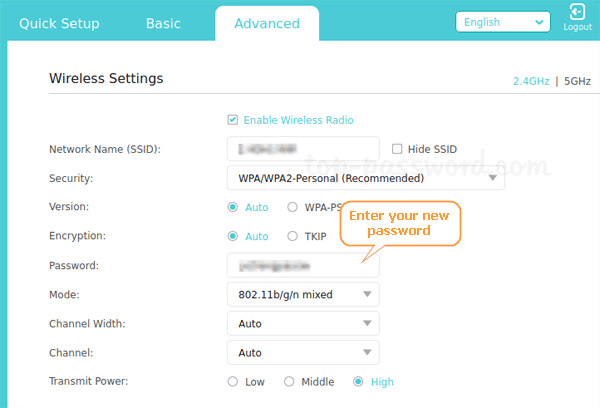
Part 2: Change Wi-Fi Password on Your Router
Before getting started, make sure your current device is connected to your router via Wi-Fi or Ethernet cable. By default, the router’s IP address is 192.168.0.1, 192.168.1.1 or the default gateway which you can find out using the ipconfig command.
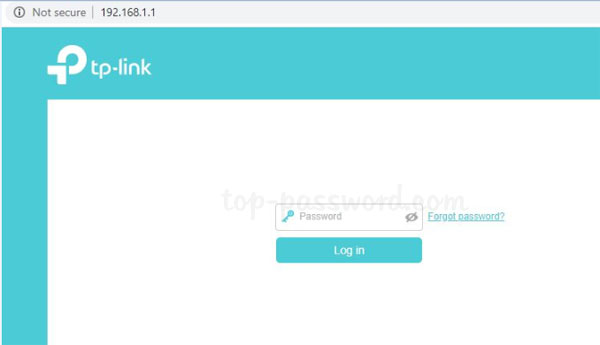
- Open your Web browser and enter the IP address of your router in the address bar, press Enter to access the router’s web-based management page. You need to login with your router password.
You can locate the default username, default password and router’s IP address on the bottom of the router itself. If you’ve changed the router password but forgot it, you can reset your router to the factory. With the power switched on, use a pin to press and hold the Reset button on the side panel of your router for 10 seconds.
- Look for a section like “Wireless” or “WLAN”. From there you should be able to see the current SSID and Wi-Fi password, and set a new password. If you are using a dual-band router, you can click 2.4 GHz or 5 GHz to set a separate password for each network.
- After changing your Wi-Fi password, you need to restart the router to apply the changes.