Forgot the root password after you’ve installed Ubuntu or Kali Linux subsystem on Windows 10? How can I reset it? Since the Fall Creators Update, you can run different Linux distribution directly on Windows 10 using a feature called “Windows Subsystem for Linux”. In this tutorial we’ll show you a simple way to reset lost root password for any Linux subsystem in Windows 10.
How to Reset Lost Root Password in Windows Subsystem for Linux
- To open the terminal for your Linux instance on Windows 10, just click the Cortana search box in the taskbar, and then type the name of your Linux distribution (e.g. “kali linux“, “ubuntu“) to launch it.

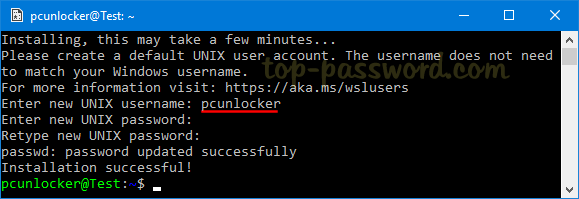
- Run the following command to find out the user ID of each Linux account.
cat /etc/passwd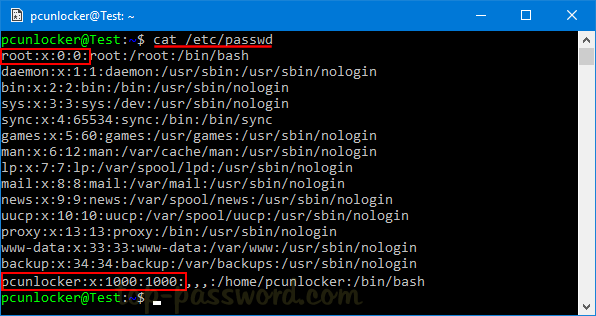
As you can see from the screenshot above, the root account has a user ID of 0. The account I’m using is named “pcunlocker“, and its user ID is 1000 (or 0x3e8 in hexadecimal).
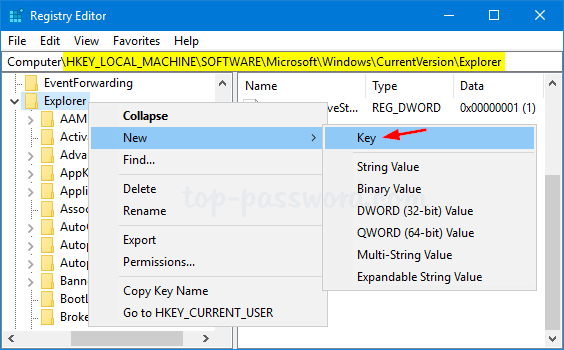
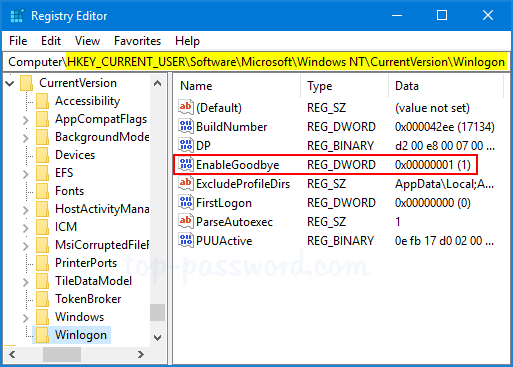
- Now close the terminal and open the Registry Editor. Navigate to the following key:
HKEY_CURRENT_USER\Software\Microsoft\Windows\CurrentVersion\LxssYou may see one or multiple subkeys named with the GUID of each Linux distribution. Navigate through each GUID key below that, noting the corresponding DistributionName on the right.
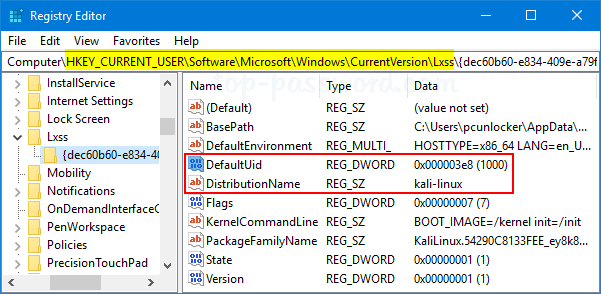
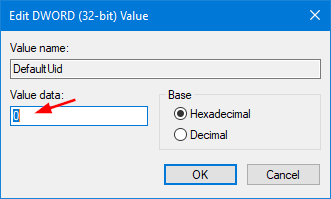
- When you find the GUID key of the Linux instance you want to reset root password for, double-click on the DefaultUid DWORD on the right-hand side and change it to 0 (root’s user ID).
- Close Registry Editor and restart your Windows 10 machine.
- The next time you open the Linux app, it will launch the terminal as the root user. Type passwd and hit Enter, it will let you create a new root password.
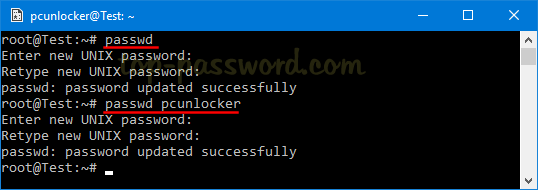
Use the “passwd user_name” command and you can reset forgotten password of any other Linux account.
- At this point you’ve successfully reset lost root password. Now open Registry Editor and go back to the previous registry key, change the value data of the DefaultUid back to the user ID of your default account.
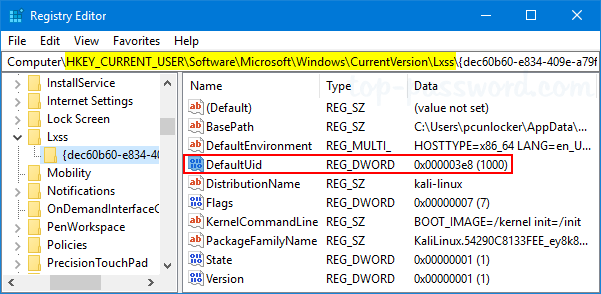
In my example, I set the DefaultUid value back to “1000” (or 0x3e8 in hexadecimal) as I want Windows 10 to open the Linux terminal as the “pcunlocker” user by default.
That’s it!