Archive for the ‘Tips & Tricks’ category

Quick Ways to Open Snipping Tool in Windows 10

October 27th, 2016 by Admin

Snipping Tool is a built-in screen grabbing software available in all versions of Windows, which makes it easy to capture snapshot. In this article we’ll show you 4 quick ways to open Snipping Tool in Windows 10.

Method 1: Open Snipping Tool from Start Menu

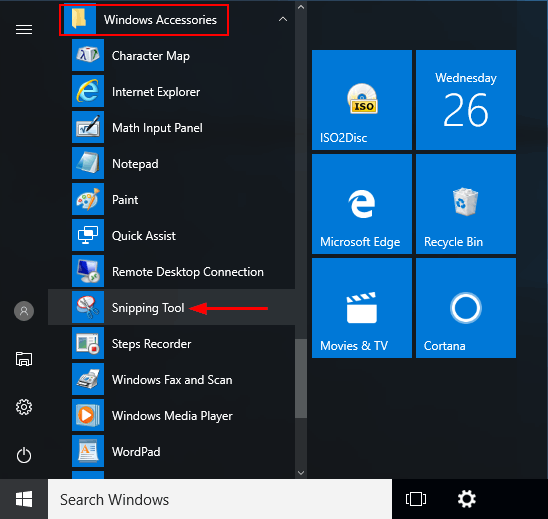
To launch the Snipping Tool in Windows 10, click the Start button. From the Start Menu, expand Windows Accessories and click the Snipping Tool shortcut.

snipping-tool-in-start-menu

Method 2: Open Snipping Tool from Run or Command Prompt

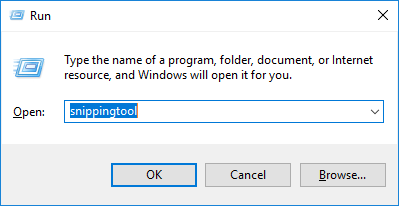
Press the Windows key + R keyboard shortcut, then type snippingtool in the Run box and press Enter.

run-snipping-tool

You can also launch the Snipping Tool from Command Prompt. Just type snippingtool at the Command Prompt and press Enter.

snipping-tool-using-cmd

Method 3: Open Snipping Tool via Cortana Search

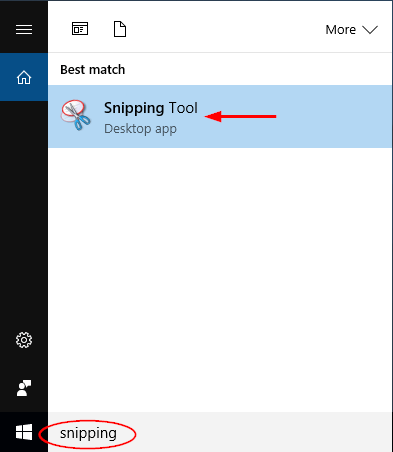
Just click the Search or Cortana icon in the Windows 10 taskbar and type “snipping“, You’ll see the Snipping Tool shortcut appear at the top of the list.

search-snipping-tool

Click the shortcut and Snipping Tool will open immediately.

Method 4: Create a Keyboard Shortcut for Snipping Tool

If you need to use the Snipping Tool regularly, you can create a keyboard shortcut that lets you open Snipping Tool by pressing a hotkey. Here’s how:

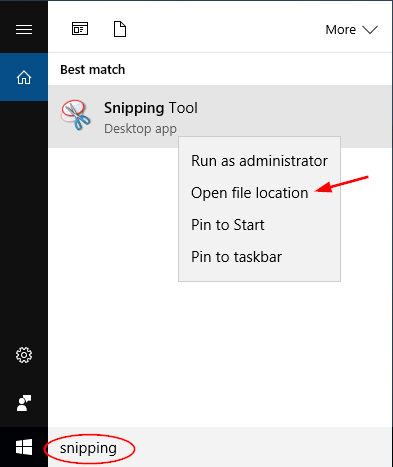
  1. Click the Search or Cortana icon in the Windows 10 taskbar and type “snipping“. Right-click the Snipping Tool shortcut from the result, and select “Open file location“.

    snipping-tool-location

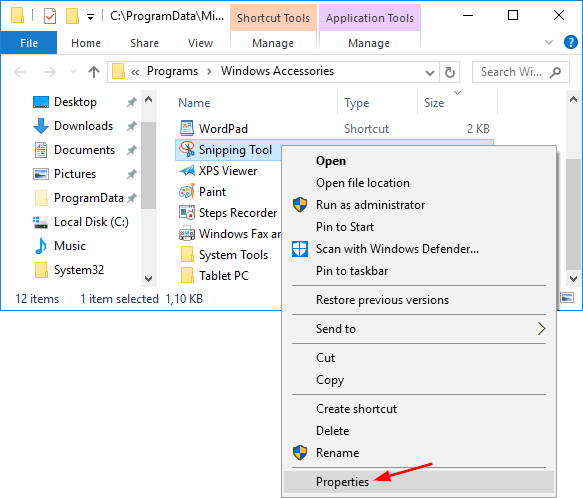
  2. Windows Explorer will open the Snipping Tool shortcut in the Program/Accessories folder. Right-click on Snipping Tool and select Properties from the context menu.

    snipping-tool-shortcut

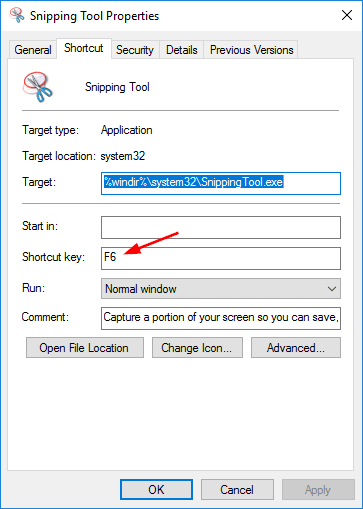
  3. Under Shortcut tab, click the Shortcut key text box, and then enter a keyboard shortcut that you would like to use to launch Snipping Tool. For example, if you want to use Ctrl + F12 keyboard shortcut, just hold down the Ctrl key and press F12.

    snipping-tool-keyboard-shortcut

Prevent Windows 10 Users from Changing or Adding Password in PC Settings

October 26th, 2016 by Admin

How to stop a user from changing their password? Look for a way to disable admin’s ability to change password? In this tutorial we’ll show you how to prevent both administrators and standard users from changing or adding Windows 10 password in PC Settings.

Note: Users can still open an elevated Command Prompt to change Windows password. To prevent changing a password from Command Prompt, you have to disable Command Prompt completely.

How to Prevent Windows 10 Users from Changing or Adding Password in PC Settings?

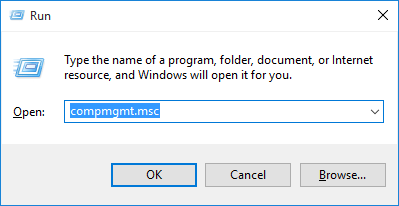
  1. To get started, you need to open up the Computer Management console. This can be done by pressing the Windows key + R and type compmgmt.msc in the Run box.

    compmgmt

  2. Expand the Local Users and Groups category in the left pane. Click on the Users folder and you will see a list of Windows accounts on your computer in the right pane.
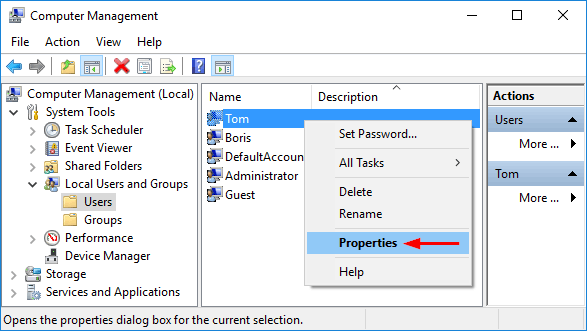
  3. Right-click on the account that you wish to deny permission to change their password, and select Properties from the drop-down menu.

    account-properties

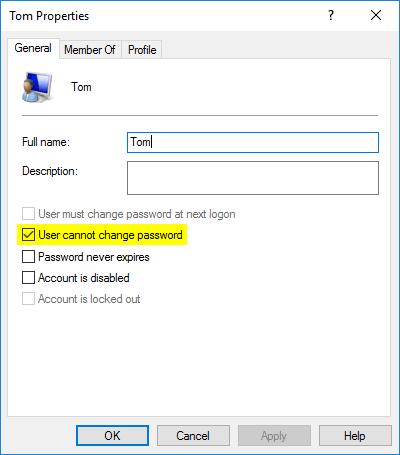
  4. Uncheck the checkbox labeled User cannot change password. Click Apply and then OK.

    user-cannot-change-password

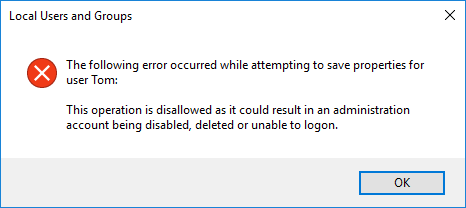
    If your selected user is an administrator, you’ll received the error message “This operation is disallowed as it could result in an administration account being disabled, deleted or unable to logon.

    disallow-saving-account-properties

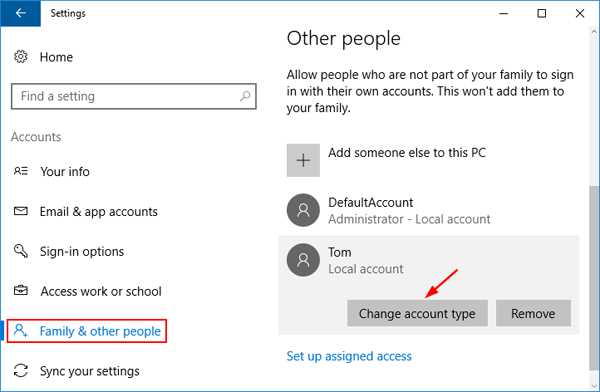
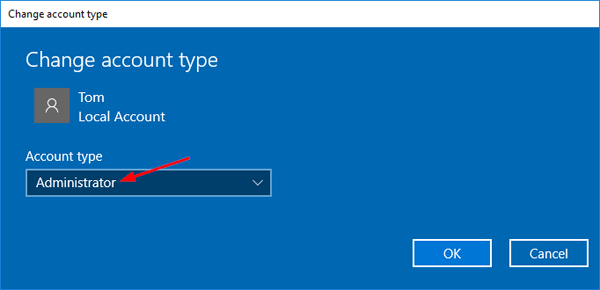
    To get around this issue, you can change that administrator account to a standard/limited user, then follow the steps above to apply the “User cannot change password” option. When it’s done, change the account back to administrator.

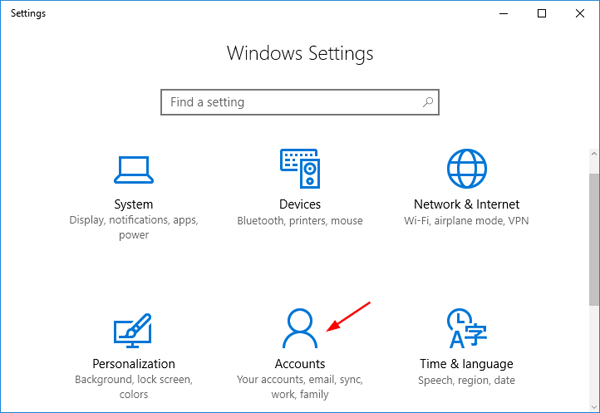
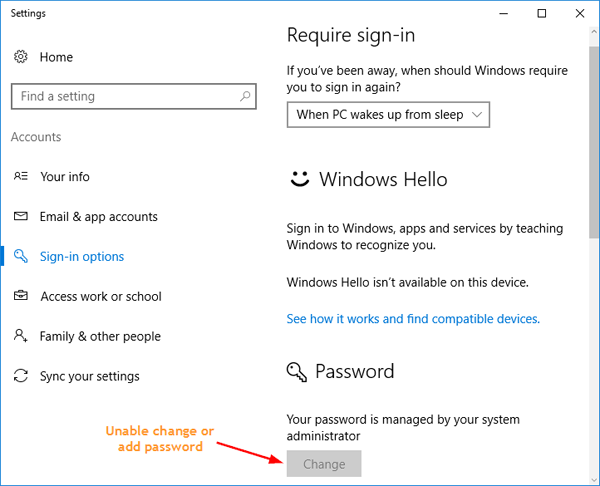
  5. Now log off and log on to your selected account, open the PC Settings, select Accounts -> Sign-in options and you’ll find the option of changing or adding password is greyed out.

    prevent-users-change-password

How to Change Number Format in Windows 10

October 25th, 2016 by Admin

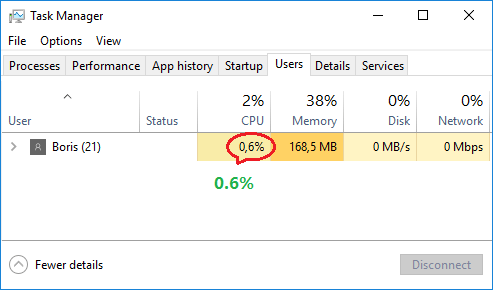
In some situation, comma is used instead of a dot to separate the fractional part of decimal numbers. This might cause some issues with certain software. How can you change the decimal separator from a comma to a dot in numbers? In this tutorial we’ll show you how to change / customize the number format in Windows 10.

decimal-symbol-use-comma

How to Change Number Format in Windows 10?

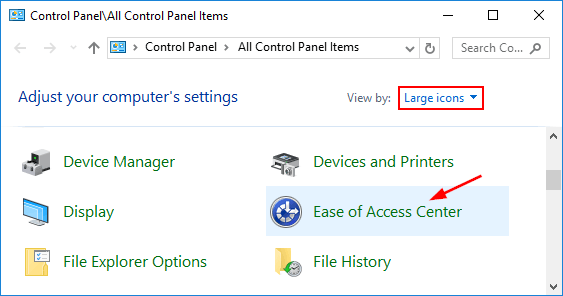
  1. Open the Control Panel in Large or Small icons view. Click on Region.

    region

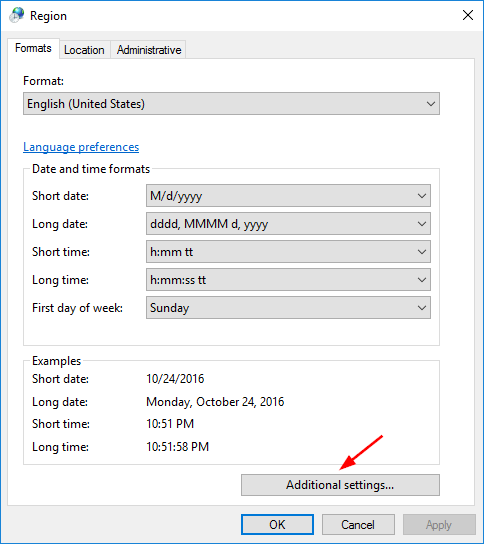
  2. When the Region window opens, click on the Additional settings button.

    advanced-region-settings

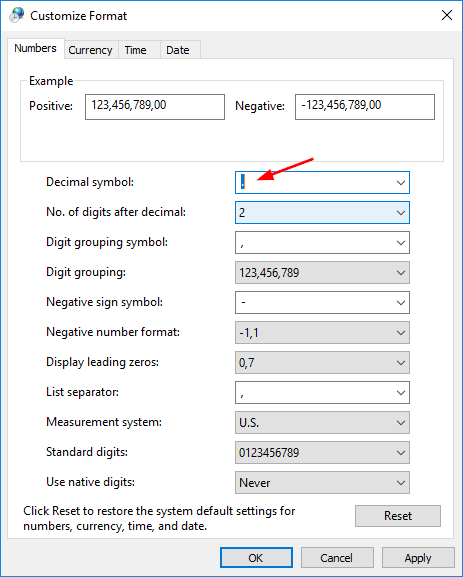
  3. The Customize Format window opens. In the Numbers tab, you can customize how numbers are displayed by Windows. For example, change decimal symbol from , (comma) to . (dot).

    customize-number-format

  4. If you’ve messed up the number format, just click the Reset button on the bottom-right of the window. It will restore your number format to default.

How to Disable or Turn Off Notification Sounds in Windows 10

October 25th, 2016 by Admin

Keep hearing the annoying notification sound? Windows 10 notification sounds might drive you crazy. In this tutorial we’ll show you 2 simple ways to disable or turn off notification sounds in Windows 10.

Method 1: Turn Off Windows 10 Notification Sounds from Settings App

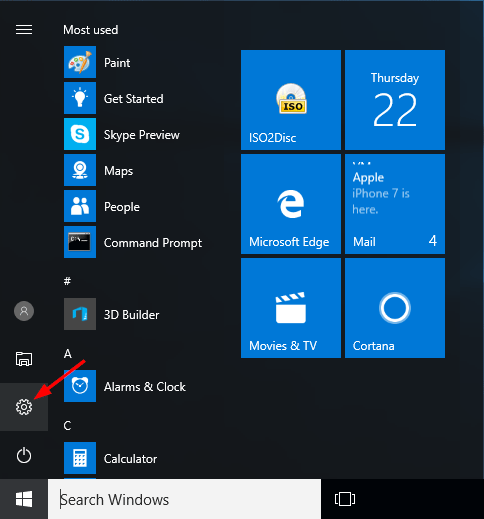
  1. Click the Start button and then click the Settings icon, or press Windows key + I to open the Settings app.
  2. On the main settings screen, click System.
    system-settings

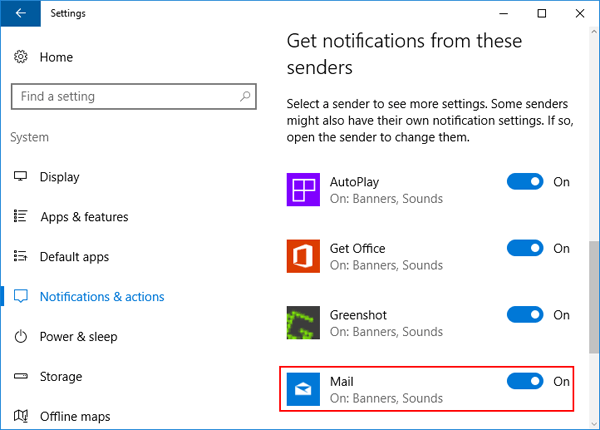
  3. On the left side of the window, click on Notifications & actions. Then, on the right side, scroll down to the “Get notifications from these senders” section, and click on the app that you want to block from playing notification sound.

    notifications-actions

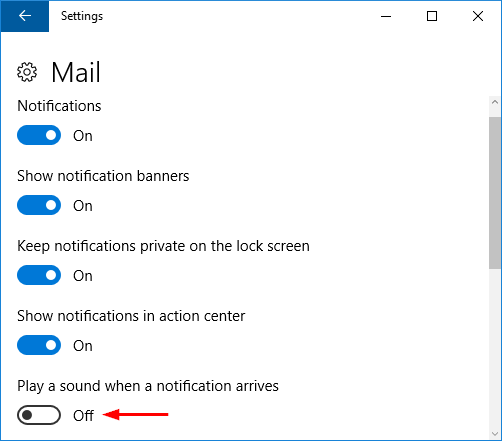
  4. Turn off the option named “Play a sound when a notification arrives“. Repeat these steps and you can disable notification sounds from other apps.

    not-play-sound-for-notification

Method 2: Turn Off Windows 10 Notification Sounds from Control Panel

  1. Open the Control Panel in Large or Small icons view. Click the Sound option.

    control-panel

  2. When the Sound Settings dialog opens, click the Sounds tab.
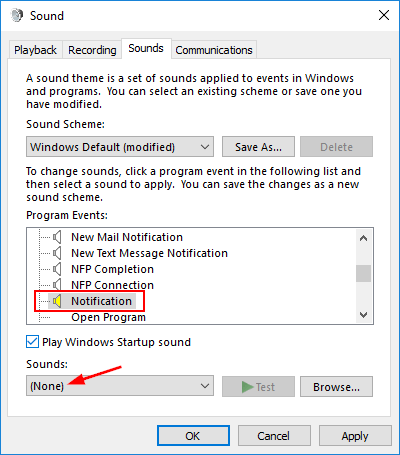
  3. Select the Notification option under the Program Events section. Click the Sounds drop-down list at the bottom and select None. Click OK to save your change.

    sound-settings

  4. Now your Windows 10 system will still be able to receive all the notifications, but it won’t play sounds any longer.

How to Set Up An Alarm in Windows 10

October 24th, 2016 by Admin

It’s most common to use alarm in mobile phone to get up in the morning. Now Windows 10 also comes with the Alarm & Clock feature, and we can use alarm in the PC to notify ourselves of the task we need to do. In this tutorial we’ll show you how to set up an alarm in Windows 10.

How to Set Up An Alarm in Windows 10?

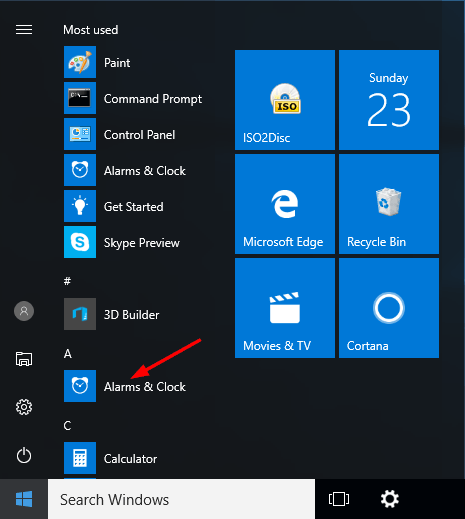
  1. Click the Start button. When the Start Menu appears, scroll to the A letter and select Alarm & Clock.

    alarm-and-clock

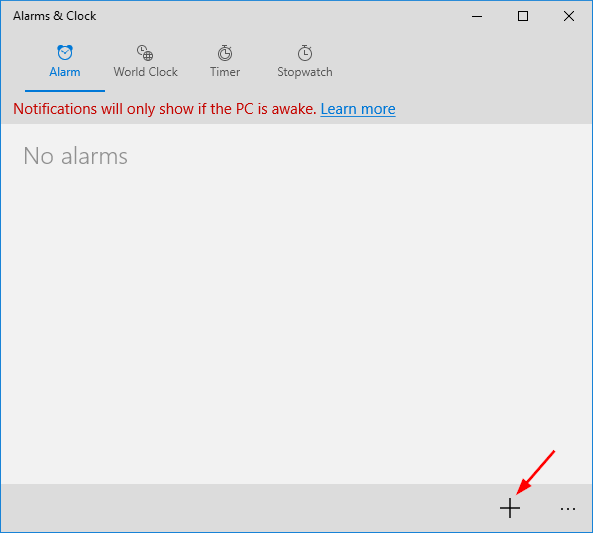
  2. To set an alarm in Windows 10, you can either edit any existing alarm or create a new one by clicking the plus sign + in the bottom-right corner.

    add-alarm

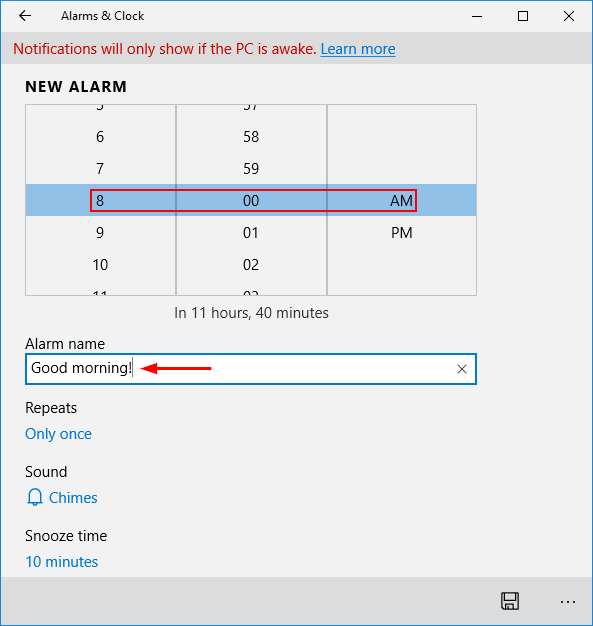
  3. The first thing you can do is set the alarm time, by selecting the hour and minute you want it triggered. Next give your new alarm a name.

    set-alarm-time

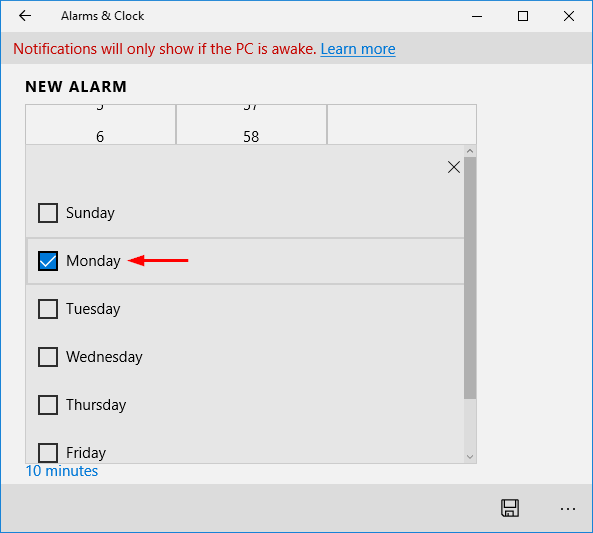
  4. By default, the alarm is set to sound only once. You can set the alarm to sound in certain weekdays by clicking Repeats.

    set-alarm-repeats

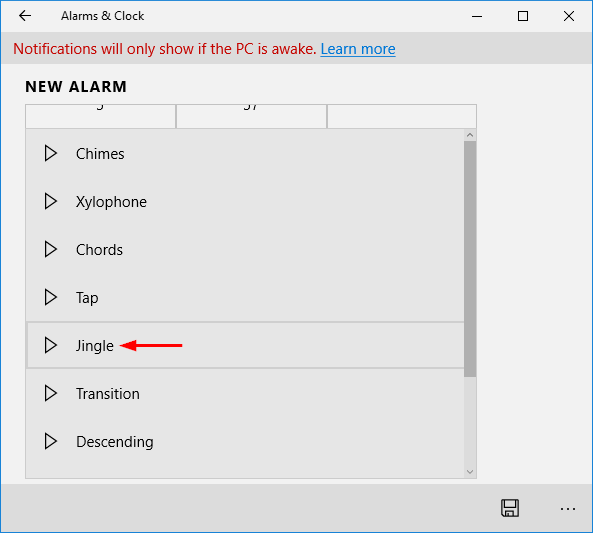
  5. Click Sound to choose the alarm sound you want to hear.

    choose-alarm-sound

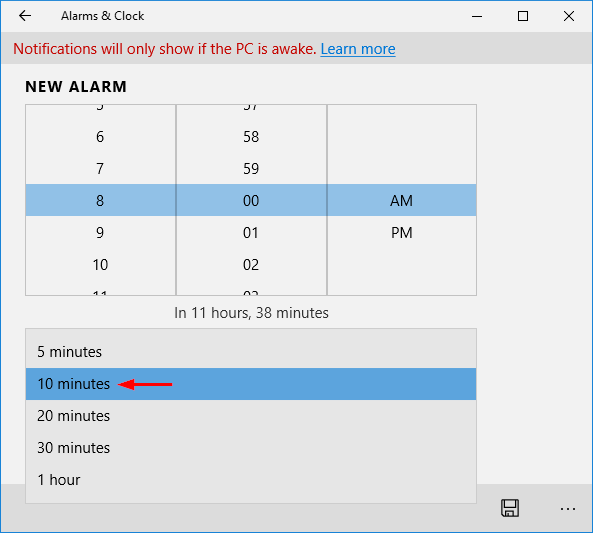
  6. Finally, set the Snooze time span by picking up the needed time from its list.

    alarm-snooze-time

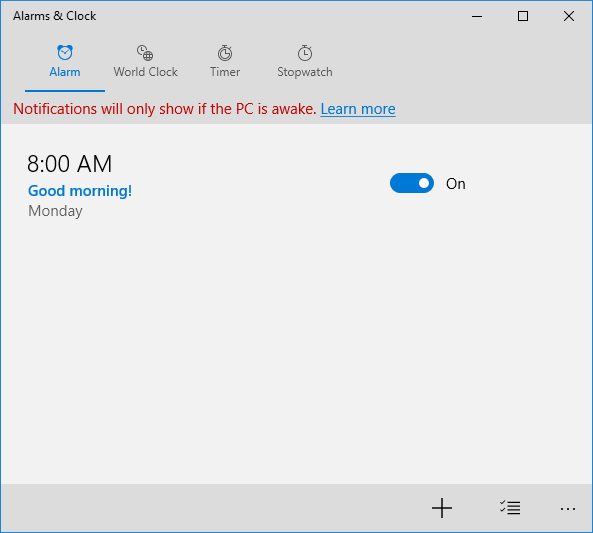
  7. When you’ve finished setting everything, click the Save button on the right lower corner of the screen.
  8. Now, your alarm is set. If you want to turn off the alarm, just set the switch to Off.

    windows-10-alarm

How to Disable & Clear Location History in Windows 10

October 24th, 2016 by Admin

Windows 10 enables location tracking by default, Cortana and other apps can use the geographic location of your computer to provide more accurate results for things like maps and web searches. But users concerned about privacy might want to turn off location tracking permanently. In this tutorial we’ll show you how to turn on/off location tracking, and clear location history in Windows 10.

How to Disable & Clear Location History in Windows 10?

  1. Open Settings app by clicking its icon in Start menu or pressing Windows logo + I keyboard shortcut.

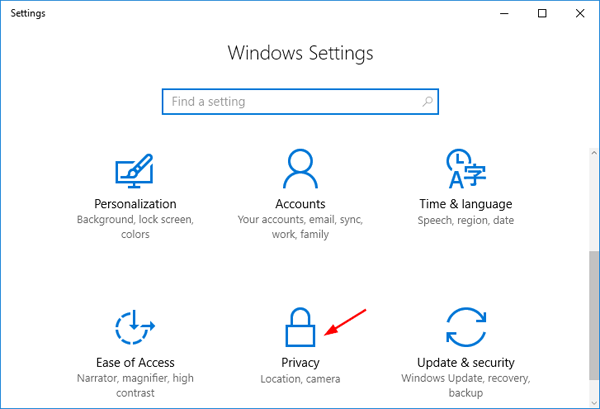
  2. Click on Privacy.

    privacy-settings

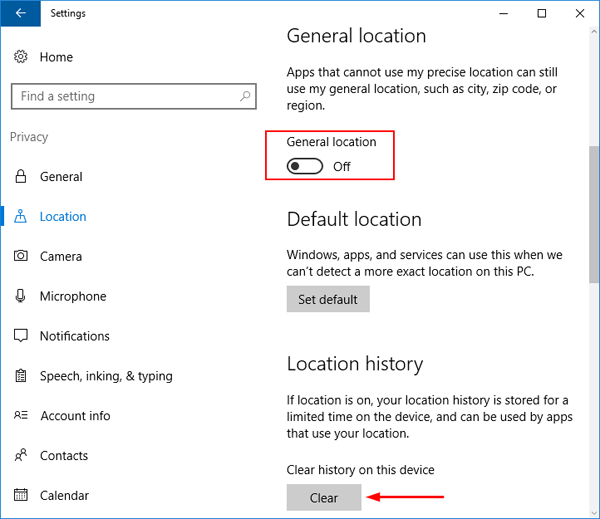
  3. Select Location from the list on the left side. Scroll down to the Location history section, click the Clear button under Clear history on this device.

    clear-location-history

  4. Windows 10 can find your general location using IP address. In order to disable general location, switch the “General location” switch to Off.
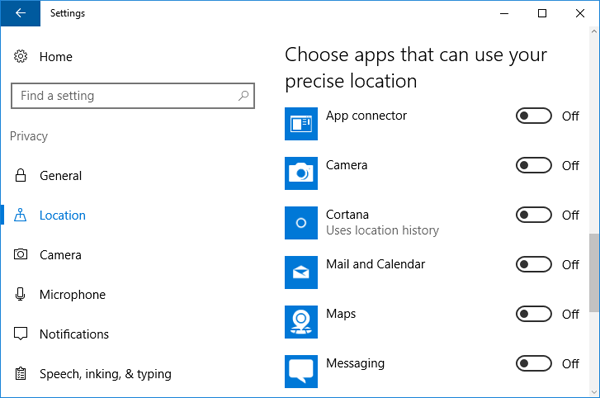
  5. Windows 10 can also determine the precise location using your router details. Scroll down to the bottom, you can choose whether apps can access your precise location.

    disable-precise-location

2 Ways to Turn On or Off Screen Saver in Windows 10 / 8 / 7

October 20th, 2016 by Admin

Screen saver is a nice way to protect your computer from prying eyes when you walk away without locking it. After a short time of inactivity, screen saver will automatically lock the screen and apply password protection. But sometimes screen saver will bother you while playing movie. In this tutorial we’ll show you 2 ways to turn on or off screen saver in Windows 10 / 8 /7.

Method 1: Turn On / Off Screen Saver from Screen Saver Settings Dialog

  1. Right-click the empty space on your desktop and select Personalize.

  2. It now opens up the Personalization settings. Click on Lock screen in the left pane, then click the Screen saver settings link in the right pane.

    screen-saver-settings

    If you’re running Windows 7, simply click on the Screen Saver link at the bottom of the window.

    screen-saver-personalization

  3. Once Screen Saver Settings dialog is launched, you can customize the screensaver and change the idle time before the screen saver is activated. If you want to turn off screen saver, just set the screen saver as None and Uncheck the box to On resume, display logon screen.

    screen-saver

  4. Click Apply and then OK.

Method 2: Turn On / Off Screen Saver Using Group Policy

  1. Press Windows key + R and type gpedit.msc and hit Enter. This will open the Local Group Policy Editor.

    gpedit

  2. Navigate to User Configuration > Administrative Templates > Control Panel > Personalization. Double-click on the policy labeled “Enable screen saver“.

    enable-screen-saver

  3. Set it to Disabled if you want to turn off screen saver. After disabling, all the screen saver settings options will be greyed out. If you want to turn on screen saver later, you need to set that option to Enabled.

    turn-on-off-screen-saver

  4. Click OK and reboot your computer for the changes to take effect.

Fix: Screen Saver Settings Greyed out in Windows 10 / 8 / 7

October 17th, 2016 by Admin

Unable to change screen saver settings? All screen saver options are greyed out or disabled? This problem is caused by a group policy setting that got screen saver disabled. In this tutorial we’ll show you 2 simple ways to fix this problem in Windows 10, 8 and 7.

screen-saver-greyed-out

Method 1: Fix Screen Saver Settings Greyed out Using Group Policy

  1. Press the Windows key + R to open the Run box. Type gpedit.msc and press Enter.

    gpedit

  2. In the left pane of Local Group Policy Editor, navigate to:
    User Configuration > Administrative Templates > Control Panel > Personalization
  3. In the right pane, locate the following two policies:
    • Enable screen saver
    • Password protect the screen saver

    screen-saver-group-policy

  4. Double-click on each policy to modify, set both of them to Not Configured. Click Apply and then OK.

    enable-screen-saver

  5. Reboot your computer and you should be able to change the screen saver settings.

Method 2: Fix Screen Saver Settings Greyed out Using Registry Hack

  1. Press the Windows key + R to open the Run box. Type regedit and press Enter.

    regedit-via-run

  2. In the left pane of Registry Editor, navigate to the following key:
    HKEY_CURRENT_USER\Software\Policies\Microsoft\Windows\Control Panel\Desktop

    ScreenSaveActive

  3. Delete both ScreenSaveActive and ScreenSaverIsSecure in the right pane. Reboot your computer and the screen saver settings should be editable from now on.

4 Ways to Open Screen Saver Settings in Windows 10

October 17th, 2016 by Admin

To turn on or disable screen saver, you have to open the Screen Saver Settings dialog. Windows 10 has buried it where you might not be able to find it. It certainly isn’t in any obvious place, so here we’ll show you 4 ways to open Screen Saver Settings in Windows 10.

screen-saver-settings

Method 1: Open Screen Saver Settings by Right-clicking the Desktop

Right-click on any empty space of your desktop, and select Personalize from the context menu.

personalize

When the Settings app launches, select Lock screen on the left side. Click the Screen saver settings link on the right side at the bottom.

lock-screen-settings

Method 2: Open Screen Saver Settings from Run or Command Prompt

Press the Windows key + R to open the Run box. Type the following command and press Enter.
control desk.cpl,,@screensaver

open-screen-savers-settings-via-run

Or run the above command at the Command Prompt, it will also open Screen Saver Settings dialog in Windows 10.

Method 3: Open Screen Saver Settings Using Windows 10 Search

Click the Cortana Search box at the taskbar. Type in Screen Saver.

open-screen-saver-settings-via-search

Click on “Change screen saver” and it will take you to the Screen Saver Settings right away where you can turn on or off screen saver in Windows 10.

Method 4: Open Screen Saver Settings from Control Panel

Open the Control Panel in Windows 10. You’ll see a Search box in the upper right corner. Type Screen Saver and press Enter.

change-screen-saver-via-control-panel

Click on “Change screen saver” from the search result. This will open the Screen Saver Settings dialog immediately.