Archive for the ‘Windows 10’ category

2 Ways to Open Chrome in Guest Browsing Mode on Windows 10

October 6th, 2019 by Admin

Chrome browser can be started in guest mode so you don’t leave any traces like cookies, cache or browsing activities on the computer. This is useful when you need to use a public computer for private browsing. In this tutorial we’ll show 2 different ways to launch Chrome in guest browsing mode on Windows 10.

Method 1: Open a Guest Window from within Chrome

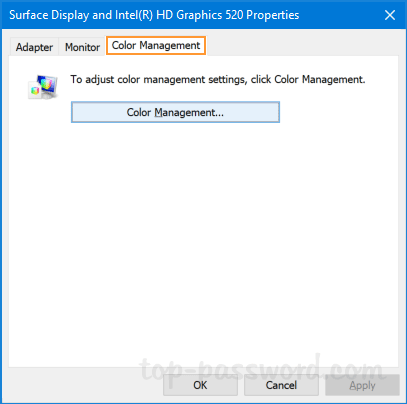
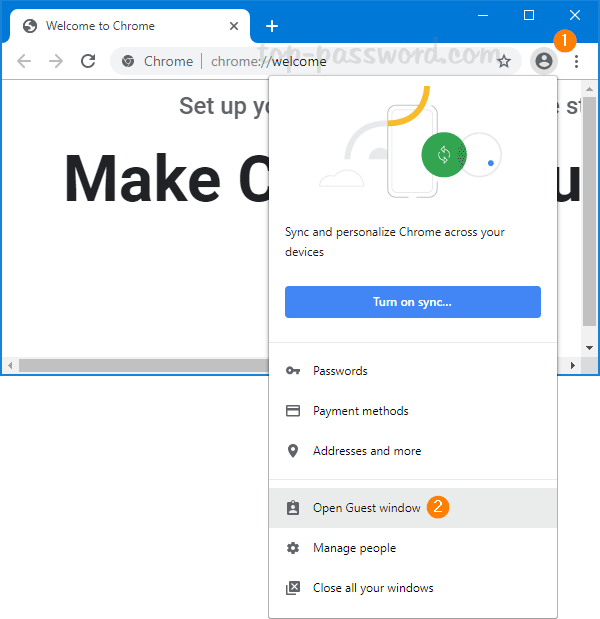
Launch the Chrome browser. Click on the Profile icon in the top right corner and then select Open Guest window.

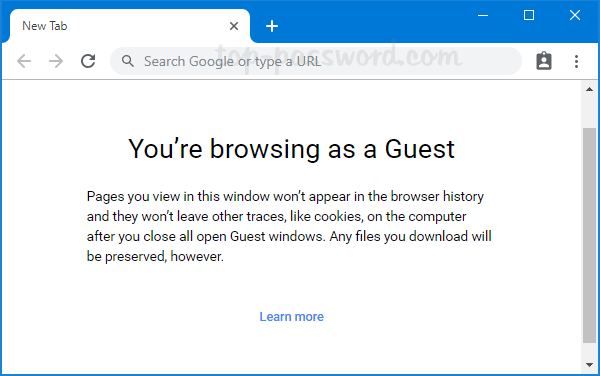
A new window will pop up in guest mode and you can browse privately.

Method 2: Create a Shortcut to Always Start Chrome in Guest Mode

The above method requires so many steps to open a guest window. If you need to use guest mode frequently, it’s a good idea to create a desktop shortcut for launching Chrome in guest mode by default. Follow these steps:

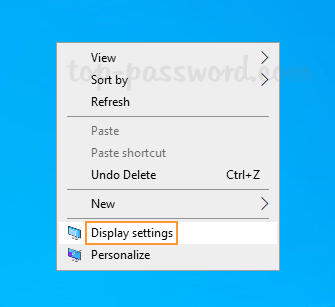
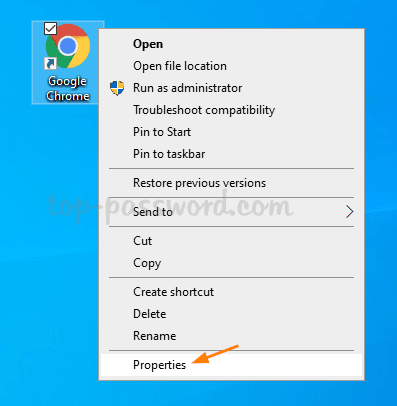
Right-click on the Chrome desktop shortcut and select Properties from the context menu.

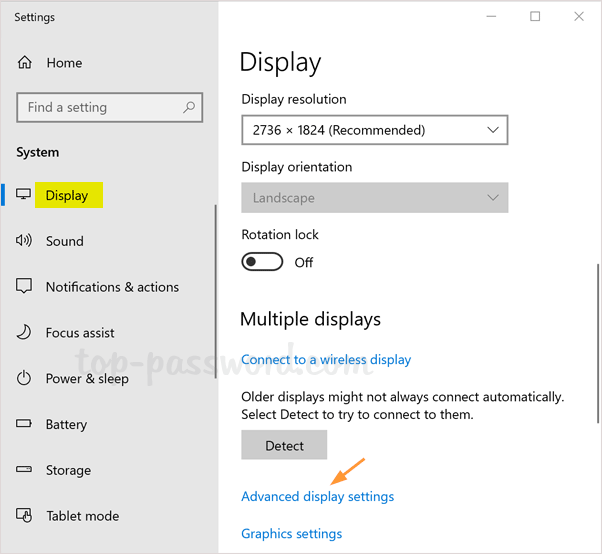
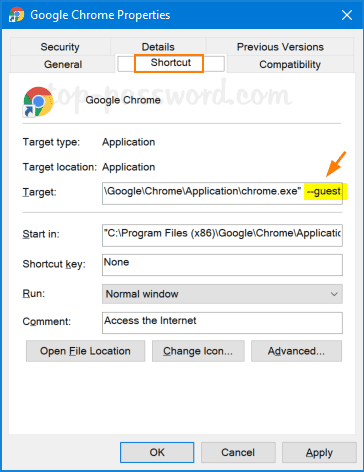
Switch to the Shortcut tab. Add “ --guest” at the end of the string present in the Target text box, and then click Apply.

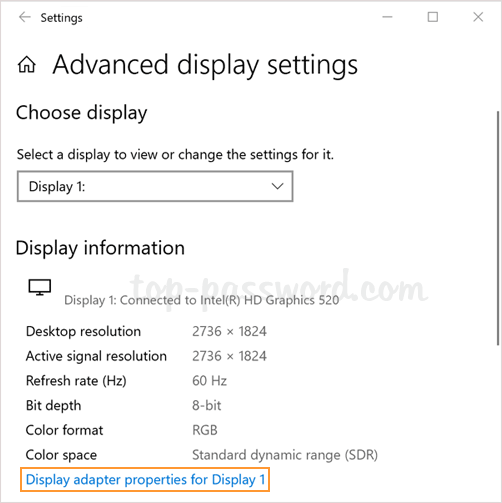
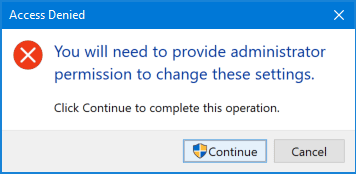
When Chrome asks for administrator permission, click on Continue.

Now, double-click on the Chrome desktop shortcut and it will open a guest window directly.

Easy Ways to Enable Telnet Client in Windows 11 / 10 / 8 / 7

September 29th, 2019 by Admin

Telnet is not recognized as an internal or external command on Windows 10? Starting with Windows 7, telnet is not enabled by default and you have to install it manually. In this tutorial we’ll show you 2 simple ways to enable telnet client in Windows 11 / 10 / 8 / 7.

Method 1: Enable Telnet Client Using Control Panel

  1. Open the Control Panel with Large icons view, and click on Programs and Features.

  2. Click the “Turn Windows features on or off” option in the left pane.

  3. In the Windows Features window, check the checkbox for Telnet Client and click OK.

  4. When complete, you’ll see the “Windows completed the requested changes” message.

  5. Now, you can start using the telnet command from the Command Prompt or PowerShell.

Method 2: Enable Telnet Client Using PowerShell or Command Prompt

  1. Open Windows PowerShell (or Command Prompt) as administrator.
  2. Type the following command and hit Enter. It will take a while to install telnet on your computer.
    dism /online /Enable-Feature /FeatureName:TelnetClient

    Whenever you need to disable or uninstall telnet, run the below command:
    dism /online /Disable-Feature /FeatureName:TelnetClient

That’s it!

How to Enable Remote Desktop with Registry, PowerShell or Command Prompt

September 19th, 2019 by Admin

Is there a script to remotely enable remote desktop on Windows Server 2016? Previously we’ve covered how to turn on remote desktop protocol (RDP) using the GUI interface, but those methods don’t work in some scenarios where you do not have physical access to the computer on which you want to enable RDP. In this tutorial we’ll show you how to enable remote desktop remotely using Registry, PowerShell or Command Prompt.

Method 1: Enable Remote Desktop Using Registry Tweak

Once you are connected to the remote machine’s registry, navigate to the location: HKEY_LOCAL_MACHINE\SYSTEM\CurrentControlSet\Control\Terminal Server. In the right pane, double-click the DWORD fDenyTSConnections and change its value from 1 to 0.

Reboot your machine and remote desktop should now be accessible. If you need to disable remote desktop in future, just set the value of fDenyTSConnections to 1.

Method 2: Enable Remote Desktop Using PowerShell

Before getting started, you need to establish a session with the remote computer using PowerShell. Once connected, run the following PowerShell commands to enable remote desktop:

Set-ItemProperty -Path 'HKLM:\System\CurrentControlSet\Control\Terminal Server'-name "fDenyTSConnections" -Value 0
Enable-NetFirewallRule -DisplayGroup "Remote Desktop"

The first command will turn on remote desktop, while the second command will activate the firewall rules that allow remote desktop connections.

When you need to disable remote desktop later, run the following commands instead:

Set-ItemProperty -Path 'HKLM:\System\CurrentControlSet\Control\Terminal Server'-name "fDenyTSConnections" -Value 1
Disable-NetFirewallRule -DisplayGroup "Remote Desktop"

Method 3: Enable Remote Desktop Using Command Prompt

If you can open a remote Command Prompt window via SSH, PsExec or WinRS, run the following commands to enable remote desktop and configure Windows Firewall to allow remote desktop connections:

reg add "HKLM\SYSTEM\CurrentControlSet\Control\Terminal Server" /v fDenyTSConnections /t REG_DWORD /d 0 /f
netsh advfirewall firewall set rule group="remote desktop" new enable=yes

To disable remote desktop, execute the below commands:

reg add "HKLM\SYSTEM\CurrentControlSet\Control\Terminal Server" /v fDenyTSConnections /t REG_DWORD /d 1 /f
netsh advfirewall firewall set rule group="remote desktop" new enable=No

That’s all!

How to Speed Up Windows 10 Menu Animations with Ease

September 16th, 2019 by Admin

When you hover over an item in a menu, there is a delay for the submenu to pop up with an animation effect. To reduce that delay, you can use a registry tweak to speed up menu animations and make your Windows 10 apps more responsive.

How to Speed Up Windows 10 Menu Animations

  1. Press Windows + R to open the Run dialog box. Type regedit and hit Enter to open the Registry Editor.

  2. Navigate to the location below. In the right pane, double-click on MenuShowDelay to modify it.
    HKEY_CURRENT_USER\Control Panel\Desktop

  3. By default, the menu animations duration is set to 400 millisecond (1000 milliseconds = 1 second). In order to speed up the animation, you can change this value to a lower number such as 200. Setting the “MenuShowDelay” value to 0 will make the submenu pop up without any delay.

  4. When you are done editing, close Registry Editor and restart your computer. When you right-click any program or file on your desktop and hover over a context menu item with a right arrow, the submenu should pop up much faster than before.

Windows 10 also includes many other visual effects and animations that give you a smoother and a more modern interface. If you want to disable all animations to get a performance boost, please check out this article: 3 Ways to Turn off Visual Animations in Windows 10.

3 Ways to Turn off Visual Animations in Windows 10

September 10th, 2019 by Admin

Windows 10 comes with lots of animation effects to give you a more attractive and user-friendly feel, such as fading effects, when you maximize/minimize a window or open/close a menu. If you find these animations slow down your computer or you don’t like them at all, here are 3 ways to turn off visual animations in Windows 10 to boost performance.

Method 1: Turn off Visual Animations Using the Settings App

  1. Use the Windows key + I keyboard shortcut to open the Settings app, and then click on Ease of Access.

  2. From the left pane, select the Display category. In the right-side pane, slide the “Show animations in Windows” button to the left to disable the animations altogether.

Method 2: Turn off Visual Animations Using Control Panel

  1. Open the Control Panel with Large icons view, and click on Ease of Access Center.

  2. Scroll down to the “Explore all settings” section, click on “Make the computer easier to see“.

  3. Check the option “Turn off all unnecessary animations (when possible)” and click OK.

Method 3: Turn off Visual Animations Using System Properties

  1. Use the Windows key + R keyboard shortcut to open the Run dialog, type sysdm.cpl and hit Enter to open the System Properties window.

  2. Select the Advanced tab. Click on the Settings button under the Performance section.

  3. In the Performance Options dialog, you’ll see a long list of checkbox options which let you tweak your system’s visual effects. To disable animations, we recommend unchecking the following options:

    • Animate controls and elements inside windows
    • Animate windows when minimizing and maximizing
    • Fade or slide menus into view
    • Fade or slide ToolTips into view
    • Fade out menu items after clicking
    • Slide open combo boxes
    • Smooth-scroll list boxes

  4. When done, click OK and then Apply to make the changes take effect.

How to Project Your Screen to Another Windows 10 Computer Through Wi-Fi

September 5th, 2019 by Admin

Is it possible to make the screen of one laptop appear on another laptop? How do you mirror desktop PC to laptop wirelessly? Windows 10 includes a useful feature that lets you turn your Windows 10 PC into a wireless display, so you can mirror another PC’s display with ease. In this tutorial we’ll walk you through the steps to project your screen to another Windows 10 computer through Wi-Fi.

Before getting started, make sure you have two Windows 10 computers that support Miracast, and they are connected to the same Wi-Fi network.

Part 1: Set Up The Receiver Computer

On the computer you want to use as a wireless monitor (which we’ll call it “receiver computer”), press the Windows key + I together to open the Settings app, navigate to System -> Project to This PC. By default the Projecting To This PC feature is turned off. You can turn it on by selecting “Available everywhere“.

If your PC needs to run on battery power only, just turn off the last option labelled “This PC can be discovered for projection only when it is plugged into a power source“. Now, your main computer can cast screen on this computer.

Part 2: Project Your Screen

On the main computer – the one you’re projecting the screen from, press the Windows key + P together. The Project menu will appear as a flyout to the right of your screen. Just click the “Connect to a wireless display” link.

It will take a while to scan around for wireless monitors. Once your receiver computer is found, just click it.

Now, a Connect permission prompt will display on your receiver computer. Go back to the receiver computer and click Yes to allow the connection.

Now, your receiver computer will merely mirror what’s on your main PC’s screen, and you can you can control it with your mouse and keyboard.

Automatically Close Apps When Shutting down or Restarting Windows 10

September 1st, 2019 by Admin

When you try to log off, shutdown or restart your PC, Windows 10 will give you the chance to save your work before gracefully closing all open programs. To proceed with the shutdown or restart process, you have to click on Shut down anyway. If you don’t take any action for a minute, it will bring you back to the desktop.

Once you get into the habit of saving your work before shutting down or restarting your computer, you can use a registry tweak to force Windows 10 to automatically close all apps without any prompt at shutdown, restart or log off, which helps saving valuable time.

Configure Windows 10 to Automatically Close Applications at Shutdown or Restart

  1. To start, you’ll need to use the Registry Editor. To open it, press Windows + R on your keyboard and then type regedit, hit Enter.

  2. Navigate to: HKEY_CURRENT_USER\Control Panel\Desktop. In the left pane, right-click on the Desktop key and select New -> String Value.

  3. Name the new string AutoEndTasks, then double-click it and set the value data to 1. Click OK and restart your PC to apply the changes.

  4. The next time you shut down, restart, or log out of your user account, Windows 10 will automatically close all running apps no matter if there is any unsaved work.

If you ever want to revert back, either delete the registry string AutoEndTasks or change the value data back to 0, Windows 10 will use the default setting instead.

Easy Ways to Open Display Color Calibration in Windows 10

August 27th, 2019 by Admin

If your monitor is not showing the most accurate colors for your games or photos, calibrating the monitor is necessary. Thankfully, Windows 10 has included a Display Color Calibration tool and you can access it using different ways.

Method 1: Open Display Color Calibration via Search

  1. Click the Search box at the left of the taskbar and enter “display color”. Choose Calibrate display color in the result.

  2. The Windows Color Calibration tool will open. You can follow the wizard to change your display’s gamma, brightness, contrast, and color balance settings.

Method 2: Open Display Color Calibration via Control Panel

  1. Open Control Panel in Large icons view, and click on Color Management.

  2. When the Color Management window opens, select the Advanced tab and you can click on the Calibrate display button to launch the Display Color Calibration utility.

Method 3: Open Display Color Calibration via Right-clicking Desktop

  1. Right-click empty space on your desktop and select Display settings.

  2. Click on the “Advanced display settings” link on the right side of the Settings window.

  3. On the next screen, click on the “Display adapter properties for Display 1” link.

  4. Choose the Color Management tab, then click on the Color Management button.

  5. Select the Advanced tab then click on Calibrate display to launch the utility.

Method 4: Open Display Color Calibration via Run or Command Prompt

  1. Press the Windows key + R to open the Run dialog box, or open up a Command Prompt window. Type dccw and press Enter.

  2. This should be the quickest way to open the Display Color Calibration tool in Windows 10.

Fix: Touchscreen not Working in Windows 10

August 20th, 2019 by Admin

Your touchscreen not working after Windows 10 updates? Or touchscreen isn’t as accurate as it used to be? If your Windows 10 touchscreen doesn’t respond or respond inaccurately, just follow this troubleshooting tutorial to fix the issue with ease.

Solution 1: Enable Touchscreen & Update Drivers

  1. Press the Windows key + R to open the Run box, type devmgmt.msc and hit Enter to open Device Manager.

  2. Expand the “Human Interface Devices” category, right-click on HID-complaint touch screen and select Enable device from the pop-up menu. If the “Enable device” option is not available, continue to the next step.

  3. Now, we need to update the touchscreen driver. Just right-click on HID-complaint touch screen and then choose “Update driver“.

  4. Click the Search automatically for updated driver software option.

  5. If a newer driver package is available, Device Manager will download and install the package automatically. Reboot your computer and tap the screen to see if it responds.

Solution 2: Calibrate Touch Screen

  1. Open the Control Panel with Large icons view, and then click on Tablet PC Settings.

  2. On the Display tab, click on Setup. Follow the on-screen directions to identify your screen as a touch screen.

  3. When you’re back to the “Tablet PC Settings” dialog, click on the Reset button to reset touch calibration to the default settings.

    Another way of resetting touch calibration is to open Command Prompt and execute this command:
    tabcal.exe ClearCal DisplayID=\\.\DISPLAY1

  4. Now, restart Windows 10 and check if your issue got fixed.

Solution 3: Changing Power Management Settings

  1. Open Device Manager and expand the “Human Interface Devices” category. We need to turn off power saving for each device related to touch screen. Right-click on the related device (e.g. “Intel(R) Precise Touch Device“) and select Properties.

  2. Go to the Power Management tab and uncheck the box which says “Allow the computer to turn off this device to save power“. Click OK.

  3. After disabling power saving for each touch device, then restart and see if your problem is resolved.

Conclusion

This can solve a lot of issues you may experience with your computer’s touchscreen. Still having the issue? If your touchscreen experienced a hardware failure, then visit your computer manufacturer’s website and download the hardware diagnostics tools to detect or fix the problem.

How to Fix: Windows 10 Notifications Disappear Too Quickly

August 19th, 2019 by Admin

Windows 10 notifications disappear too quickly from the bottom right of your screen before you can read them? By default, the notifications will pop up for 5 minutes before they are sent off to the Action Center. If you would like the notifications to stay a litter longer, here are 3 ways to change Windows 10 notification duration with ease.

Method 1: Change Windows 10 Notification Duration from Settings App

  1. Open the Settings app, and click on the Ease of Access.

  2. Choose the Display tab on the left side. On the right, click the “Show notifications for” drop down menu and you can change the time duration from the default 5 seconds to 7, 15, 30 seconds or even 5 minutes.

  3. Your notifications will now stay longer on the bottom right of your screen before they disappear.

Method 2: Change Windows 10 Notification Duration from Control Panel

  1. Open the Control Panel in Large icons view, and click on Ease of Access Center.

  2. Under the “Explorer all settings” section, click on the “Use the computer without a display” link.

  3. Scroll down to the “Adjust time limits and flashing visuals” section, click the drop-down list to specify how long Windows notification dialog boxes should stay open.

  4. Click OK to save your changes.

Method 3: Change Windows 10 Notification Duration from Registry Editor

  1. Open Registry Editor and navigate to the key: HKEY_CURRENT_USER\Control Panel\Accessibility. Double-click the DWORD MessageDuration on the right pane to modify it.

  2. The Edit DWORD Value window will appear. Set Base to Decimal and enter the time duration in seconds. If you enter 300, notifications will disappear within five minutes.

  3. Close Registry Editor. You have to log off or restart your computer to make the changes take effect.