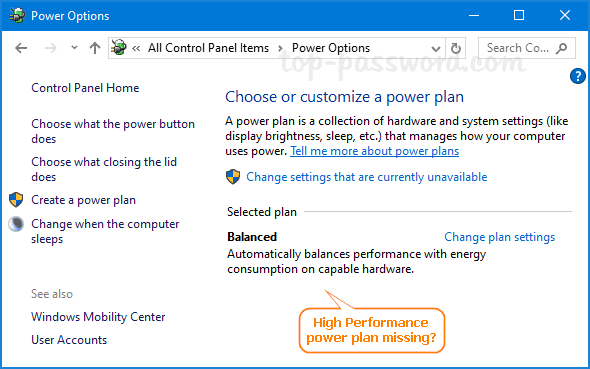
High Performance power plan missing after Windows 10 updates? Only balanced power plan is available on your DELL Inspiron laptop? By default, every Windows installation should come with three predefined power plans: Power Saver, Balanced, and High Performance. If any power plan is missing on your PC, here are easy ways to restore it.
Method 1: Disable Connected Standby
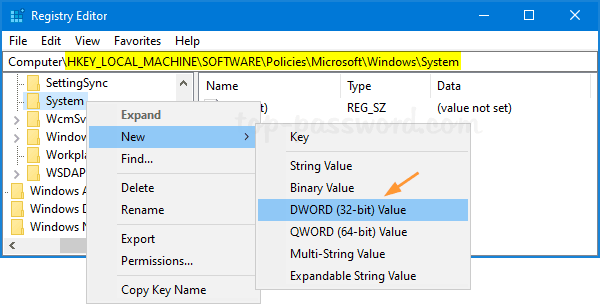
Connected Standby is a new feature introduced since Windows 8 that offers a fast sleep/wake. By default, Connected Standby is enabled and it will limit what power settings or plans are available to users. To restore your missing power plans, you may need to turn off Connected Standby using this registry tweak:
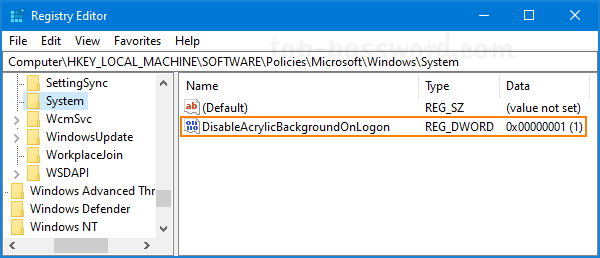
- Open Registry Editor and navigate to:
HKEY_LOCAL_MACHINE\SYSTEM\CurrentControlSet\Control\Power. In the right pane, double-click on the DWORD CsEnabled to modify it.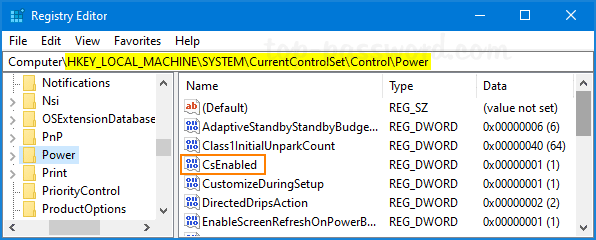
- Change the value from 1 (enable) to 0 (disable), and click OK.

- Close Registry Editor. After rebooting you should have your default power plans back.
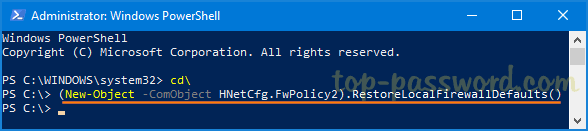
Method 2: Restore Missing Power Plans Using Command Prompt
- Open the Command Prompt as administrator.
- Copy and paste the command below for the missing power plan you want to restore into the Command Prompt, and hit Enter.
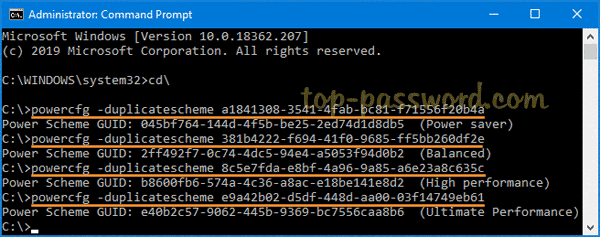
- Power saver:
powercfg -duplicatescheme a1841308-3541-4fab-bc81-f71556f20b4a - Balanced:
powercfg -duplicatescheme 381b4222-f694-41f0-9685-ff5bb260df2e - High Performance:
powercfg -duplicatescheme 8c5e7fda-e8bf-4a96-9a85-a6e23a8c635c - Ultimate Performance (available since Windows 10 April 2018 Update):
powercfg -duplicatescheme e9a42b02-d5df-448d-aa00-03f14749eb61
- Power saver:
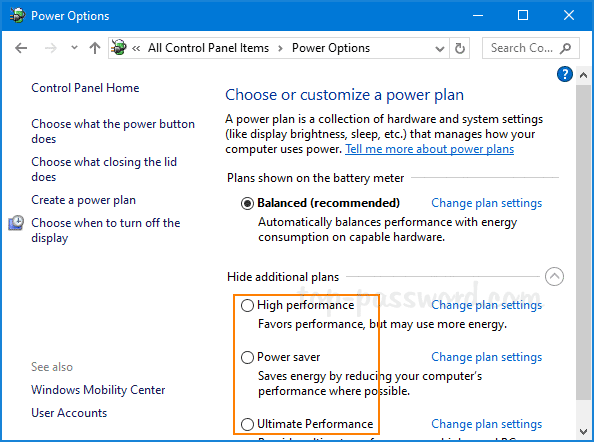
- When done, open the Power Options and you can immediately access the missing power plans that you just added.
Conclusion
The above methods should work on most Windows 10/8 systems. If you still couldn’t get the power plans back, just open the Control Panel and add a new power plan for your own purpose.