Archive for the ‘Windows 10’ category

EFS: Add Encrypt / Decrypt to Right-Click Context Menu in Windows 10

December 11th, 2018 by Admin

In order to encrypt a file with EFS, you have to go through the file’s advanced properties and check the “Encrypt contents to secure data” option. In this tutorial we’ll show you a tip to add Encrypt / Decrypt to right-click context menu in Windows 10, which will simplify the process of EFS encryption and decryption.

How to Add Encrypt / Decrypt to Right-Click Context Menu in Windows 10

  1. Open Registry Editor, and navigate to the below path:
    HKEY_CURRENT_USER\Software\Microsoft\Windows\CurrentVersion\Explorer\Advanced

    Right-click on the Advanced key in the left pane and select New -> DWORD (32-bit) Value.

  2. Name it as EncryptionContextMenu, and then double-click it to modify its value data.

  3. Set its value data to 1 and click OK.

  4. Close Registry Editor and restart your PC. You can encrypt any file by selecting Encrypt option from context menu, or right-click EFS encrypted file and select Decrypt to decrypt it.

If you want to remove the Encrypt & Decrypt item from your right-click context menu, just delete the EncryptionContextMenu entry from Windows Registry and you’re done.

3 Ways to Disable EFS (Encrypting File System) in Windows 10 / 8 / 7

December 7th, 2018 by Admin

EFS (Encrypting File System) is a feature built into the NTFS file system in Windows that lets you encrypt folders or files on the fly. Though it’s free, many users would like to use third-party alternatives like TrueCrypt, Lock My Folders. In this tutorial we’ll show you 3 ways to disable EFS in Windows 10 / 8 / 7.

Method 1: Disable EFS via Local Group Policy Editor

  1. Open the Local Group Policy Editor and navigate to:
    Computer Configuration\Administrative Templates\System\Filesystem\NTFS.

    In the right pane, double-click on the “Do not allow encryption on all NTFS volumes” policy to edit it.

  2. Select Enabled and click OK.

  3. Reboot your computer for the policy to take effect. The option “encrypt contents to secure data” should be greyed out and you’re unable to encrypt or decrypt folders/files with EFS.

You can also use Registry Editor to enable the “Do not allow encryption on all NTFS volumes” policy. Just navigate to the registry key: HKEY_LOCAL_MACHINE\SYSTEM\CurrentControlSet\Policies, create a 32-bit DWORD NtfsDisableEncryption and set its value to 1.

If you want to enable EFS encryption again, just set NtfsDisableEncryption to 0 and reboot your computer.

Method 2: Disable EFS via Command Prompt

Open the elevated Command Prompt, and run the following command to disable EFS:
fsutil behavior set disableencryption 1

If you ever want to turn on EFS again, execute this command:
fsutil behavior set disableencryption 0

This task could also be done using a registry tweak. Just open Registry Editor and navigate to: HKEY_LOCAL_MACHINE\SYSTEM\CurrentControlSet\Control\FileSystem. Look for the 32-bit DWORD NtfsDisableEncryption and modify its value to 1.

Method 3: Disable EFS via Local Security Policy

  1. Use the Windows key + R to open the Run command. Type secpol.msc and hit Enter to open the Local Security Policy.

  2. Navigate to: Security Settings -> Public Key Policies -> Encrypting File System. Right-click on “Encrypting File System” and select Properties.

  3. Under the General tab, choose to not allow “File encryption Using Encrypting File System (EFS)”. Click OK and reboot your system.

  4. When you try to encrypt a folder/file, you’ll get the error message “This machine is disabled for file encryption“.

Revert the above change and you can get EFS encryption back to work.

Auto Lock Windows 10 PC for All Users After Inactivity

December 6th, 2018 by Admin

If you routinely forget to lock the screen when you walk away from your computer, it’s recommended to set Windows 10 to automatically lock itself after a specific period of inactivity. This can prevent prying eyes from peeking your work. Here are 2 simple ways to configure inactivity time to automatically lock your PC for all user accounts in Windows 10.

Method 1: Auto Lock Windows 10 PC After Inactivity Using GPO

  1. Use the Windows key + R keyboard combination to open the Run command. Type secpol.msc and hit Enter.

  2. When the Local Security Policy is opened, expand Local Policies -> Security Options. Double-click on the “Interactive logon: Machine inactivity limit” policy in the right pane.

  3. Now you can set desired inactivity time limit, which can range from 0 to 599940 seconds. If Machine will be locked after is set to zero, the policy is turned off and your PC will never lock after any inactivity.

  4. Save your changes and reboot. Your computer will lock automatically when it has been idle for the specified inactivity limit, and you’ll need to enter your password to unlock it.

Method 2: Auto Lock Windows 10 PC After Inactivity Using Registry Editor

  1. Open the Registry Editor. Copy and paste the following path in the address bar, and press Enter.
    HKEY_LOCAL_MACHINE\SOFTWARE\Microsoft\Windows\CurrentVersion\Policies\System
  2. In the right pane, look for the 32-bit DWORD InactivityTimeoutSecs and double-click it to modify. If it doesn’t exist, you have to create it.

  3. In the popup dialog, select Decimal and enter the amount of idle time before Windows 10 locks the screen. For instance, if you want Windows to auto lock after 15 minutes of inactivity, set the value to 900.

  4. Close Registry Editor and restart your computer.

How to Stop EFS from Encrypting All New Files on Windows 10 Desktop

December 4th, 2018 by Admin

Any new files made on the desktop were being automatically encrypted? Unable to disable EFS for the desktop folder? Recently I also ran into this issue and every time I create a new file and save it to my desktop, a gold padlock icon appears on it. When I tried to turn off EFS, and it gave the error message “The specified file could not be decrypted“. Eventually I found 2 methods to stop EFS from encrypting all new files on the desktop in Windows 10.

Method 1: Using the File Ownership Context Menu

Open File Explorer and browse to your user profile folder C:\Users\user_name. You should see gold padlock icon over the desktop item. Just right-click it and select File ownership -> Personal.

That will turn off EFS encryption for your desktop immediately. Now, any new files dropped or created in the desktop should not encrypt automatically.

Method 2: Disable EFS Using Another Admin Account

Another solution is to log in to Windows with another administrative account. Right-click on the Desktop folder and select Properties. Go to the General tab and click Advanced. Untick that option “Encrypt contents to secure data” and click OK.

That’s it!

How to Disable or Lock All Taskbar Settings in Windows 10

December 3rd, 2018 by Admin

After customizing the taskbar in Windows 10, you can lock all the taskbar settings to prevent others from resizing, arranging, moving its location, using small/large taskbar buttons and so on. Here’re 2 simple ways to disable or lock all taskbar settings in Windows 10.

Method 1: Disable or Lock All Taskbar Settings via Group Policy

  1. Open the Local Group Policy Editor and browse to: User Configuration -> Administrative Templates -> Start Menu and Taskbar, then double-click the “Lock all taskbar settings” policy in the right side.

  2. Change the setting from Not Configured to Enabled. Click OK and then restart your computer.

  3. When you right-click Windows 10 taskbar, you’re unable to select the “Taskbar settings” option any longer. If you open the Settings app and navigate to Personalization -> Taskbar, all your taskbar settings are also greyed out.

Method 2: Disable or Lock All Taskbar Settings via Registry Editor

  1. Open the Registry Editor and navigate to the following key:
    HKEY_CURRENT_USER\Software\Microsoft\Windows\CurrentVersion\Policies\Explorer
  2. In the right hand side, look for a 32-bit DWORD named TaskbarLockAll and change its value data to 1 to disable all the taskbar settings. If you don’t see TaskbarLockAll, you have to create it manually.

  3. You will need to restart Windows for the changes to take effect.

Note that you’re still able to pin or unpin items in the taskbar after locking all taskbar settings in Windows 10. That’s all there is to it.

2 Ways to Show or Hide Status Bar in Windows 10 Explorer

November 29th, 2018 by Admin

How to get back the missing start bar in File Explorer? The status bar sits at the bottom of File Explorer, and it lets you see brief information about the currently selected files and switch the folder layout. In this tutorial we’ll show you 2 simple ways to show or hide status bar in File Explorer in Windows 10.

Method 1: Show or Hide Status Bar in File Explorer Using Folder Options

  1. Open up File Explorer, and move to the Ribbon Menu. Click Options under the View tab to launch Folder Options.

  2. Go to the View tab. Under the Advanced settings section, check or uncheck the “Show status bar” option depend on whether you want to enable status bar or not.

  3. Click OK. You can see the change immediately.

Method 2: Show or Hide Status Bar in File Explorer Using Registry Editor

  1. Open Registry Editor. Simply paste the following registry path in the address bar and press Enter.
    HKEY_CURRENT_USER\Software\Microsoft\Windows\CurrentVersion\Explorer\Advanced

  2. Double-click on the 32-bit DWORD ShowStatusBar in the right pane, change its value to 0 to disable status bar. To enable it, you need to set its value to 1.
  3. Close Registry Editor. Open the File Explorer and this registry tweak should take effect immediately.

How to Encrypt Your Folder without EFS in Windows 10

November 28th, 2018 by Admin

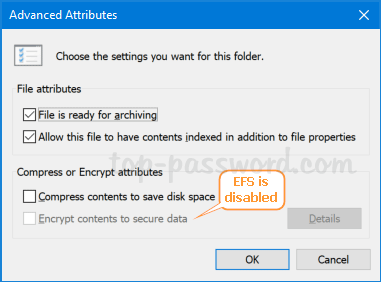
What is the best alternative to Windows Encrypted File System (EFS)? Need to secure your folder before sharing it with your friends? To prevent your sensitive data from being exposed or stolen, you can encrypt your folders/files with this software – Lock My Folders. It provides automatic, real-time(on-the-fly) and transparent encryption for individual folder/file in Windows 10.

Part 1: Install Lock My Folders

To start, you have to download the Lock My Folders application. Once the download is complete, double-click on the setup file and go through the simple installation wizard.

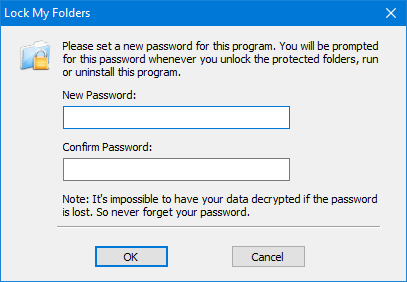
The first time you launch the program it will prompt you to create a master password that is used to encrypt and lock/unlock your secure folders.

Part 2: Create Encrypted Folders

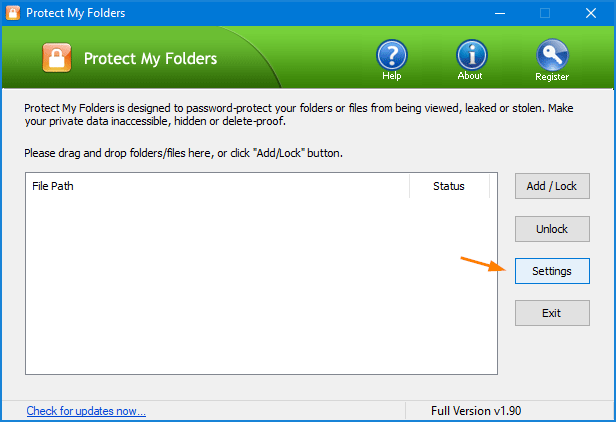
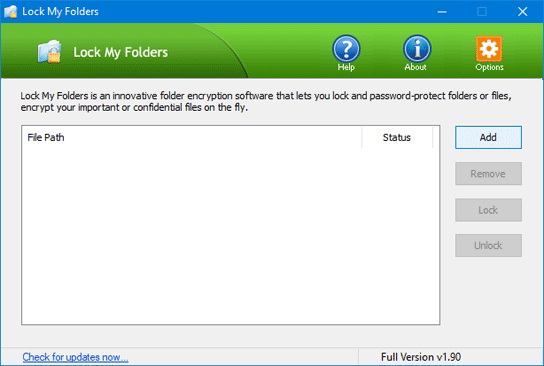
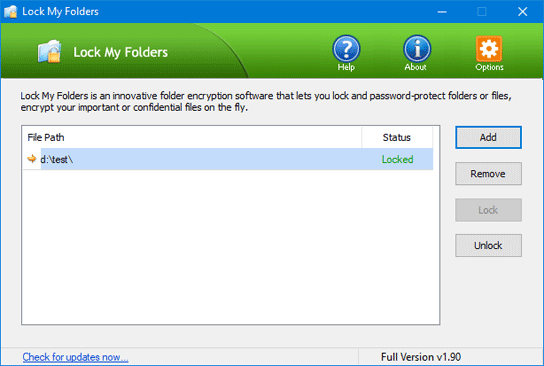
After running the Lock My Folders app, you can click on the Add button to create an encrypted folder.

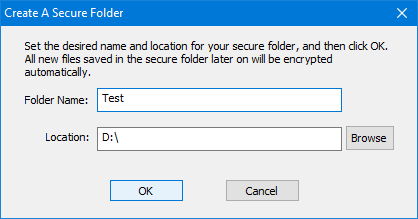
In the pop-up window, enter a name for the secure folder you want to create, and browse to the location you want to store it. Click OK.

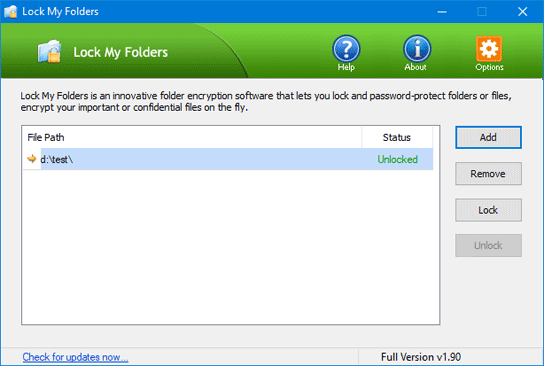
The newly-created secure folder will be shown as “Unlocked”. All files dropped in this secure folder will be encrypted automatically by Windows kernel-mode drivers.

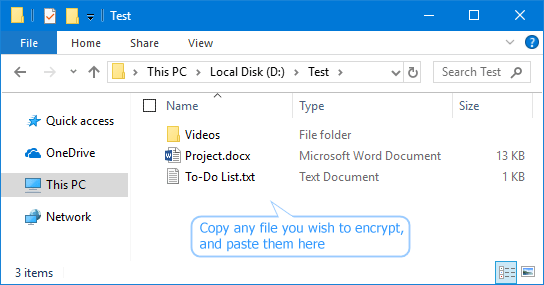
Now, you can open the secure folder in Windows Explorer and put all your sensitive files in it – whether they’re photos, videos, financial documents, or anything else.

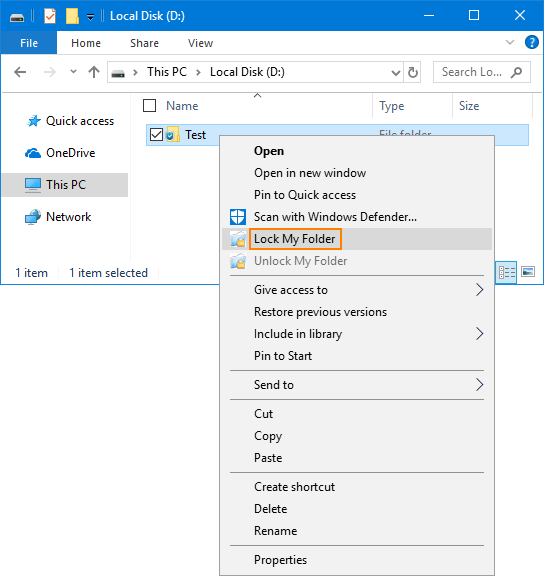
If you want to temporarily prevent others from accessing your secure folder, just right-click on it and select “Lock My Folders” from the context menu and make it inaccessible. Every time you restart or shutdown your computer the secure folder will also lock itself automatically.

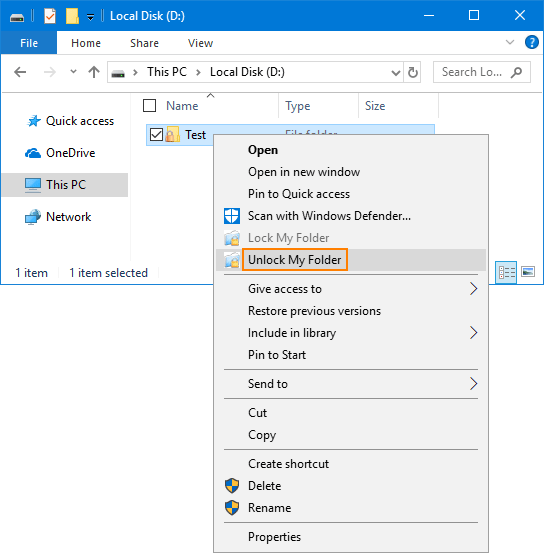
The next time you log into Windows, you need to unlock the secure folder with your master password before you can access it.

Part 3: Send or Share Encrypted Folder

When you need to transfer the encrypted folder to another PC or upload it to cloud storage, just open up the Lock My Folders program again. Select your secure folder and click on the Remove button.

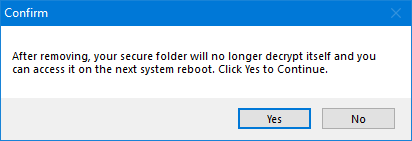
Click Yes to confirm. A restart is required before you can copy / transfer the secure folder.

After restarting, all files in the secure folder should exist in encrypted format. You can confidently transfer the encrypted folder using a USB drive, and share it with your friends. Anybody can’t decrypt the secure folder without knowing your master password.

Restore Missing “Pin to Start” Context Menu in Windows 10

November 26th, 2018 by Admin

Can’t pin or unpin any app to the Start Menu? The “Pin to Start” option doesn’t show up after the latest Windows 10 update? If you are facing this problem, here is the tutorial to restore missing “Pin to Start” context menu in Windows 10.

Fix: “Pin to Start” Missing from Context Menu in Windows 10

  1. Press the Windows key + R keys to launch Run dialog box, type regedit and press Enter.

  2. In the Registry Editor window, paste the following into the Registry Editor’s address bar, and then press Enter.
    HKEY_CURRENT_USER\Software\Microsoft\Windows\CurrentVersion\Policies

    On the right pane, look for the DWORD value named as NoChangeStartMenu. If it is listed there, right-click and select the Delete option.

  3. Next, go to each of the following registry keys. right-click the DWORD value LockedStartLayout to delete it if it exists.

    HKEY_CURRENT_USER\Software\Policies\Microsoft\Windows\Explorer
    HKEY_LOCAL_MACHINE\Software\Policies\Microsoft\Windows\Explorer

  4. Close Registry Editor. Finally, open the elevated Command Prompt and execute this command:
    regsvr32 /i shell32.dll

  5. Restart your computer to check if the “Pin to Start” option is restored back to your right-click context menu.

The above method will clear the policy settings for both “Prevent users from customizing their Start Screen” and “Start Layout“, and tell File Explorer to fix the “Pin to Start” context menu in case it’s missing or corrupted. Hopefully, your problem will be solved!

How can I disable specific Control Panel applets in Windows

November 23rd, 2018 by Admin

Control Panel exposes lots of crucial settings that you might not want somebody else to mess with. In previous post we’ve covered a way to hide specific Control Panel items using GPO, but that can’t prevent others from opening the hidden Control Panel item using Command Prompt. Here we’ll show you another way to disable specific Control Panel applets in Windows 10 / 8 / 7.

How can I Disable Specific Control Panel Applets?

Each tool in Control Panel is represented by a .cpl file in the directory: C:\Windows\System32. In order to prevent anybody from accessing specific Control Panel applets, we can lock down the .cpl files with the application – Protect My Folders.

  1. Download and install the Protect My Folders program. The first time you launch the program, you’ll be asked to set up a password to help prevent unauthorized users from opening it.
  2. Before locking down the .cpl files, you have to modify the program settings. Click on the Settings button.

  3. Under the “Exclude List” tab, select your Windows directory and click on Remove.

  4. Next, open File Explorer and navigate to C:\Windows\System32. You can search for all files with .cpl filename extensions, and double-click on each .cpl file to know if the Control Panel applet is the one you want to disable. For example, timedate.cpl is the “Date and Time” applet, appwiz.cpl is the “Programs and Features” applet, etc.

  5. Just drag the .cpl files you want to restrict others from accessing, and drop them into the Protect My Folders program.

  6. Close the Protect My Folders program. Now, if you try to access the blocked Control Panel applet, it won’t open up any longer.

That’s it!

4 Ways to Change Time Zone in Windows 10

November 20th, 2018 by Admin

If your computer shows the wrong time, it’s probably because Windows fails to update the time zone based on your physical location, especially when you’re traveling overseas. In this tutorial we’ll show you 4 simple ways to change time zone in Windows 10.

Method 1: Change Time Zone in Windows 10 from Settings

Open the Settings app and go to the “Time & Language” section.

Select Date & time in the left-hand menu. Make sure the “Set time zone automatically” is turned off, so you can then click the “Time zone” drop-down menu to set the correct time zone for your location.

Method 2: Change Time Zone in Windows 10 from Control Panel

Open the Control Panel in Large icons view, and click on Date and Time.

Click on the Change time zone button.

In the Time Zone Settings window, you can adjust the time zone based on your physical location. Click OK to save your changes.

Method 3: Change Time Zone in Windows 10 from Command Prompt

Open an elevated Command Prompt.

To view the current time zone, type tzutil /G and press Enter. If you want to find out the list of all available time zones, type tzutil /L instead.

To set a new time zone, execute the command:
tzutil /S "time_zone_name"

Method 4: Change Time Zone in Windows 10 from PowerShell

Open Windows PowerShell as administrator.

You can find out your current time zone by executing the Get-TimeZone command. To list all available time zones, run this command: Get-TimeZone -ListAvailable.

In order to change the time zone, execute the command:
Set-TimeZone -Name "time_zone_name"

That’s it!