Archive for the ‘Windows 10’ category

How to Add Desktop Toolbar to Windows 10 Taskbar

June 21st, 2018 by Admin

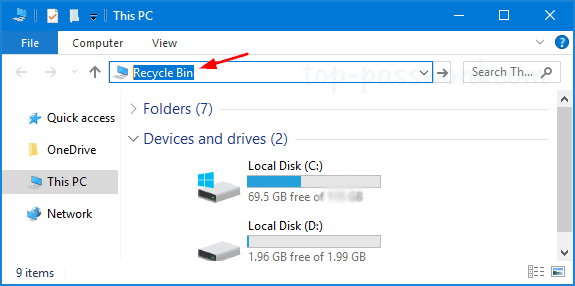
The desktop toolbar allows you to quickly access all shortcuts on your desktop, including Control Panel, This PC, Network, User Profile, Recycle Bin. This tutorial will show you how to add the desktop toolbar to the taskbar in Windows 10, and move it to the left side of the screen.

Add Desktop Toolbar to the Taskbar

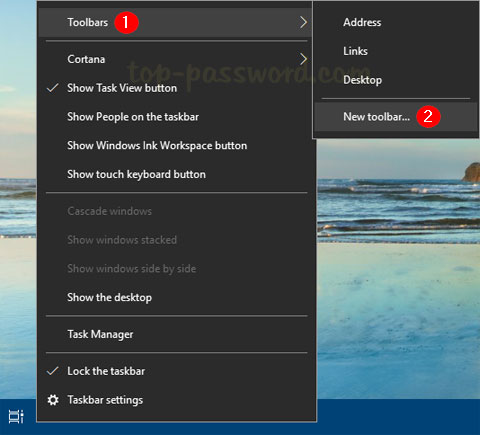
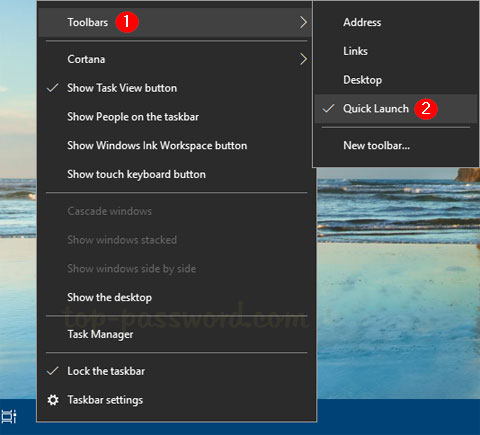
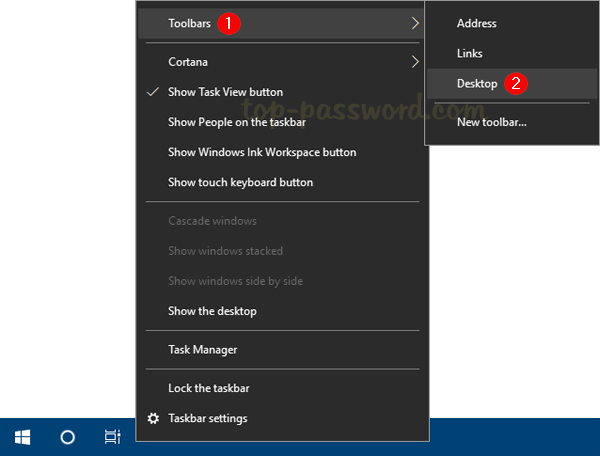
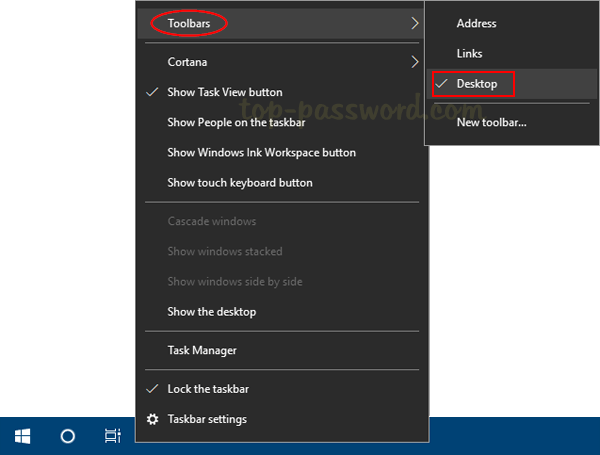
Right-click an empty space on the taskbar, and then select Toolbars -> Desktop from the popup menu.

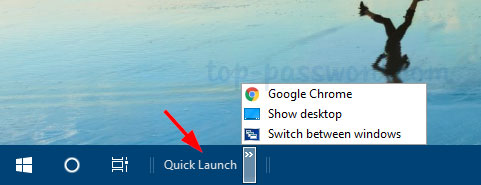
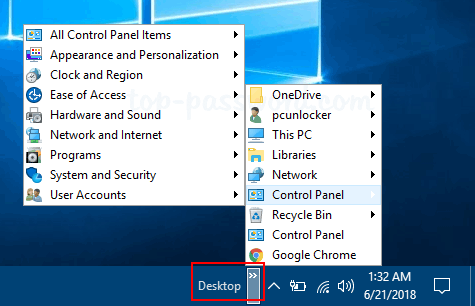
The desktop toolbar will appear in the taskbar, next to the system tray. Click the two little arrows >> on the right side of the desktop toolbar, and you can view all items located on your desktop in one long list.

Move the Location of Desktop Toolbar

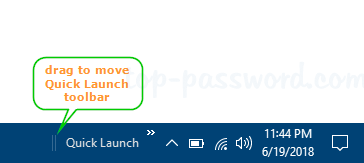
How can I move the desktop toolbar to the left so that it’s next to the Start button? Here’s how:

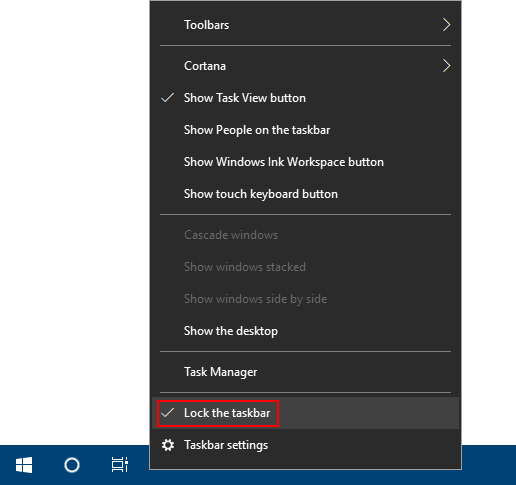
Right-click an empty space on the taskbar, click the “Lock the taskbar” option to uncheck it.

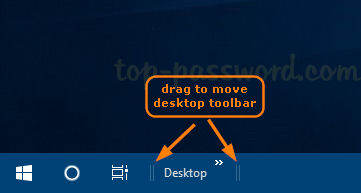
Now you’ll see the dotted vertical divider on the left and right edges of the desktop toolbar. Just drag the divider to move the desktop toolbar to the far left side of the screen.

Remove Desktop Toolbar from the Taskbar

Right-click an empty space on the taskbar, and then navigate to Toolbars and uncheck the Desktop option. This will remove the desktop toolbar from Windows taskbar immediately.

That’s it!

How to Enable Quick Launch Toolbar in Windows 10, 8 or 7

June 20th, 2018 by Admin

Quick Launch is a small toolbar that resides in your Windows taskbar that allows you to quickly launch programs that you place in it. Since Windows 7, Quick Launch toolbar was removed from the taskbar but you can get it back. In this tutorial we’ll show you how to enable Quick Launch toolbar in Windows 10/8/7, add your favorite programs to it, and move the Quick Launch toolbar to the left of taskbar.

Enable Quick Launch Toolbar

Simply right-click an empty space on the Windows taskbar, and then select Toolbars -> New toolbar.

When the “New Toolbar – Choose a folder” window appears, paste the following path into the Folder field and press Enter. Then click Select Folder.
%APPDATA%\Microsoft\Internet Explorer\Quick Launch

Now, Quick Launch toolbar will appear on the far right of the taskbar.

Add Programs to Quick Launch Toolbar

If you want to add the applications you use the most to the Quick Launch toolbar, do the following:

Press the Windows key + R to bring up the Run dialog box. Type the following path and press Enter.
%APPDATA%\Microsoft\Internet Explorer\Quick Launch

Windows Explorer will open the Quick Launch folder. Now you can drag your favorite applications or shortcuts and drop them here.

When you’re done, your application icons will appear in the Quick Launch toolbar for quick access.

Move Quick Launch Toolbar to Left

If you want to move the Quick Launch toolbar to the left, right-click the taskbar and uncheck “Lock the Taskbar” from the popup menu. Click on the left edge (two vertical dotted lines) of the Quick Launch toolbar, and drag it over to the left as far as it will go.

Remove the Quick Launch Toolbar

If you don’t want to use the Quick Launch toolbar any more, right-click an empty space on the taskbar, select Toolbars and click on Quick Launch to uncheck it.

Now you’ve successfully removed Quick Launch toolbar from Windows taskbar.

7 Ways to Open Recycle Bin in Windows 10

June 19th, 2018 by Admin

Recycle Bin icon is missing or disappeared after Windows 10 update? How can I get to the Recycle Bin without the desktop icon in Windows 10? In this tutorial we’ll show you all possible ways to restore or open Recycle Bin in Windows 10.

Method 1: Open Recycle Bin from File Explorer’s Address Bar

Open File Explorer then type “recycle bin” in the address bar. Press Enter to open Recycle Bin directly.

Another way is to click on the first “>” icon in the address bar to open a drop-down menu that contains all of the desktop icons, including Recycle Bin.

Method 2: Open Recycle Bin from Run Command

Use the Windows Key + R shortkey to open the Run prompt, type the following command and press Enter.
explorer.exe shell:RecycleBinFolder

This will launch Recycle Bin immediately.

Method 3: Open Recycle Bin from Desktop Location

Use the Windows Key + R shortkey to open the Run prompt, type shell:desktop and press Enter.

You can then access the Recycle Bin in a File Explorer window.

Method 4: Open Recycle Bin from Cortana Search

Click Start, type “recycle” and you can then open the “Recycle Bin” desktop app from the search result.

Method 5: Add Recycle Bin to Windows 10 Desktop

Use the Windows key + I shortkey to open the Settings app. Navigate to Personalization -> Themes. On the right pane, scroll down to the Related Settings section, and click the “Desktop icon settings” link.

Select the check box for the Recycle Bin icon you want to appear on your desktop, and then click OK.

Method 6: Pin Recycle Bin to Start Menu

If you want to pin Recycle Bin to the Start Menu, just right-click the Recycle Bin icon on the desktop and then choose “Pin to Start“.

You should see the Recycle Bin icon show up in the Start Menu as a tile.

Method 7: Add Recycle Bin to My Computer

If you need to access Recycle Bin frequently, here is a way to add the Recycle Bin to the “This PC” view in File Explorer. Follow these steps:

Open the Command Prompt as administrator. Type the following command and press Enter.
reg add HKLM\SOFTWARE\Microsoft\Windows\CurrentVersion\Explorer\MyComputer\NameSpace\{645FF040-5081-101B-9F08-00AA002F954E}

When it’s done, open File Explorer again and go to “This PC” view. You’ll see the Recycle Bin shortcut.

If you want to remove the Recycle Bin from My Computer (“This PC”) later, just open the elevated Command Prompt again and run this command:
reg delete HKLM\SOFTWARE\Microsoft\Windows\CurrentVersion\Explorer\MyComputer\NameSpace\{645FF040-5081-101B-9F08-00AA002F954E} /f

That’s it!

How to Recover Unsaved Word 2016 Document in Windows 10

June 19th, 2018 by Admin

Have you ever accidentally quit your Word document without saving? How can I recover a Word document I was working on when my computer crashed or lost power? By default, Office automatically saves a copy of your document every 10 minutes using the AutoSave feature. In this tutorial we’ll show you how to easily recover unsaved Word 2016 document in Windows 10.

Part 1: Find AutoRecovery File Location

Office 2016 application automatically saves temporary backups of files at regular intervals (every 10 minutes, by default). Before recovering your unsaved document, you need to find out where the latest backup of your file is saved. Follow these steps:

  1. Open your Word 2016 application, and then click the File tab.
  2. On the File menu, click Options.

  3. Navigate to the Save tab on the left pane, and then look for the “Save documents” section on the right pane. Note down the AutoRecover file location. By default, it’s C:\Users\user_name\AppData\Roaming\Microsoft\Word.

  4. Now, open File Explorer and browse to the AutoRecover file location, you should see one (or more) files with the extension .asd. These are the Word autorecovery files.

Part 2: Recover Unsaved Word 2016 Document

  1. Open a blank Word document and then click the File tab.
  2. On the File menu, select the Info tab. Click Manage Document, and then choose “Recover Unsaved Documents” from the drop-down menu.

  3. When the Open dialog box opens, browse to the AutoRecover file location. Select the appropriate .asd file and click Open.

  4. Voila! Your unsaved Word document is back, and at most you’ve only lost the last 10 minutes of work.

5 Ways to Open Microsoft Store in Windows 10

June 15th, 2018 by Admin

Microsoft Store, formerly known as Windows Store, is built into Windows 10 which lets you browse and download millions of apps and games. In this post we’ll show you 5 ways to open Microsoft Store app in Windows 10.

Method 1: Open Microsoft Store from Start Menu

Click the Start button. You can access the Microsoft Store app from both the left side of your Start Menu and the right side as live tiles.

Method 2: Open Microsoft Store Using Cortana Search

On the Windows 10 taskbar, type “store” in the Cortana Search box and you can open the Microsoft Store app from the search result.

Method 3: Open Microsoft Store from Run

Press the Windows key + R on your keyboard, type “ms-windows-store:” without the quotation marks in the Run box that appears, and then press Enter.

Method 4: Open Microsoft Store from Command Prompt

Another similar method is to open the Command Prompt, run the command “start ms-windows-store:” and press Enter.

Alternatively, you can open PowerShell, type the same command and press Enter.

Method 5: Pin Microsoft Store to Windows 10 Taskbar

Once the Microsoft Store app is launched, right-click the program’s icon in the taskbar and select the “Pin to taskbar” option from the context menu.

Every time you want to open Microsoft Store, just click the pinned shortcut in the taskbar and you can access it quickly.

How to Copy and Paste in Command Prompt on Windows 10 / 8 / 7

June 14th, 2018 by Admin

How can I paste the text from the clipboard into Command Prompt? To avoid type a lengthy command, you may prefer to use copy and paste to put it into Command Prompt. In this tutorial we’ll show you how to copy and paste in Command Prompt on Windows 10 / 8 / 7.

Quick Edit Mode:

Quick Edit Mode lets you use the cursor to directly select the text in the Command Prompt.

To turn on Quick Edit mode, follow these steps:

  1. Right-click on the title bar of Command Prompt and select Properties.

  2. Then go to the Options tab and check “Quick Edit Mode” and click OK.

How to copy the text out of Command Prompt when Quick Edit Mode is turned off? Each time you need to select or copy the text from the Command Prompt, an additional step is required: Right-click the title bar, select Edit on the menu, and then click Mark.

Part 1: Copy and Paste in the Windows 8 / 7 Command Prompt

In Windows 8 or Windows 7, there is not a direct keyboard shortcut (Ctrl + C / V) to copy and paste the text in the Command Prompt. If you’ve enabled Quick Edit Mode, here’s how you can copy and paste text in the Command Prompt:

  1. Use the left mouse button to highlight the text you want to copy from the Command Prompt.
  2. Now, you can copy the selected text by pressing the right mouse button.
  3. To paste it anywhere in the Command Prompt, find the line where you want to paste it, and press the right mouse button again. Of course, you can also paste the text by right-clicking on the title bar and then select Edit -> Paste.

Part 2: Copy and Paste in the Windows 10 Command Prompt

  1. Right-click on the Command Prompt’s title bar, choose Properties.
  2. Check “Enable Ctrl key shortcuts“. You’ll probably have to check the “Use legacy console (requires relaunch)” checkbox first though.

  3. Click OK to save the changes and relaunch the Command Prompt.
  4. Now, you can use the cursor to select the text, press the right mouse button or press Ctrl + C to copy the text. Afterwards, press the right mouse button or press Ctrl + V to paste it.

How to Check and Repair Bad Sectors for USB Drive

June 12th, 2018 by Admin

There are two types of bad sectors – hard and soft. Hard bad sector is a cluster of storage on the hard drive that’s physically damaged, while soft bad sector is the result of software or data error. When copying files, it might stop at bad sectors saying “can’t read from the source file or disk“, “Location is not available” or “A disk read error occurred“.

In this tutorial we’ll show you 2 simple ways to check and repair bad sectors for USB drive in Windows 10 / 8 / 7, without using third-party software.

Method 1: Check and Repair Bad Sectors Using Windows Error Checking Tool

  1. Open Windows Explorer. Right-click on the USB drive you want to repair, and then select Properties from the context menu that appears.
  2. In the Properties dialog box, go to the Tools tab and then click on Check now.

  3. A new dialog box will appear, check both options: “Automatically fix file system errors” and “Scan for and attempt recovery of bad sectors“, and then click on Start.

  4. It will scan the disk for errors, fix logical errors, detect and mark bad sectors. The process could take a significant amount of time to complete, and lots of system resources are required for the task.

Method 2: Check and Repair Bad Sectors Using Chkdsk Command Line

  1. Press the Windows + R keys to open the Run dialog box. Type cmd and press Enter.
  2. At the Command Prompt, run the following command to check and repair bad sectors found on your drive. Replace F: with the drive letter of the USB drive you want to repair.

    chkdsk /f /R F:

  3. It will locate bad sectors and recover readable information from your USB drive. When chkdsk can’t obtain exclusive access to your drive, it will prompt you to schedule this task to run just on the next reboot.

Reset Lost Root Password in Windows Subsystem for Linux

June 11th, 2018 by Admin

Forgot the root password after you’ve installed Ubuntu or Kali Linux subsystem on Windows 10? How can I reset it? Since the Fall Creators Update, you can run different Linux distribution directly on Windows 10 using a feature called “Windows Subsystem for Linux”. In this tutorial we’ll show you a simple way to reset lost root password for any Linux subsystem in Windows 10.

How to Reset Lost Root Password in Windows Subsystem for Linux

  1. To open the terminal for your Linux instance on Windows 10, just click the Cortana search box in the taskbar, and then type the name of your Linux distribution (e.g. “kali linux“, “ubuntu“) to launch it.

  2. Run the following command to find out the user ID of each Linux account.
    cat /etc/passwd

    As you can see from the screenshot above, the root account has a user ID of 0. The account I’m using is named “pcunlocker“, and its user ID is 1000 (or 0x3e8 in hexadecimal).

  3. Now close the terminal and open the Registry Editor. Navigate to the following key:
    HKEY_CURRENT_USER\Software\Microsoft\Windows\CurrentVersion\Lxss

    You may see one or multiple subkeys named with the GUID of each Linux distribution. Navigate through each GUID key below that, noting the corresponding DistributionName on the right.

  4. When you find the GUID key of the Linux instance you want to reset root password for, double-click on the DefaultUid DWORD on the right-hand side and change it to 0 (root’s user ID).

  5. Close Registry Editor and restart your Windows 10 machine.
  6. The next time you open the Linux app, it will launch the terminal as the root user. Type passwd and hit Enter, it will let you create a new root password.

    Use the “passwd user_name” command and you can reset forgotten password of any other Linux account.

  7. At this point you’ve successfully reset lost root password. Now open Registry Editor and go back to the previous registry key, change the value data of the DefaultUid back to the user ID of your default account.

    In my example, I set the DefaultUid value back to “1000” (or 0x3e8 in hexadecimal) as I want Windows 10 to open the Linux terminal as the “pcunlocker” user by default.

That’s it!

How to Install Kali Linux as a Subsystem on Windows 10

June 11th, 2018 by Admin

Windows subsystem for Linux (WSL) is an optional Windows component that lets you install and run Linux environments natively on Windows 10, without dual-booting or using a virtual machine. In this tutorial we’ll walk you through the steps to install Kali Linux as a subsystem on Windows 10.

Step 1: Enable the Windows Subsystem for Linux

Before installing Kali Linux app, you have to enable the Windows Subsystem for Linux feature. To do this, run PowerShell as an administrator and execute the following command:

Enable-WindowsOptionalFeature -Online -FeatureName Microsoft-Windows-Subsystem-Linux

When you’re prompted to restart the computer, press Y and Enter to reboot. The system will immediately begin to restart.

Step 2: Download and Install Kali Linux App

Kali Linux is officially released as an application on the Microsoft Store. Just open the Windows Store app and search for Kali Linux, and click Get to download and install it on your computer.

The download is approximately 160Mb in size and you should be able to get it installed in minutes.

Step 3: Create a User to Log into Kali Linux

To open the Kali Linux app you installed, just click the Cortana Search box in the taskbar and type “kali”. You can then click the Kali Linux shortcut to launch it.

This will open a console window. Wait for installation to complete then you will be prompted to create your Linux user account.

Now you can regularly upgrade the Kali Linux installation to the latest version by using the commands:
sudo apt-get update
sudo apt-get dist-upgrade
sudo apt-get clean

Congratulations, you’re all set up and running a Kali Linux subsystem directly on your Windows 10 machine!

Remove Double Blue Arrows on Compressed Folders / Files in Windows 10

June 10th, 2018 by Admin

What are the double blue arrows that sometimes appear on my desktop icons and pictures and how can I get rid of them? When a folder or file is compressed with NTFS to save space, Windows 10 will add a double blue arrows overlay at the top right corner to show compression status of the folder/file. If you’re annoyed by this odd and inconsistent behavior, here are 2 simple ways to remove double blue arrows on compressed folders/files in Windows 10.

Method 1: Remove Double Blue Arrows for All Compressed Folders/Files

All you need to do is put a blank icon file somewhere on your PC, then make a small registry change to make Windows display this blank image instead of the blue double arrows icon.

  1. First of all, download blank_icon.zip and extract the blank.ico file to C:\Windows.
  2. Press the Windows key + R keyboard combination to open the Run box. Type regedit and press Enter to open Registry Editor.

  3. Now Navigate to the following location:
    HKEY_LOCAL_MACHINE\SOFTWARE\Microsoft\Windows\CurrentVersion\Explorer

    Right-click on the Explorer subkey on the left pane, and select New -> Key.

  4. Name the new key “Shell Icons“, and then right-click it and select New -> String Value.

  5. Name the new string “179“, and then double-click it to set its value data to C:\Windows\blank.ico.

  6. Close Registry Editor. Log off or restart Windows 10 for the change to take effect.

Method 2: Remove Double Blue Arrows for Certain Folders/Files

If you just want to remove double blue arrows for a certain folder or file, just decompress it to turn off NTFS compression.

  1. Open File Explorer and browse to the folder or file with double blue arrows overlay, right-click on it and select Properties from the context menu.
  2. Under the General tab, click the Advanced button.

  3. Tick the checkbox for “Compress contents to save disk space“. Click OK.

  4. If you selected a folder, then you will be prompted to tick “Apply changes to this folder, subfolder and files” and click OK. It will take some time to decompress all its subfolders and files.

  5. At this point you should see the double blue arrows has disappeared from your folder/file icon. That’s it!