Archive for the ‘Windows 7’ category

2 Ways to Backup or Export EFS Certificate in Windows 10 / 8 / 7

October 16th, 2017 by Admin

When you encrypts a folder or file with EFS, Windows will create a EFS certificate and store it locally, so you can transparently access encrypted files without being prompted for certificate / password. In the event of a system failure or your EFS certificate is corrupted or lost, you’ll be unable to access EFS encrypted files any more. So it is very important to backup or export EFS certificate in Windows 10 / 8 / 7.

Method 1: Backup or Export EFS Certificate Using Certificates Manager

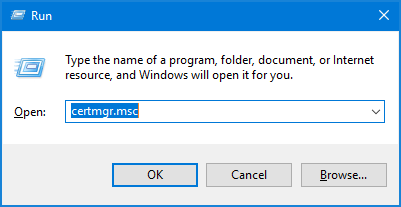
  1. Press the Windows key + R together to open the Run box. Type certmgr.msc and click OK to open Certificates Manager.
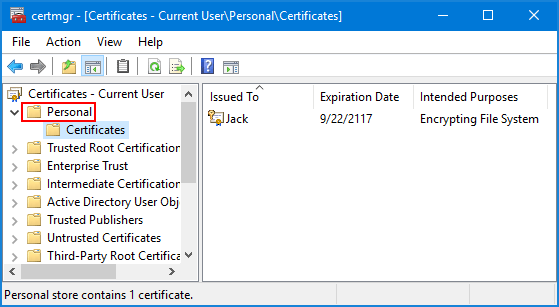
  2. In the left pane of the Certificates console, expand the Personal node and then click on Certificates.
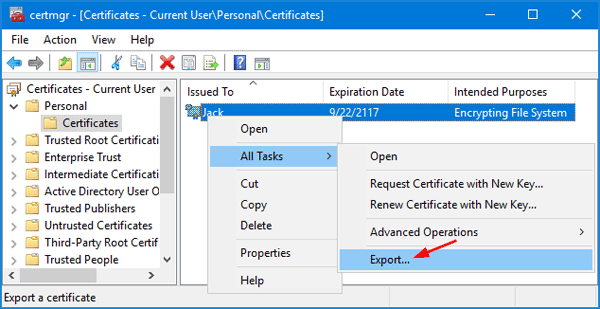
  3. In the right pane, right-click the certificate that lists Encrypting File System under Intended Purposes, and then select All Tasks -> Export.
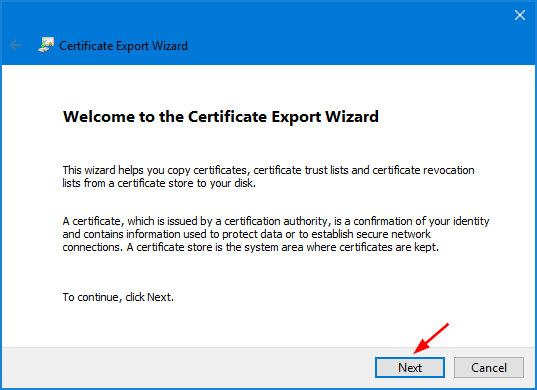
  4. When the Certificate Export Wizard opens, click Next.
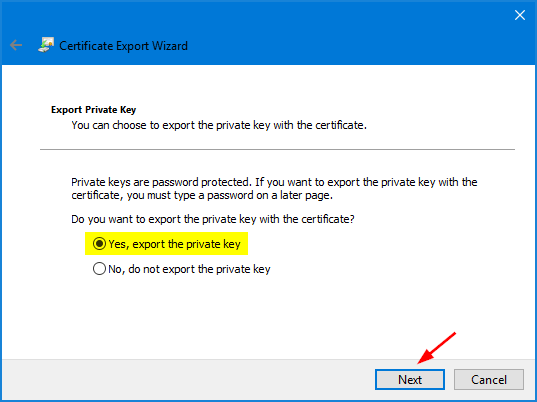
  5. Choose “Yes, export the private key” and click Next.
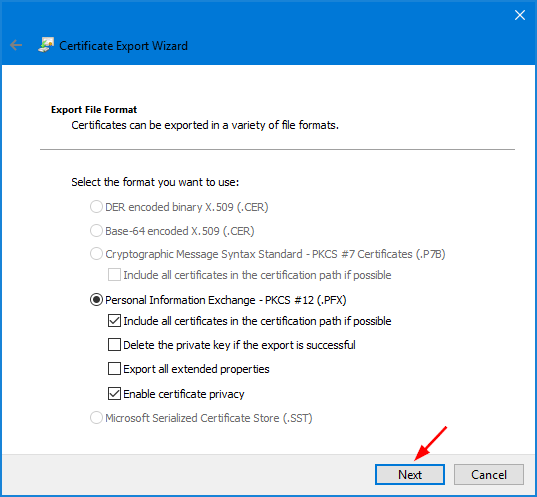
  6. Click the checkbox next to “Include all certificates in the certification path if possible” and click Next.
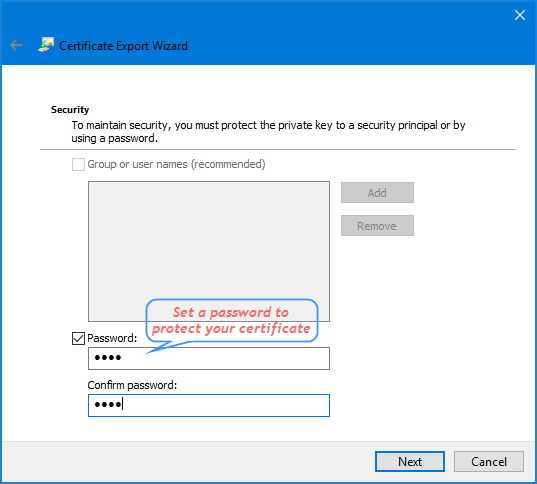
  7. Enter a password that will be used to protect your exported EFS certificate. Confirm it and click Next.
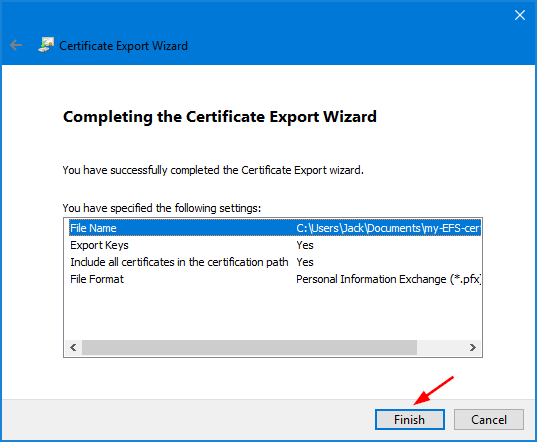
  8. Click the Browse button to find a location to save your exported EFS certificate (.pfx). Type in a name such as “my-EFS-certificate.pfx” and then click Next.
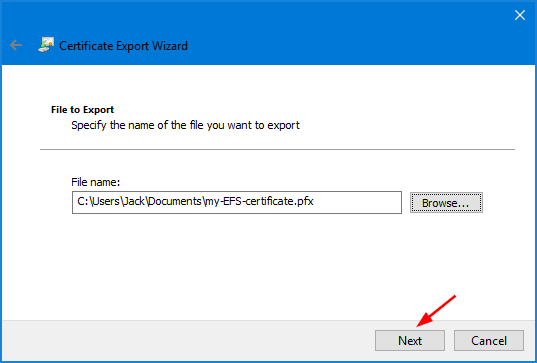
  9. Click Finish.

    You can then backup the exported EFS certificate in a safe place!

Method 2: Backup or Export EFS Certificate Using Command Prompt

  1. Open the Command Prompt as administrator.
  2. In order to export EFS certificate stored in Certificates Manager, type the following command:

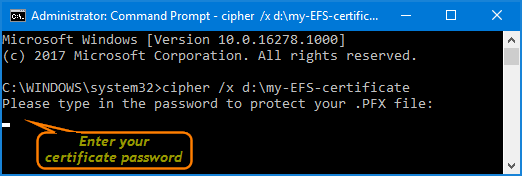
    cipher /x d:\my-EFS-certificate

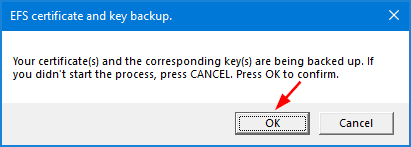
  3. Once you press Enter, you’ll be prompted to confirm backing up EFS certificate. Click OK to continue.
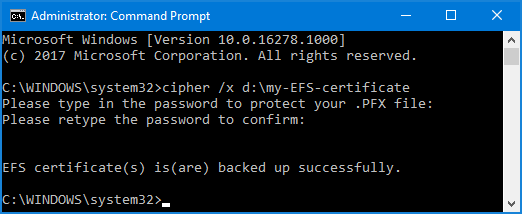
  4. Type a password used for protecting your EFS certificate, then confirm the password.
  5. The .pfx file containing the EFS private key certificate is now saved to the location d:\my-EFS-certificate.
    That’s it!
Enable or Disable Folder Options in Windows 10 / 8 / 7

October 12th, 2017 by Admin

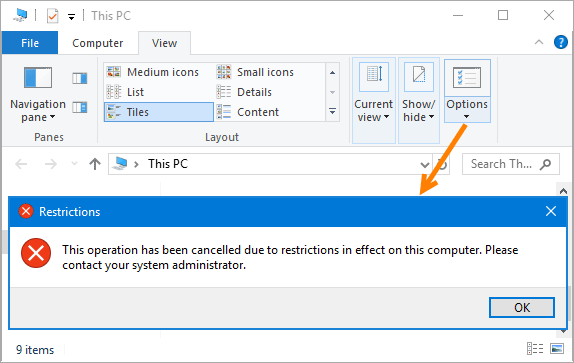
Folder Options is missing from Windows Explorer? How can I remove Folder Options from Control Panel? In this tutorial we’ll show you 2 easy ways to enable or disable Folder Options in Windows 10, 8 and 7.

Method 1: Enable / Disable Folder Options Using Group Policy

  1. Press WIN + R keys to bring up the Run dialog box. Type gpedit.msc and hit Enter.

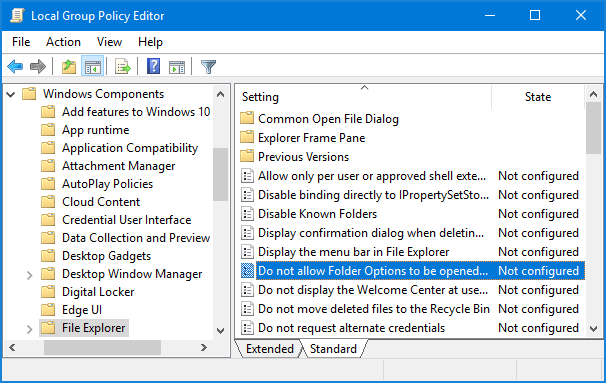
  2. In the Local Group Policy Editor window, navigate to:
    User Configuration > Administrative Templates > Windows Components > File Explorer

    If you’re running Windows 7/Vista/XP, browse to:
    User Configuration > Administrative Templates > Windows Components > Windows Explorer

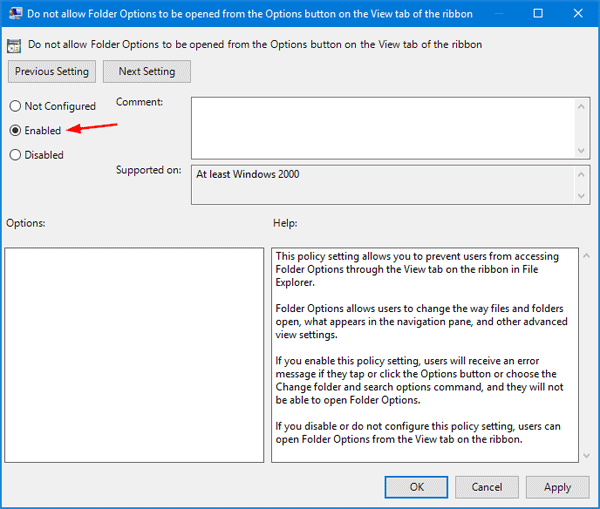
  3. Double-click on the policy”Do not allow Folder Options to be opened from the Options button on the View tab of the ribbon” on the right pane. For Windows 7/Vista/XP, this policy is called “Removes the Folder Options menu item from the Tools menu“.

  4. Set it to Enabled or Disabled, depend on if you want to disable or enable Folder Options in Windows Explorer.

  5. Click Apply and then OK. This policy setting will take effect without rebooting.

Method 2: Enable / Disable Folder Options Using Registry Editor

  1. Press WIN + R keys to bring up the Run dialog box. Type regedit and hit Enter.

  2. When Registry Editor is launched, navigate to the key:
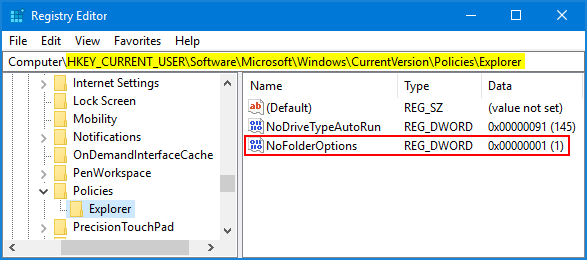
    HKEY_CURRENT_USER\Software\Microsoft\Windows\CurrentVersion\Policies\Explorer
  3. If you want to disable Folder Options in Windows, right-click an empty area on the right pane and create a new DWORD (32-bit) Value, named it as NoFolderOptions and set its value to 1.

    If you want to enable Folder Options, just delete the NoFolderOptions value.

  4. Exit the Registry Editor. Restart needed for your registry change to take effect.

4 Ways to Open Folder Options in Windows 11, 10, 8 and 7

October 12th, 2017 by Admin

How can I open Folder Options through the Command Prompt? If you want to show hidden files or customize how your files are displayed in Windows Explorer, you have to access Folder Options. In this tutorial we’ll show you 4 quickest ways to open Folder Options in Windows 11, 10, 8 and 7.

Method 1: Open Folder Options from Windows Explorer

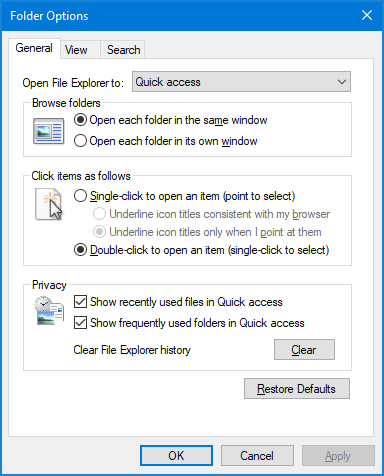
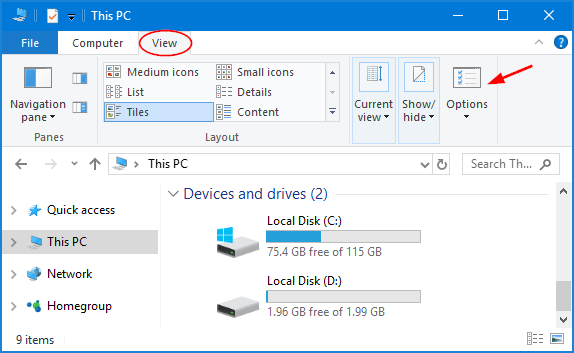
Press WIN + E keyboard combination to open Windows Explorer (also known as “File Explorer). Click the View tab, and then click Options in the ribbon. This will open Folder Options dialog.

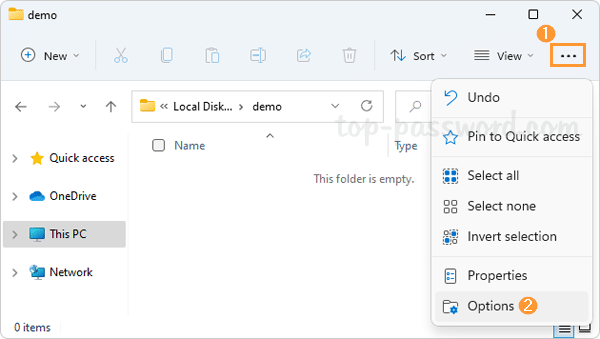
In Windows 11, open File Explorer and click on the See more button (three dots) on the right side of the toolbar, and then select Options.

Method 2: Open Folder Options from Control Panel

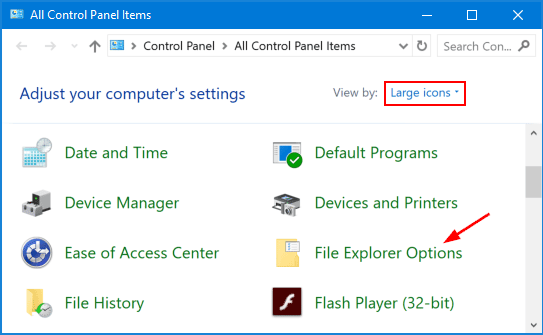
Open the Control Panel. Change the View by option to Large icons or Small icons.

Click File Explorer Options to open Folder Options.

Method 3: Open Folder Options from Run or Command Prompt

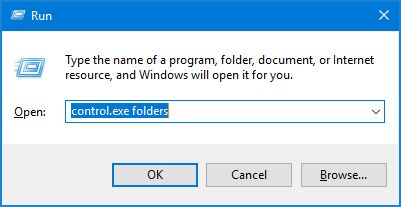
Press the WIN + R keys together to open the Run command box, and then type control.exe folders and press Enter to access Folder Options.

If you’re at Command Prompt, type control.exe folders and you can also access Folder Options quickly.

Method 4: Open Folder Options by Search

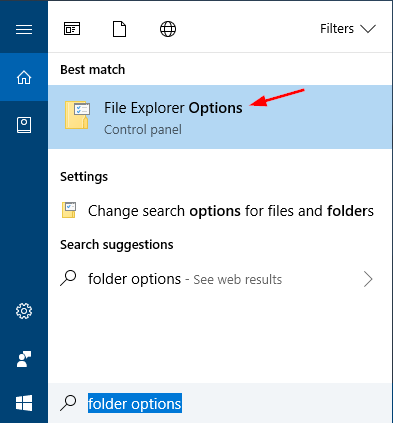
If you’re running Windows 10/8, type folder options into the Cortana Search box on the taskbar. Click on File Explorer Options from the result.

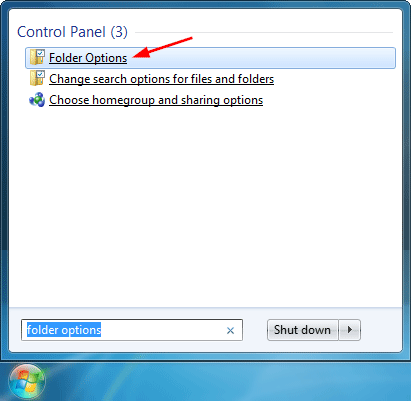
If you’re running Windows 7, click the Start button and type folder options into the search box, then click Folder Options.

That’s it!
How to Find Unsigned Drivers in Windows 10 / 8 / 7

October 10th, 2017 by Admin

Device drivers are critical system files that include a digital signature. When a signed driver has been tampered with or corrupted, the signature becomes invalid and the driver is then unsigned. Unsigned drivers can cause system instability. In this tutorial we’ll show you how to quickly find unsigned drivers in Windows 10 / 8 / 7.

How to Find Unsigned Drivers in Windows 10 / 8 / 7?

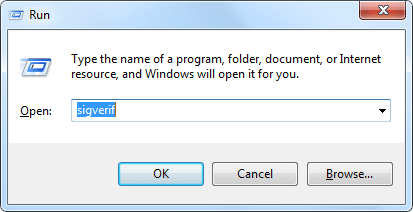
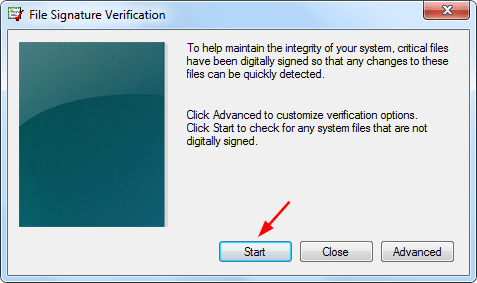
  1. Press the Windows + R keys to open the Run dialog box. Type sigverif and click OK.

  2. When the File Signature Verification utility opens, click Start.

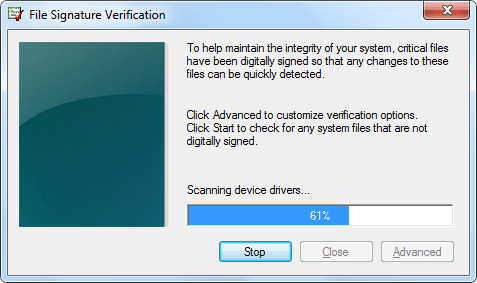
  3. It will scan your entire system for unsigned drivers.

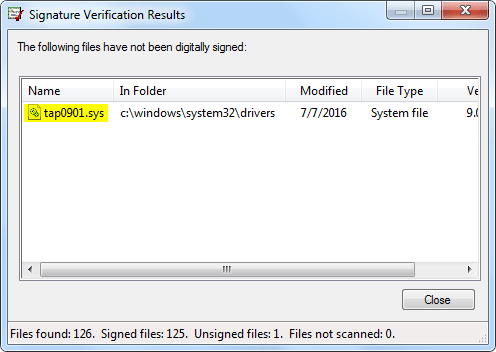
  4. After the scan completes, it will display a list of any unsigned drivers you have installed on your computer.

While unsigned drivers don’t necessarily have to be problematic or malicious, it makes sense to check the system for those so you can uninstall them or find a updated signed driver.

How to Disable F1 Key from Opening Help in Windows 10 / 8 / 7

October 10th, 2017 by Admin

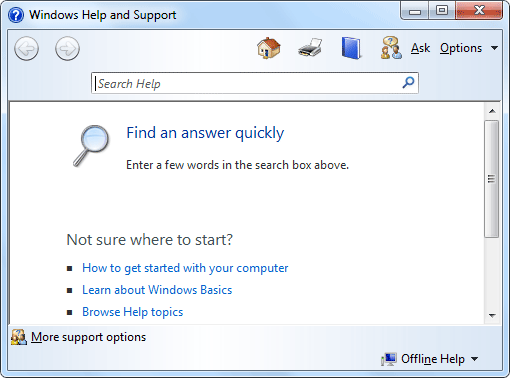
How can I stop F1 key from opening Windows Help when gaming? In Windows 8 and 7, pressing F1 key opens Windows Help and Support by default. If you’re using Windows 10, pressing F1 will open a browser window and search for “how to get help in windows 10” on Bing. It can be really annoying when you keep hitting the F1 key accidentally. Here is the best way to disable F1 key from opening help in Windows 10 / 8 / 7.

How to Disable F1 Key from Opening Help in Windows 10 / 8 / 7?

  1. Download the registry fix from this link. It is a zip archive which contains two .reg files.
  2. Next, double-click the disable-f1-key-for-help.reg file to import/merge its contents to the registry.
  3. This registry changes take effect without restart. Now press F1 key will no longer open the Help window in Windows.

Note: this wouldn’t prevent F1 key from working in a game or third-party programs.

How to Turn On / Off File and Printer Sharing in Windows 10 / 8 / 7

September 27th, 2017 by Admin

File and Printer Sharing is a network feature that allows Windows users to share local files and printer with other computers on a network. This is really useful on home network but it can be a security concern on public network. In this tutorial we’ll show you 3 easy ways to turn on or off file and printer sharing in Windows 10 / 8 / 7.

Method 1: Turn On / Off File and Printer Sharing through Control Panel

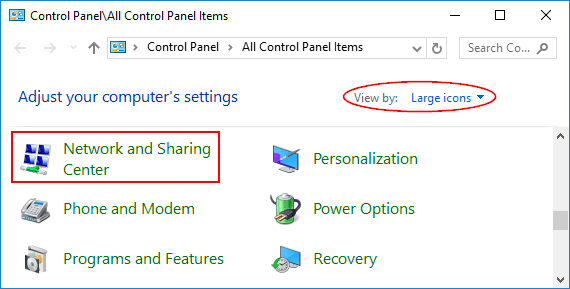
  1. Open Control Panel. Click the View by option at the top right, and set it to Large icons. Next, click Network and Sharing Center.

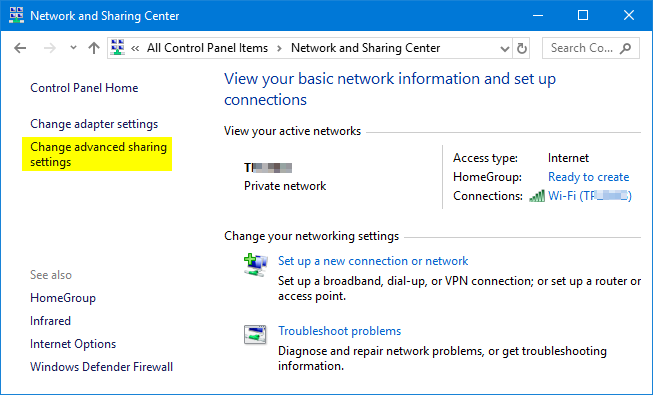
  2. Click on the Change advanced sharing settings link on the left side.

  3. Expand the network profile you’re using, select either Turn on file and printer sharing or Turn off file and printer sharing. Click on Save changes when done.

You can configure Windows to turn on file and printer sharing on private network, while choosing to turn off file and printer sharing when your network is set to Guest or Public.

Method 2: Turn On / Off File and Printer Sharing Using Command Prompt

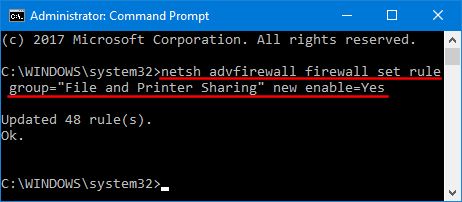
Open the Command Prompt as administrator. Copy and paste the following command and hit Enter. This will turn on file and printer sharing for all network profiles.

netsh advfirewall firewall set rule group="File and Printer Sharing" new enable=Yes

If you want to turn off file and printer sharing for all network profiles, type this command instead:

netsh advfirewall firewall set rule group="File and Printer Sharing" new enable=No

Method 3: Turn On / Off File and Printer Sharing Using PowerShell

Open Windows PowerShell as administrator. Copy and paste the command below to enable file and printer sharing for all network profiles:

Set-NetFirewallRule -DisplayGroup "File And Printer Sharing" -Enabled True

Or disable file and printer sharing:
Set-NetFirewallRule -DisplayGroup "File And Printer Sharing" -Enabled False

Reset Notepad to Default Settings in Windows 10 / 8 / 7

September 2nd, 2017 by Admin

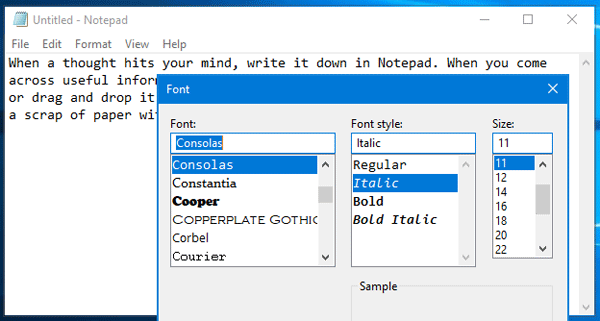
Notepad is a built-in basic text editor that’s been part of Windows for a very long time. You’ve probably customize the default font, font size, window size or word wrap in Notepad, but now you want to reset Notepad to its default settings. Luckily, there is simple registry hack that can reset Notepad completely back to all default settings in Windows 10 / 8 / 7.

How to Reset Notepad to Default Settings in Windows 10 / 8 / 7?

  1. Press the Windows key + R to open the Run command box. Type regedit and press Enter.

  2. When Registry Editor is launched, navigate to the following key:

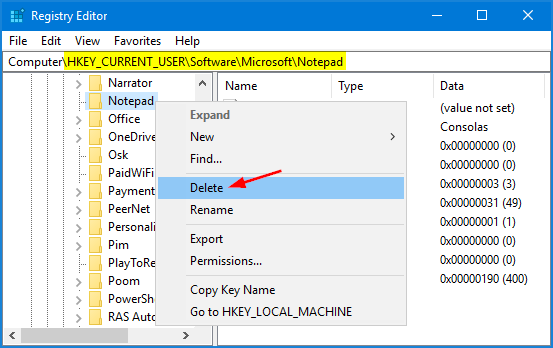
    HKEY_CURRENT_USER\Software\Microsoft\Notepad

  3. Right-click on the Notepad key in the left pane, and then select Delete from the pop-up menu.

  4. Click Yes to confirm your operation. All your saved settings in Notepad will be deleted. Your Notepad will be back to the default settings on the next run.

Fix: Windows Couldn’t connect to the Group Policy Client Service

August 29th, 2017 by Admin

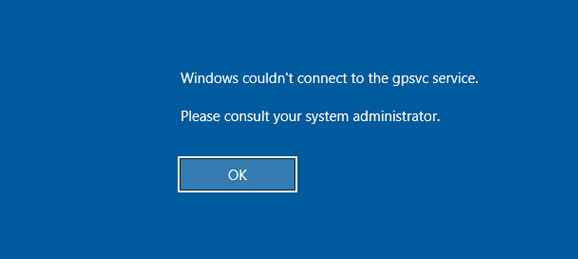
When you try to log into a standard user account, it may come up with a message saying: “Windows couldn’t connect to the Group Policy Client service. Please consult your administrator.

If you’re facing this problem, you have come to the right place! In this tutorial we’ll show you effective ways to fix the error “Windows couldn’t connect to the Group Policy Client service” in Windows 10, 8 and 7.

Method 1: Perform a System Repair

  1. Open the Command Prompt as Administrator.
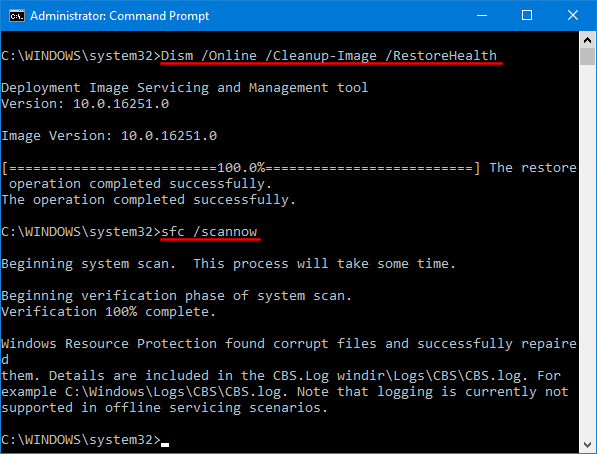
  2. Run the following commands one by one to scan for corrupt system files on your computer and repair them.

    Dism /Online /Cleanup-Image /RestoreHealth
    sfc /scannow

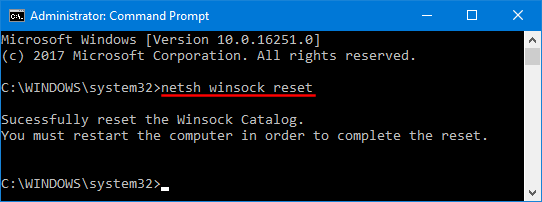
  3. Execute this command to reset winsock catalog back to default setting or clean state.

    netsh winsock reset

  4. You will then be asked to restart your computer, after which the issue is hopefully resolved.

Method 2: Fix the Registry Settings

  1. Press the Win + R keys to open the Run box. Type regedit and hit Enter to open the Registry Editor.
  2. In the left pane of Registry Editor, navigate to following registry key:
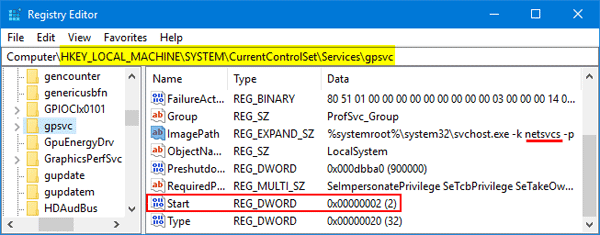
    HKEY_LOCAL_MACHINE\SYSTEM\CurrentControlSet\Services\gpsvc

    You should see a DWORD value named Start in the right pane. Make sure its value is set to 2. If you need to modify its value, you have to take ownership of the registry key gpsvc firstly.

  3. Next, look for the ImagePath string which contains a service name we’ll use later. In my example, the service name is “netsvcs”. You may have a different name like “GPSvcGroup”.
  4. Now, navigate to the following key:
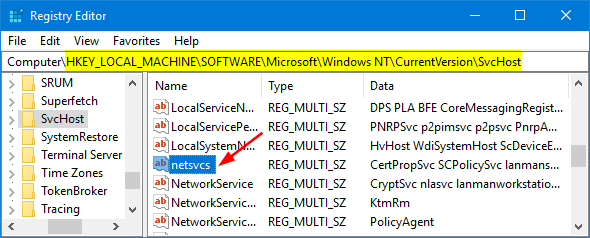
    HKEY_LOCAL_MACHINE\SOFTWARE\Microsoft\Windows NT\CurrentVersion\SvcHost

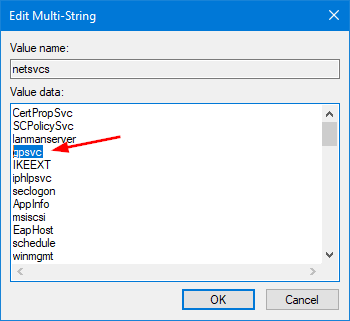
    In the right pane, you should see a Multi-String named “netsvcs” (or “GPSvcGroup”). Double-click on it and make sure that ‘GPSvc’ is added into the list.

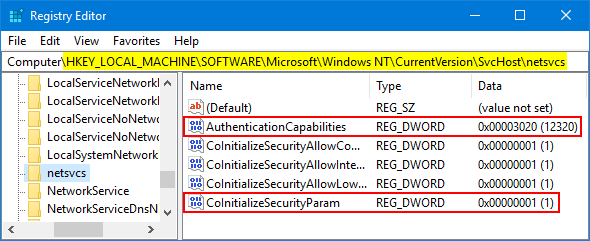
  5. Expand the SvcHost key in the left pane, and then click the “netsvcs” (or “GPSvcGroup”) subkey. Right-click an empty area in the right pane to create a DWORD (32-bit) value named AuthenticationCapabilities, give it a value of 12320 in decimal. Next, create another DWORD value called CoInitializeSecurityParam and set its value to 1.

  6. Once you complete all steps above, reboot the computer and the “Windows Couldn’t connect to the Group Policy Client Service” problem should be fixed.

How to Find Your Printer’s IP Address in Windows

August 27th, 2017 by Admin

How do I find the IP address of a printer on a network? Sometimes you may need to install the printer on a different computer, so you need to obtain your printer’s IP address. In this tutorial we’ll show you 2 simple ways to find out your printer’s IP address in Windows 11, 10, 8 and 7.

Method 1: Find Printer’s IP Address via Configuration Sheet

If you have physical access to the printer, you can usually print the configuration page by pressing and holding a button (Power or Go) on the printer for about 5 to 10 seconds. You must find out the button/or combination of button by reading printer manual.

Some printers have the option to view the IP address directly from the system menu. For example, if you’re using HP Office Jet Pro 8600 printer, just go to the Home Screen -> Setup, then touch Reports and then select Network Configuration to see all of the printer’s network details.

Method 2: Find Printer’s IP Address in Windows

If you’re running Windows 11, here’s how you can find the IP address of the printer installed on your computer.

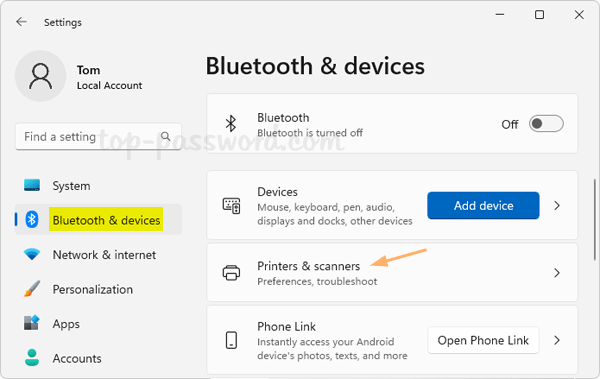
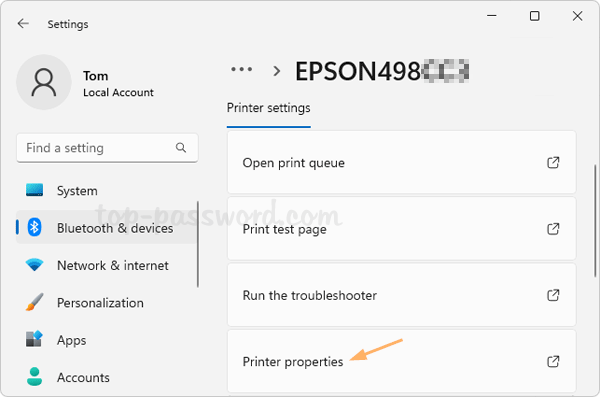
  1. Press the Windows and I keys together on the keyboard to open the Settings app, go to: Bluetooth & devices -> Printers & scanners.

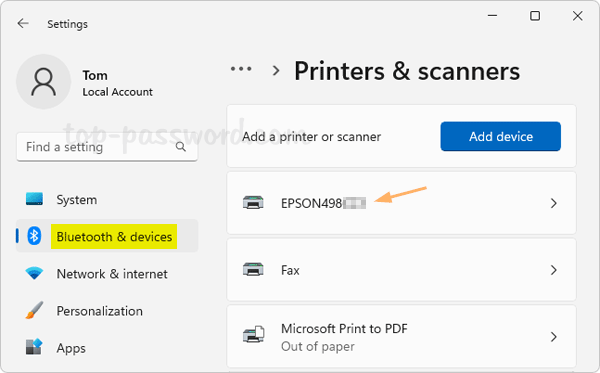
  2. Click on the printer you want to find the IP address of.

  3. Click the “Printer properties” option.

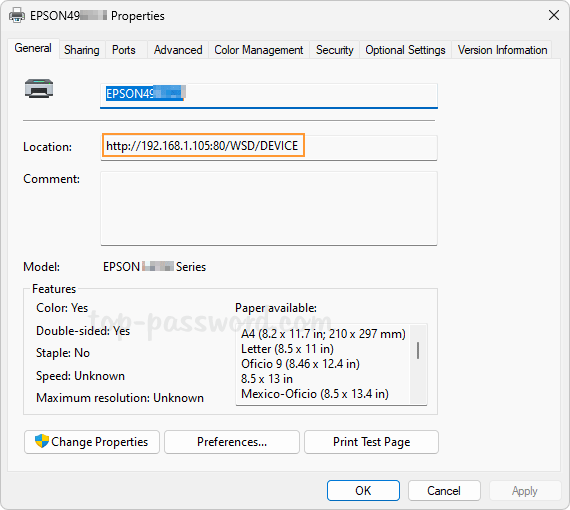
  4. Under the General tab, you will see the IP address of your printer in the Location textbox.

On Windows 10, 8 , 7, you can use the Control Panel to find the printer’s IP address. Follow these steps:

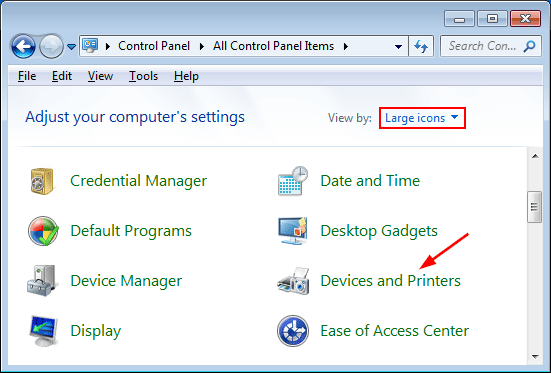
  1. Open the Control Panel and set the View by option to Large icons. Click Devices and Printers.

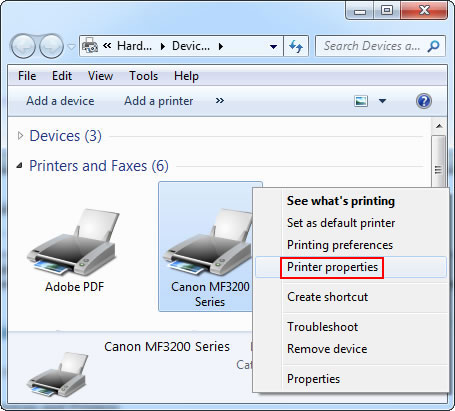
  2. Right-click on the printer installed on your PC, and then select Printer Properties from the menu that appears.

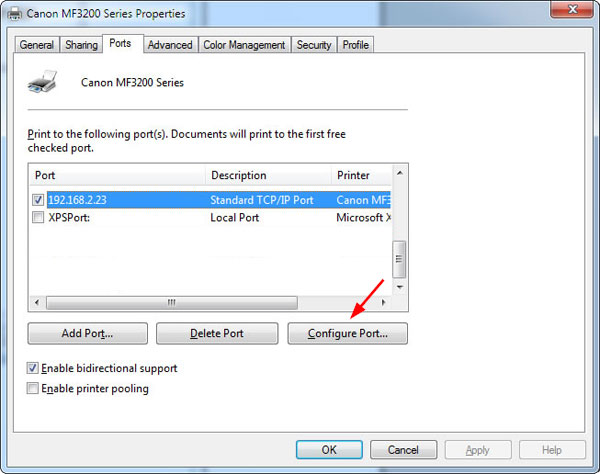
  3. In the Properties window, go to Ports tab. Select the port that has the check mark and click Configure Port.

  4. In the next screen, you should see the IP address in the “Printer Name or IP Address” text box. That’s it!
How to Disable Local Users and Groups (lusrmgr.msc) in Windows 10 / 8 / 7

August 16th, 2017 by Admin

How can I restrict access to Local Users and Groups MMC snap-in? In this tutorial we’ll show you 2 ways to disable Local Users and Groups (lusrmgr.msc) in Windows 10, 8 and 7. After disabling, you’ll find the Local Users and Groups is missing in Computer Management.

Method 1: Disable Local Users and Groups (lusrmgr.msc) Using Group Policy

  1. Press the Windows logo key + R to open the Run box. Type gpedit.msc and hit Enter.
  2. Navigate to the following path on the left side pane of Local Group Policy Editor:

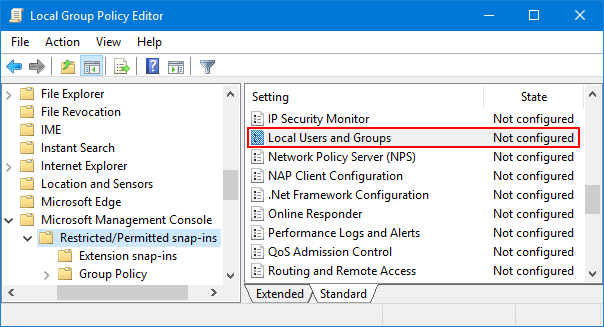
    User Configuration -> Administrative Templates -> Windows Components -> Microsoft Management Console -> Restricted/Permitted snap-ins

  3. Now, on the right side window, double-click on the “Local Users and Groups” setting to modify.

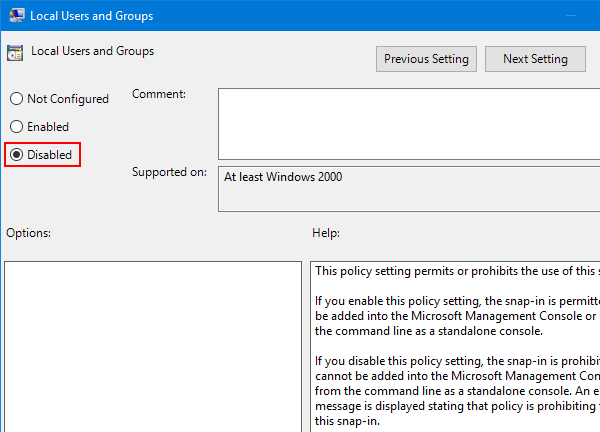
  4. Select the Disabled option. Click Apply and then OK.

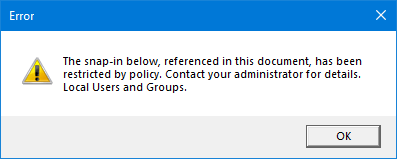
  5. The policy setting will take effect immediately. You’ll find Local Users and Groups not showing in computer management. If you try to open Local Users and Groups by using the lusrmgr.msc command, you’ll get this error message: “The snap-in below, referenced in this document, has been restricted by policy. Contact your administrator for details“.

Method 2: Disable Local Users and Groups (lusrmgr.msc) Using Registry Editor

  1. Press Windows Key + R on your keyboard to launch Run prompt. Enter regedit and hit Enter to open Registry Editor.
  2. Navigate to the following key:
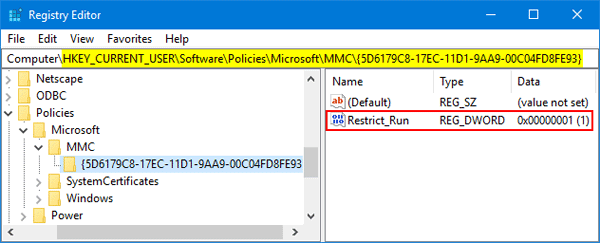
    HKEY_CURRENT_USER\Software\Policies\Microsoft\MMC\{5D6179C8-17EC-11D1-9AA9-00C04FD8FE93}

    If the last two keys (MMC, {5D6179C8-17EC-11D1-9AA9-00C04FD8FE93}) don’t exist, you’ll need to create them manually.

  3. On the right side pane, right-click in the blank area and select New -> DWORD (32-bit) Value. Name it Restrict_Run, and give it a value of 1.

  4. Close Registry Editor and reboot your computer for the policy to take effect. If you want to enable Local Users and Groups snap-in again, just change the registry value of Restrict_Run to 0 and you’re done!