Archive for the ‘Windows 7’ category

Forgot Windows 8 Password? How to Reset Windows 8 Password Easily

April 24th, 2012 by Admin

Forgetting Windows password is one of the most common problems and it can become a critical problem if your system contains important data. Advanced users can easily remove passwords from the computer but average computer users don’t have any idea about password reset disk and other methods to reset the password in Windows 8 or any other Windows versions.

Things will become easier if you have created a password reset disk in Windows 8 beforehand. So in case you have not taken precautionary steps earlier and you forget the password, you can’t create any type of password reset disk without logging into Windows 8. Here, I am going to discuss most of methods to reset Windows 8 password if you have forgotten it.

Option 1: Login with Administrator Account

It is the best way to get Windows 8 password back as by using the Administrator account, you can login on the system and then reset the user password from User management. When you install Windows 8 for the first time, it asks you to create a new user account to use on the computer and once you create it, Windows setup automatically disables the Administrator account and you can’t access it in normal mode. The next time you forget your user password, you can go to Windows Safe Mode and login with Administrator account and reset the user password. By default, Administrator account is automatically enabled in Safe Mode. To open the Safe Mode of any Windows OS, press the F8 (Function key) and after closing the BIOS messages you will see all the available options in Safe Mode and from there select Safe Mode.

Option 2: Login with Hotmail ID and Password

It is well known that Windows 8 offers us multiple ways to log into Windows 8 like using normal username and password, using Hotmail ID and password and finally using PIN password. If you set your Hotmail ID and password for Windows 8 login then you have a chance to get your login details of Windows 8 back. Open your Hotmail email ID on another computer and then change its password with a new one. After changing the Hotmail password, try to login on Windows 8 using the new password and make sure that your Windows 8 is connected to internet during this time.

Option 3: Enter 4 Digit Windows PIN Code

If you have used this way on Windows 8 previously then you can use it again to login on Windows 8. I have mentioned all the possible ways to login on Windows 8 above but if none of them work for you, I have a another solution and that is a bootable password reset disk.

Option 4: Bootable Password Reset Utility

It is the ultimate solution with a 100% success rate. It is the only solution you need if you fail to log into Windows 8 after using all the above methods. Password Recovery Bundle can help us to create a bootable password reset disk on CD/DVD or USB flash drive, which can be used to reset lost Windows 8, 7, Vista, XP, 2000 and NT passwords easily. Once you boot and log in with its bootable disk, it will reset the Windows 8 password and make it blank. After that, you can log into Windows 8 without entering any password or you can set a different password after successfully logging into Windows 8 to prevent unauthorized access by someone else.

How to Reset Lost Administrator Password on Windows 7, Vista and XP

April 5th, 2012 by Admin

Still trying to recall the administrator password to get into your computer and keep failing again and again? If you forgot Windows administrator password and don’t have a password reset disk, you won’t be able to get into your computer and reset the lost password. If there are no other user accounts on the computer, you can never use your computer again until you reinstall the system. That’s really depressing. If you have a Windows password recovery disk, things will become easier than you may think.

In this post we’ll show you how to easily reset lost administrator password on Windows 7, Vista and XP. You only need to burn the ISO image of Reset Windows Password to a blank CD, then set your locked computer to boot from the CD and it’ll guide you to reset the forgotten Windows password to blank. This CD can be used to reset lost password on any Windows system, While the password reset disk created by Windows built-in features works only on the specific computer it’s burned.

Reset Windows Password is a professional and powerful password recovery tool to help you get into the computer and reset forgotten Windows password as blank, and it is always the best way to reset lost administrator password on Windows 7, Vista and XP. Just follow this step-by-step guide:

Step 1: Create a Bootable Windows Password Reset CD

First download the .zip archive of Reset Windows Password to any accessible computer (not the computer you want to unlock). Unzip the download file, you’ll get the ISO image: ResetWindowsPwd.iso.

Then you’ll need to get a CD/DVD-recording software to burn the ISO image to a blank CD or DVD. We recommend you to use this freeware: BurnCDCC. Launch this program, point the File Image to ResetWindowsPwd.iso and select your CD-DVD Burner, then click Start to begin the creating of Windows password reset CD.

Step2: Reset Lost Windows Administrator Password

Insert the password reset CD into your locked computer. Turn on (or restart) your computer, and let’s it boot from the password reset CD. If it still boots from the local hard drive, you might need to change the BIOS setting and set CD-ROM as the first boot device.

When the boot procedure is complete, the Reset Windows Password program will automatically launch.
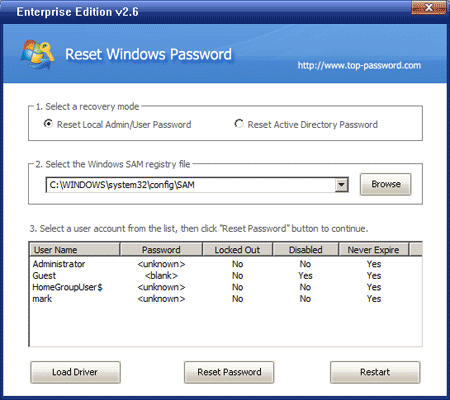
Select the administrator account, then click Reset to remove its password.

Eject the password reset CD and click on Restart to reboot the computer. Now you are able to log into your locked computer with the administrator account.

Note: This trick can be used to reset lost Windows administrator passwords on both 32-bit and 64-bit operating systems. With a password reset disk at hand, you can easily reset lost Windows passwords for any computer whose password you forgot.

Install Mac OS X Snow Leopard on a PC using VMware

February 29th, 2012 by Admin

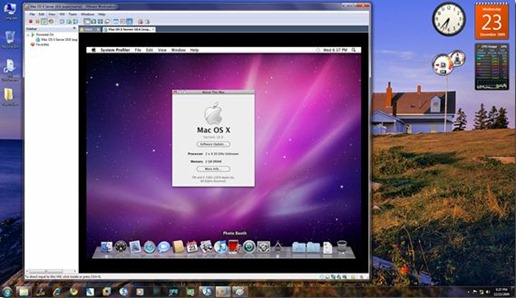
The following step by step guide will help you in installing Mac OS X 10.6 Snow Leopard as a guest virtual machine in Windows 7. You’ll need to have a system with an Intel processor which supports hardware virtualization, original OS X Snow Leopard retail disk, VMware Workstation 7 and Windows 7, Vista or XP installed as host operating system. If you meet all these requirements, you can then install OS X Snow Leopard in VMware under Windows and can enjoy the best of both worlds.


Note: We don’t in anyway encourage downloading Apple software via file-sharing / torrent sites and run it in an virtualized environment under Windows. This guide is for informational purposes only. If you like OS X Snow Leopard, Get a Mac.

Step 1: Download and install VMware Workstation 7.

Step 2: Click here to download pre-made modified version of Snow Leopard.vmdk and darwin_snow.iso files required to get this thing to work.

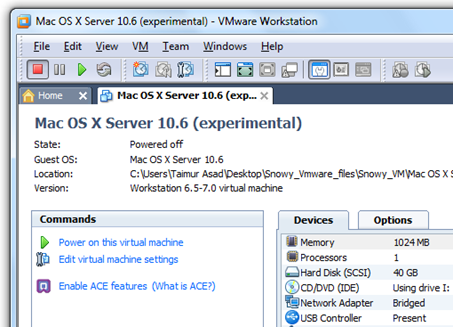
Step 3: Start VMware Workstation and open up “Mac OS X Server 10.6 (experimental).vmx” file which you downloaded in Step 2.

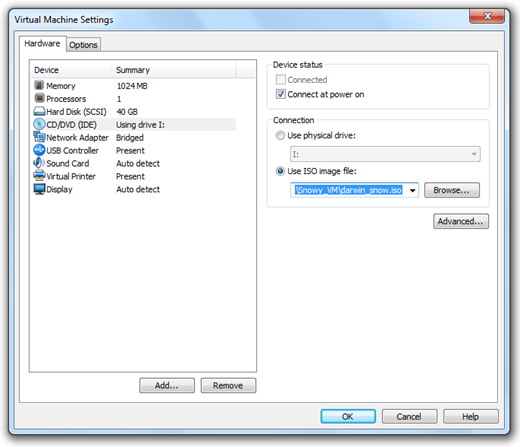
Step 4: Click on “Edit virtual machine settings”, select CD/DVD (IDE) option from left hand side and then and select “Use ISO image file” option. Point it to “darwin_snow.iso” which you downloaded in Step 2.

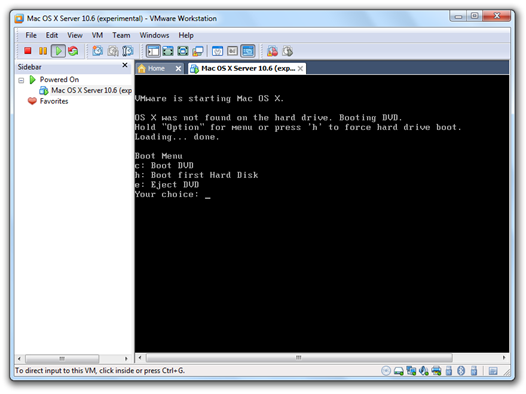
Step 5: Now power on the virtual machine and hit “F8” key. You should now have a screen similar to the one shown below.

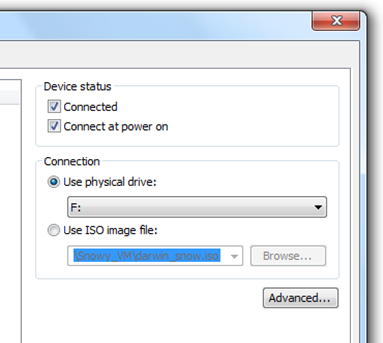
Step 6: Now you’ll have to point your virtual machine to OS X Snow Leopard retail DVD instead of “darwin_snow.iso”. To do this, right click on CD/DVD option found in lower right most corner of your VMware window and select settings.

Insert OS X Snow Leopard retail DVD in your DVD drive and select the “Use physical drive” option.

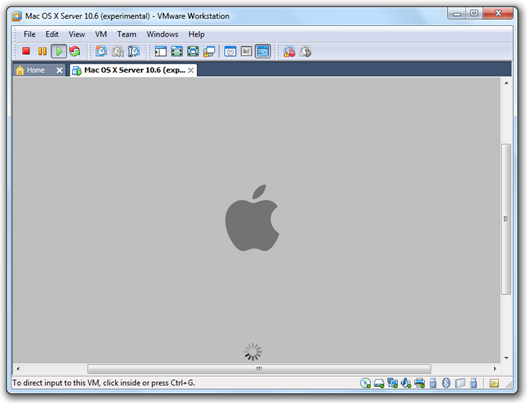
Step 7: Now go back and select “c” option (Boot DVD) from the prompt which you got in Step 5 to boot from the OS X retail DVD. OS X boot screen with Apple logo should now appear. If the boot screen doesn’t appear for you, try booting it in verbose mode by pressing “F8” key after selecting “c” option, and then enter “-v” (without quotes). This will enable the system to boot OS X DVD using verbose mode.

Step 8: Wait for a couple of minutes for the Installation Setup screen to show up. From here on, simply follow the onscreen setup instructions to install OS X Snow Leopard. Make sure you format your virtual hard drive in “Mac OS Extended (Journaled)” format using Disk Utility. Customize your installation with minimum set of printer drivers and language options for a lightweight trouble free installation experience.

Step 9: Once the installation is completed. System will automatically reboot. At this point, close your guest virtual machine and change your CD/DVD option again like you did in Step 2 to point it to “darwin_snow.iso”.

Step 10: Start the virtual machine again. Press “F8” key and select “h” option to “Boot first hard disk”. Voila! Snow Leopard should now be running live under Windows 7!

Restrict Logon Hours for Any Windows Account

January 11th, 2012 by Admin

One of my friends complained that his child spends too much time on his computer. He was very worried for his kid’s health. He tried to talk with the child but you know how stubborn they are. It was almost impossible to convince a six-year-old kid that spending too many hours in front of the computer can have a bad influence upon his health condition. I am a person who sustains children should learn how to use computers but I am against excessive use.

Regarding my friend’s problem, I advised him to try software applications that restrict access to computer for a defined time interval. He was reticent about this idea asking me if there was a costless solution. He didn’t want to use software trying to avoid his child getting suspicious. He just wanted a trick to restrict access in Windows without additional software and at no cost.

I immediately thought that the net user command would be perfect for this issue. Follow the steps outlined below to easily limit the user’s logon hours:

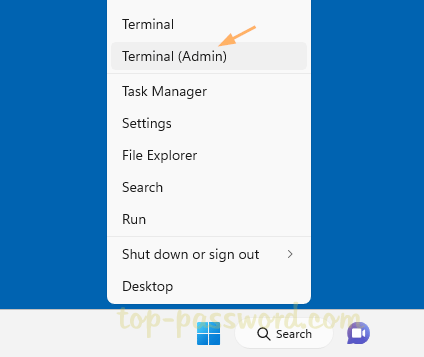
  1. Open an elevated Command Prompt.

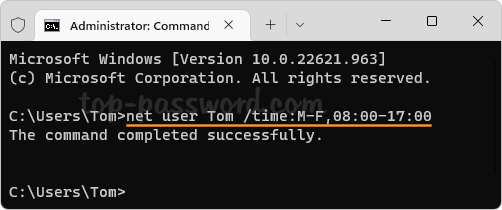
  2. Enter the appropriate net user /time command for the user(s) you wish to restrict access for.

Example 1:
Limits the user john to logon Monday- Friday between 8am and 5pm:
net user john /time:M-F,08:00-17:00

Example 2:
The same thing can also be expressed as above using the 12 hour clock :
net user john /time:M-F,8am-5pm

Example 3:
This shows the easiest way of setting limits that differ on multiple days.
net user john /time:M,8am-5pm;T,1pm-3pm;W-F,8:00-17:00

Example 4:
To remove time restrictions:
net user john /time:all

Note: The system limits time to one-hour increments, which means you can only restrict the user on the hour (e.g., 13:00 or 1pm, not 13:30 or 1:30pm). You can use the abbreviation for the day (i.e., M,T,W,Th,F,Sa,Su).

Windows accounts can be restricted from logging on to the computer at specific hours or days. You can only restrict when a user can log on to the system, but you cannot force a user to log off when their hours expire.

The next time when you try to log onto the same account, the operating system will check the time restrictions you set to determine if you are allowed to log into the  account. For restricted time periods, the system will required you to enter your password, even if you haven’t set any password on that account. Furthermore, it will always reject you regardless if you enter a valid or invalid password.