Archive for the ‘Windows 8’ category

How to Restore Local Security Policy to Default in Windows 10, 8, 7, Vista and XP

December 14th, 2015 by Admin

Did you mess with the local security policy? Or a certain program changed the security policy that caused some strange issues? Luckily there is a simple way to reset / restore your local security policy settings to default in Windows 10, 8, 7, Vista and XP, if you mess up.

How to Restore Local Security Policy to Default in Windows 10, 8, 7, Vista and XP?

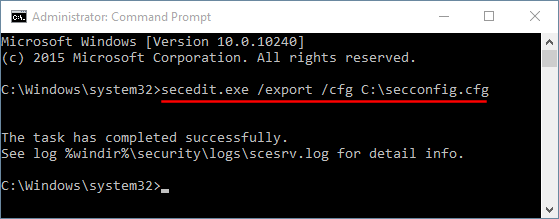
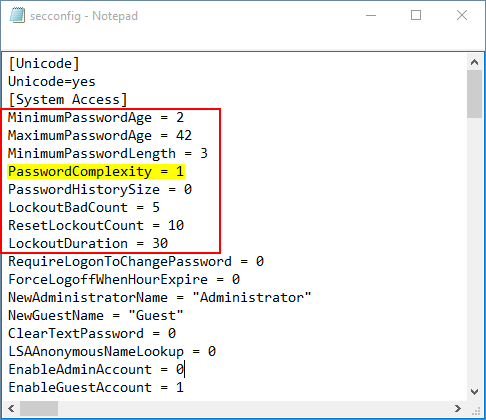
This method uses the default security configuration templates to reset the local policies (including account lockout and password complexity requirements policy). Here’s how to reset local security policy settings to their default values:

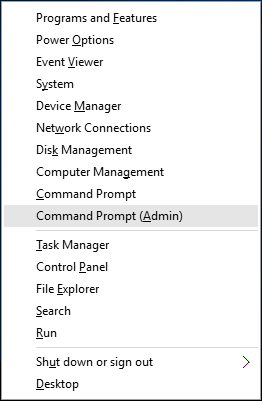
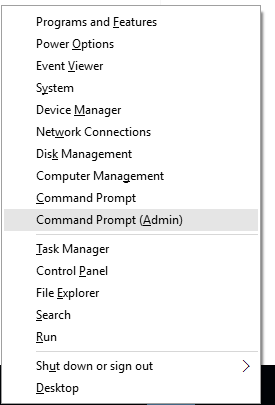
  1. Open an elevated Command Prompt. In Windows 10 and 8, press the Windows + X key combinations to open the Quick Access menu and choose Command Prompt (Admin). In Windows 7 or Vista, click the Start menu, then select All Programs -> Accessories, right-click on Command Prompt and select “Run as administrator”.
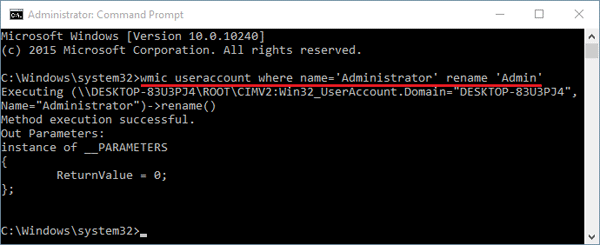
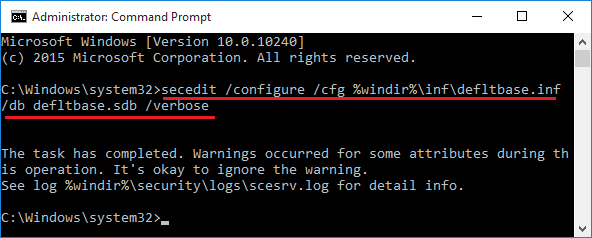
  2. Now copy and paste the following command into the Command Prompt. Hit Enter.
    secedit /configure /cfg %windir%\inf\defltbase.inf /db defltbase.sdb /verbose

    If you are running Windows XP and need to reset the security settings to their default values, use this command instead:
    secedit /configure /cfg %windir%\repair\secsetup.inf /db secsetup.sdb /verbose

    reset-local-security-policy

  3. This will take a few minutes to reset all the policies back to the Windows defaults. you’ll have to restart the computer to see the changes.

How to Turn on / off Adaptive Brightness in Windows 10 / 8

December 8th, 2015 by Admin

Adaptive brightness is a new feature in Windows 8 / 10 that uses an ambient light sensor to automatically adjust your screen’s brightness to your surroundings. When you have mostly dark stuff on screen (like a text editor with dark background), the screen will dim automatically. While on a white background it will brighten. These changes happen automatically after a few seconds, and they can also sometimes manifest as noticeable flickering.

If the brightness switching is driving you crazy, you can disable this feature so your screen will stay at the brightness level you want. In this post we’ll show you how to turn on / off adaptive brightness in Windows 10 and 8.

Updated: For the latest build of Windows 10, open the Settings app and navigate to System -> Display, you can check or uncheck the “Change brightness automatically when lighting changes” option to enable or disable adaptive brightness.

How to Turn on / off Adaptive Brightness in Windows 10 / 8?

  1. Press the Windows logo key + X to open the Quick Access menu. Click Control Panel.
  2. When Control Panel is open, set the View by option to Large icons. Click Power Options.

    control-panel

  3. Find your currently selected power plan and click on the associated “Change plan settings” link.

    power-options

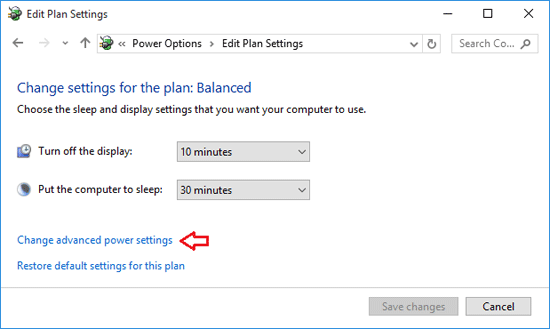
  4. Now click on “Change advanced power settings“.

    edit-power-plan

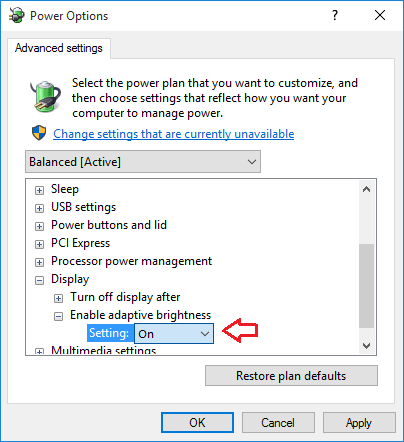
  5. Scroll down to Display –> Enable adaptive brightness, and change the settings there to Off or On.

    adaptive-brightness

    If you set it to off, your screen will maintain a constant brightness level. If you don’t see this setting, it means that your computer doesn’t come with light sensors.

Fix: Windows 8.1 Update (KB2919355) is not applicable to your computer

November 25th, 2015 by Admin

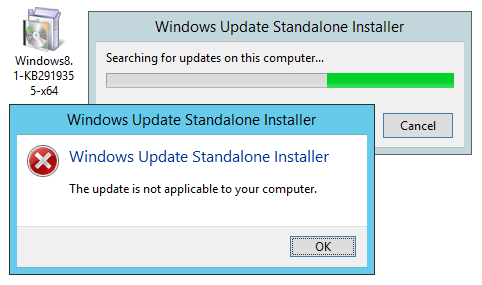
Unable to install Windows 8.1 Update (KB2919355) on your computer? Even if you’ve enabled automatic update in Windows, you might find out that KB2919355 doesn’t appear in the list of available updates. If you download KB2919355 directly from Microsoft’s online website and then install it manually, Windows Update Standalone Installer will fail with the error message “The update is not applicable to your computer“.

update-not-applicable

KB2919355 is essentially a service pack released for Windows 8.1 and Windows Server 2012 R2, but Microsoft has decided not to call it “service pack”. It is officially known as “Windows 8.1 Update”. In this article we’ll show you an effective way to install Windows 8.1 Update on Windows 8.1 and Windows Server 2012 without such a problem.

How to Install Windows 8.1 Update (KB2919355) Successfully?

  1. Press the Windows key + X to open up the Quick Access Menu. Next click Control Panel.
  2. Click the View by option at the top right of the Control Panel. Set it to Large icons. Click on Windows Update.

    control-panel

  3. Click the Change settings link on the left side of the Windows Update window.

    windows-update

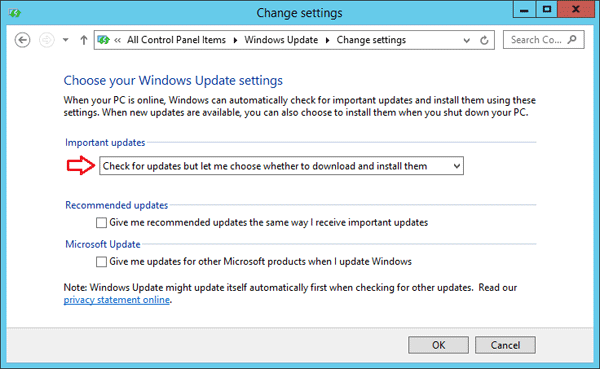
  4. Under Important updates, check the “Check for updates but let me choose whether to download and install them” option from the drop-down menu. Click OK.

    windows-update-settings

  5. When come back to the Windows Update window, click on the Check for updates link in the left pane. The search may take some time, depending on how many updates are waiting.

    check-for-updates

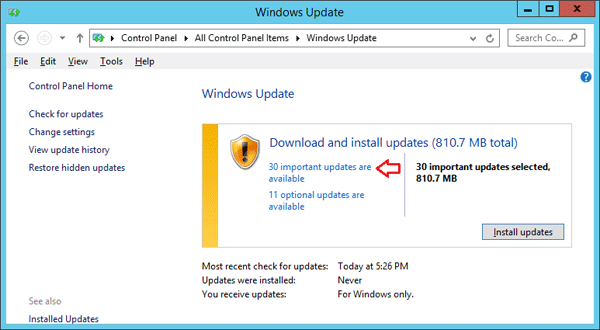
  6. When the search is finished, click the link that says how many important updates are available.

    available-updates

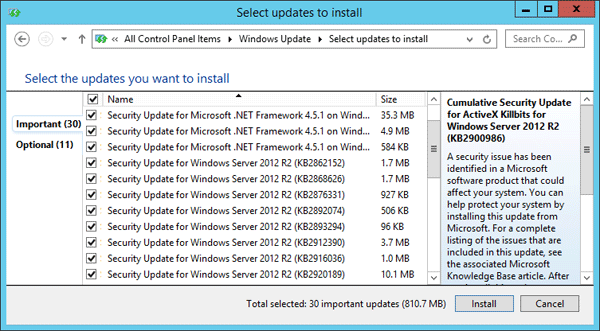
  7. In the list of available updates, select the update KB2919355, then click Install and you’re done! However, if the update KB2919355 doesn’t appear in the list of available updates, check ALL important updates and click Install.

    install-windows-updates

  8. After installing all available important updates, open your Web browse to download the Windows 8.1 Update from Microsoft’s website:

    At the download page, select your language and then click the Download button.

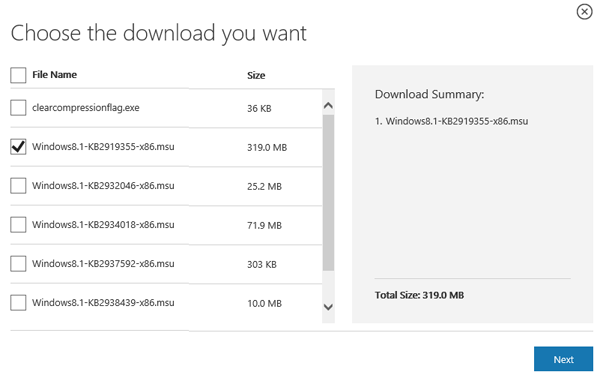
  9. Windows 8.1 Update contains six separate files: clearcompressionflag.exe, KB2919355, KB2932046, KB2934018, KB2937592 and KB2938439. You just need to select the file contains KB2919355 and click Next to begin downloading.

    KB2919355

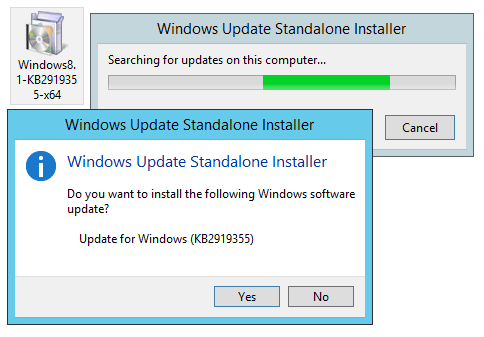
  10. Now double-click on the update KB2919355 you’ve downloaded and it should be able to be installed successfully.

    install-kb2919355

2 Options to Get out of Safe Mode in Windows 10 / 8 / 7 / Vista

November 20th, 2015 by Admin

Are you stuck in Windows Safe Mode? Every time you turn on or restart your computer and you still keep ending back in Safe Mode? In this article we’ll show you 2 ways to get out of Safe Mode in Windows 10, 8, 7 and Vista, so your system will go back to normal mode.

Note: The following methods require you to log on your computer as administrator. If you’ve forgotten your password, try to reset lost Windows password with PCUnlocker.

Option 1: Get out of Windows Safe Mode Using MSConfig Utility

MSConfig is a built-in tool available in all versions of Windows, which is designed to help identify problems that might prevent Windows from starting correctly. From within the MSConfig utility, you can set Windows to start in normal node instead of Safe Mode.

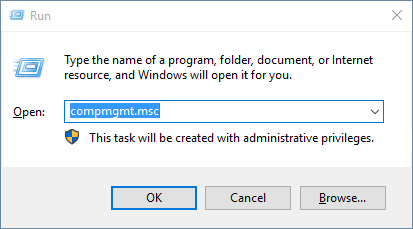
  1. Press the Windows key + R to bring up the Run box. Type msconfig and press Enter.

    msconfig

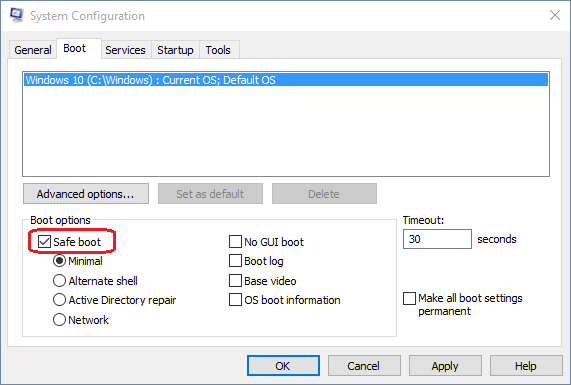
  2. When the System Configuration window opens, you’ll see the Safe boot option under the Boot options section.

    safe-boot-settings

  3. If Safe boot is checked, your computer will keep booting in Safe Mode. To get out of Safe Mode, you have to uncheck Safe boot and click Apply.
  4. Restart your computer and it will start in normal mode.

Option 2: Get out of Windows Safe Mode Using Command Prompt

  1. Before get started, you need to open a Command Prompt with administrator privileges. If your computer is current running in Safe Mode – Alternate Shell, you should be now at an administrator Command Prompt.
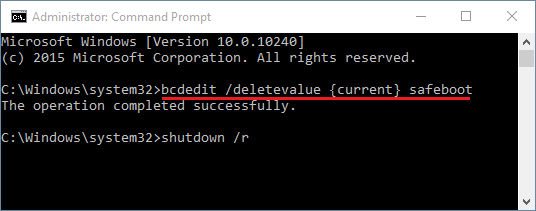
  2. Type the following command directly at the Command Prompt. Press Enter and it will turn off Safe Mode.
    bcdedit /deletevalue {current} safeboot

    get-out-of-safe-mode

  3. Reboot your computer with the command:
    shutdown /r
  4. Now your computer will boot back into normal mode. That’s it!

How to Upgrade to Windows 10 without Using Windows Update

November 18th, 2015 by Admin

Windows 10 is available to public as a free upgrade to every qualified computers running a genuine copy of Windows 8.1, 8 or 7. (Enterprise editions do not qualify.) Just download the official Media Creation Tool from Microsoft and it allows you to upgrade to Windows 10 as well as create installation media such as bootable USB or DVD drive. This tutorial will show you how to upgrade your current or another computer to Windows 10 directly without using Windows Update.

How to Upgrade Your Computer to Windows 10?

Head over to Microsoft’s website to download the 32-bit or 64-bit version of Media Creation Tool. Pick the 64-bit version if you want to run Media Creation Tool on Windows 8 or 7 64-bit OS. Otherwise opt for the 32-bit version.

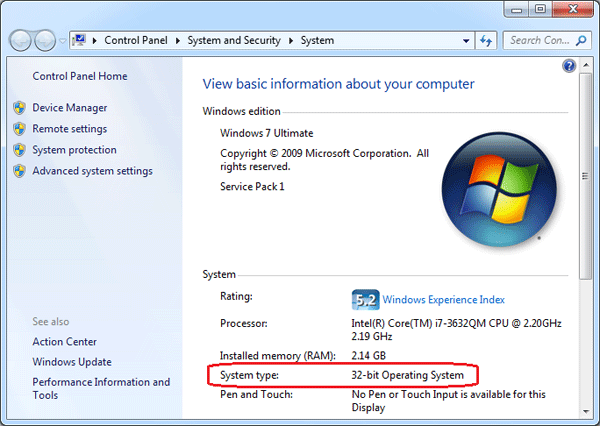
If you don’t know whether you’re running Windows 32-bit or 64-bit, right-click on “My Computer” or “This PC” icon on your desktop and select Properties, the field labeled System Type will indicate if you are using a 32-bit or 64-bit OS.

system-type

Run the Media Creation Tool and follow the steps below to upgrade your current computer or another PC to Windows 10.

Option 1: Upgrade Current Computer to Windows 10

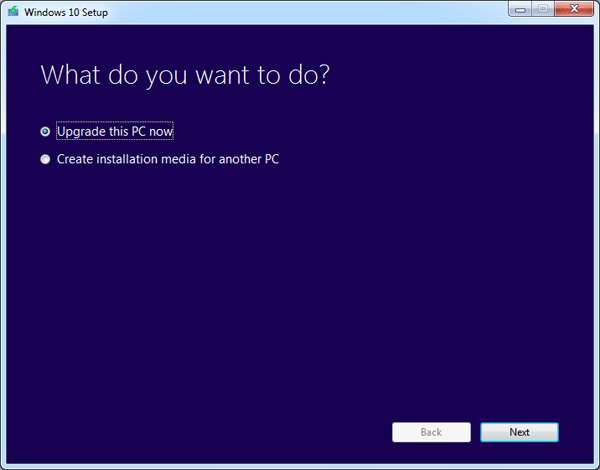
  1. Run the Media Creation Tool and then select the Upgrade this PC now option.

    upgrade-this-pc

  2. The Media Creation Tool will download Windows 10. When it’s done, accept the EULA, you’ll be presented with three options:
    • Keep personal files and apps
    • Keep personal files only
    • Nothing
  3. Select the first option to ensure your PC upgrades and you keep your files and applications. Windows 10 will start installing and after a few reboots and customization you’ll be upgraded.

Option 2: Upgrade Another Computer to Windows 10

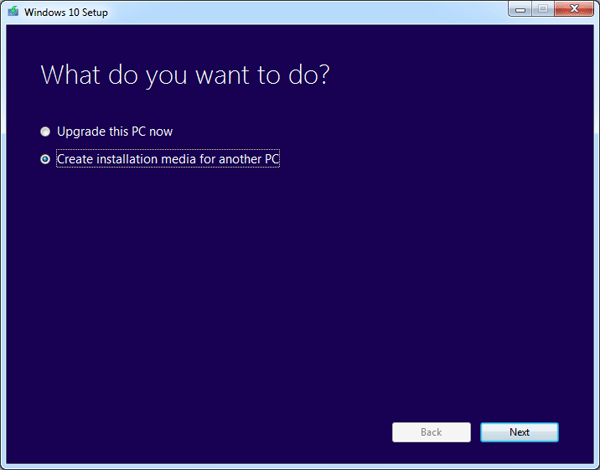
  1. Run the Media Creation Tool and then select the Create installation media for another PC option.

    create-installation-media

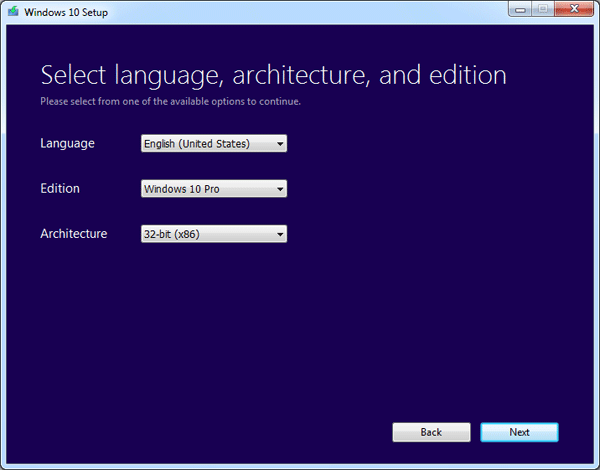
  2. Select the language, edition and architecture (32 or 64 bits) of Windows. Make sure your selections match those of the computer(s) you wish to upgrade. So, if you currently have Windows 8 Pro (32-bit), choose Windows 10 Pro 32-bit.

    select-os-edition

  3. Select USB flash drive. If you plan to burn this to DVD instead, select ISO file and, after the process is over, you’ll have to use a DVD burning program to write the ISO to disc.
  4. Click Finish when the process is complete. If you don’t plan to upgrade to Windows 10 right away, you can remove the drive and stop here.
  5. Insert the created CD or USB flash drive into the computer you want to upgrade, and then run setup.exe. Follow the on-screen instruction to complete the upgrade process. If the software asks you for a product key, you are using the wrong edition of Windows 10 to upgrade.

2 Ways to Set Password Hint for Windows User Account

November 9th, 2015 by Admin

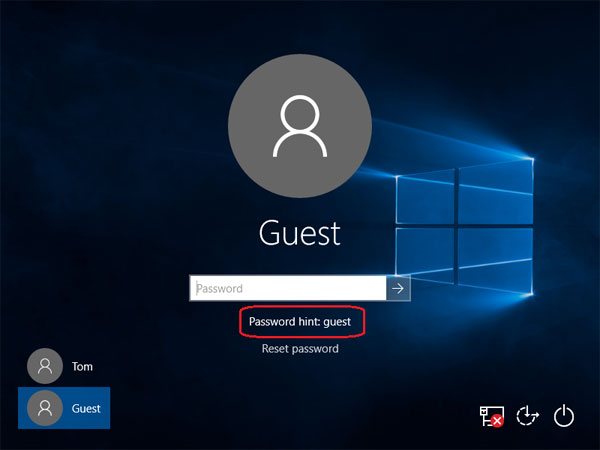
“I have activated the built-in guest account on my system so guests can use to work on my computer. To log on they must enter a password. How can I set a password hint to inform users of the correct password when entering wrong password? Please help!”

windows-password-hint

The password hint is used to remind you of your password in case you forget it. In this article we’ll show you 2 ways to set up a password hint for any user account in Windows 10, 8, 7, Vista and XP. The first method is the most common way of setting a password hint, but it doesn’t work for Windows guest account. While the second method is a bit complicated but it works with any situation.

Method 1: Set A Password Hint Through Control Panel

It’s super easy to set up a password hint when you change or reset your Windows user password. Follow these steps:

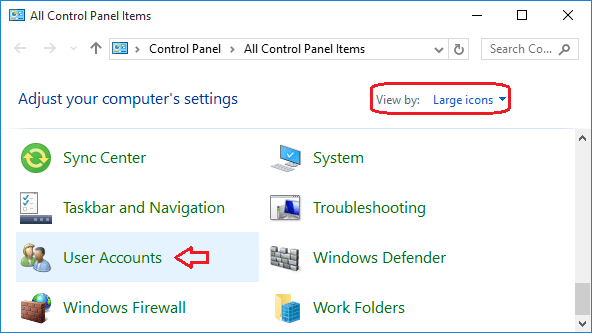
  1. Open the Control Panel. Set the View by option to Large icons. Click on User Accounts.

    control-panel

  2. Once on your user account page, click on the Manage another account link at the bottom.

    user-accounts

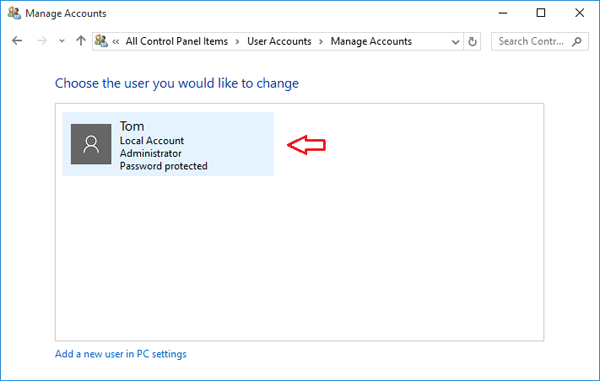
  3. Click on the user account whose password hint you want to create or change.

    manage-accounts

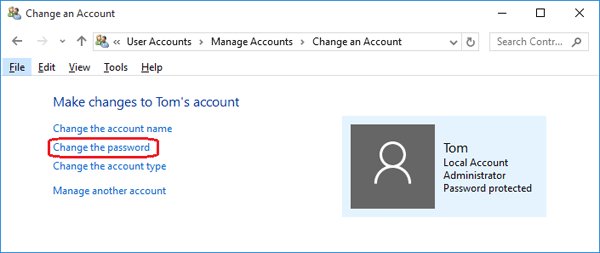
  4. In the next window, click on Change the password.

    change-windows-password

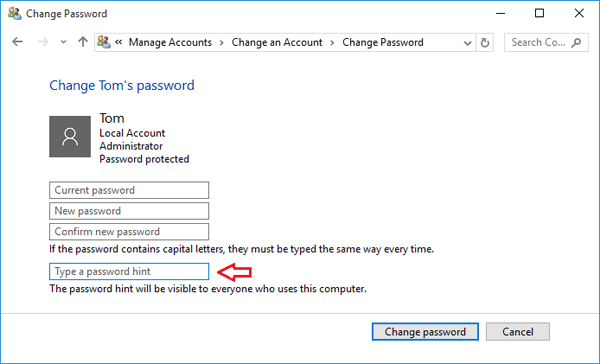
  5. Type your current password and set a new password. Next enter a word or sentence for your password hint that will help you (and you only!) remember your password. Click Change password when you are done.

    set-up-password-hint

Method 2: Set A Password Hint Through Windows Registry

It turns out that the password hint is stored in Windows registry as a readable format after you set up it through the Control Panel. Here we’ll walk you through the steps of set a password hint directly from the registry.

  1. Press the Windows key + R to open the Run box. Type regedit and hit Enter.
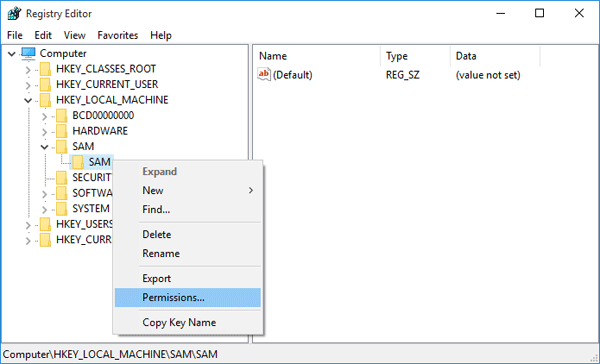
  2. When the Registry Editor opens, navigate to HKEY_LOCAL_MACHINE\SAM\SAM. To go beyond SAM you have to give yourself permission by right-clicking the second SAM Key and selecting Permissions….

    sam-permissions

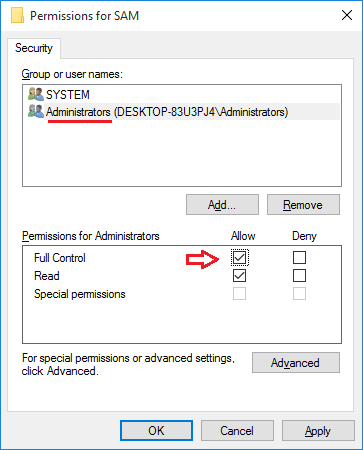
  3. In the Permissions for SAM dialog box, highlight the “Administrators” and click the “Full Control” box, click Apply and OK.

    permissions-for-sam

  4. Press F5 to refresh the registry and you’ll be able to navigate to: HKEY_LOCAL_MACHINE\SAM\SAM\Domains\Account\Users.
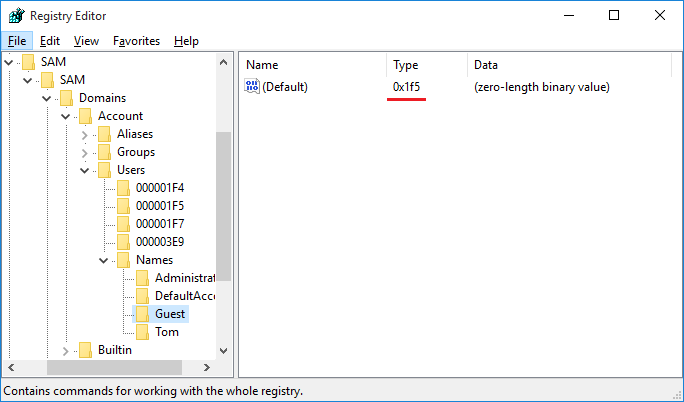
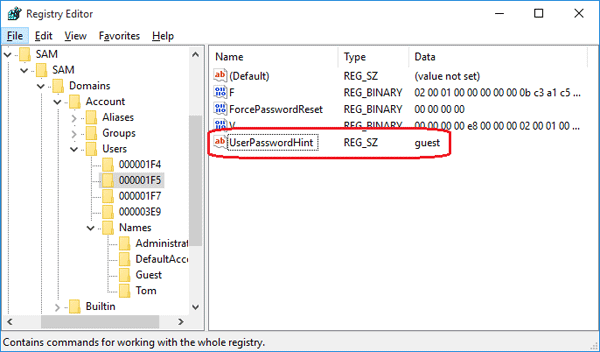
  5. You’ll notice a Names subkey with a registry key for each user account. Click on your desired account and you’ll see the RID of your account in the right pane. In my example, 0x1F5 is the RID of the built-in Guest account.

    account-rid

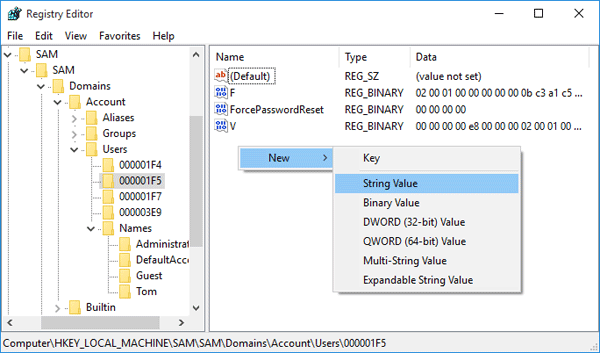
  6. Navigate to HKEY_LOCAL_MACHINE\SAM\SAM\Domains\Account\Users\{User_RID}. Right-click on an empty area in the right pane. From the pop up menu, select New > String Value.

    new-string-value

  7. Rename New Value #1 to UserPasswordHint. Next double-click on UserPasswordHint, type your password hint and click OK. Close the Registry Editor and it’s done.

    UserPasswordHint

After setting the password hint, log off or restart your computer. Type in a wrong password at the Windows login screen and it will show you the password hint as a reminder of the password. Make sure you choose a good and secure password hint. If you’re locked out and the password hint couldn’t remind you of the forgotten password, you have to use PCUnlocker to reset the login.

Fix Automatic Startup Repair Loop in Windows 10, 8 and 7

November 6th, 2015 by Admin

A customer recently mentioned that his Windows 8 laptop was stuck in an Automatic Repair loop. When he turned on the computer, it came up with the ‘Preparing Automatic Repair’ screen, and then rebooted automatically and ran Automatic Repair again, becoming caught in the loop again and again.

There could be many reasons for a failed automatic repair. However, the most common problem is corrupted registry or missing files on the hard disk. Here I will give the complete solutions on how to fix this issue in Windows 10, 8 and 7.

All the solutions below require you to run certain commands at the Command Prompt. Here is a way to access the Command Prompt at boot:

  1. Insert your Windows installation DVD, turn on the computer, and wait until you see the message “Press any key to boot from CD or DVD“. Just press any key to continue. (Note: If you don’t see this message, you probably have to change the boot order in the BIOS)
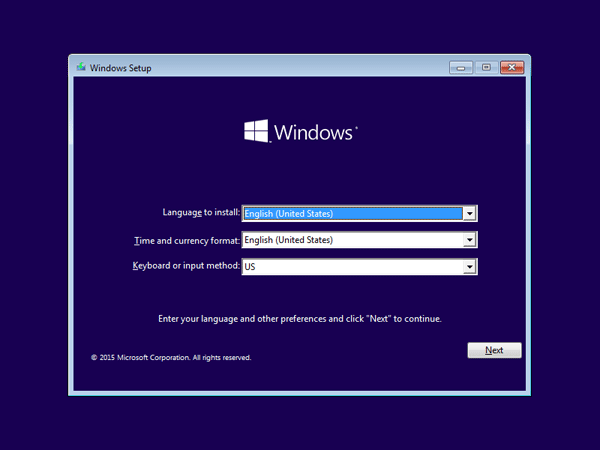
  2. After a while, you’ll get to the Windows Setup screen. Press Shift + F10 to open a Command Prompt.
    windows-setup

Solution 1: Running check disk to see if your hard drive is the problem

Chkdsk could be used to check and repair your hard drive for filesystem corruption. Before running the chkdsk command, you have to find out the drive letter of your system drive. Depending on how your system is setup, this could be either C: or D:.

  1. Type dir C:\ and press Enter.
  2. If you see the common folders: Program Files, Users and Windows, then you have found your system drive.

    find-system-partition

    If the drive is not your system drive, repeat the step above, changing the drive letter to D, E or some other letter until the system drive is located.

When you have located your Windows system drive, type the following command and press Enter. Replace d: with the actual drive letter of your system drive.

chkdsk d: /f

chkdsk

The scan should start. This could take several hours depending on the size of your hard drive. Once the scan is done, exit the Command Prompt and reboot your computer to check if the problem has been solved.

Solution 2: Manually attempt to rebuild the BCD and repair MBR

Running the bootrec utility to rebuild the BCD / MBR might fix the automatic repair loop problem. Type the following set of commands at the Command Prompt, one by one.

bootrec /fixmbr
bootrec /fixboot
bootrec /rebuildbcd

fix-mbr

The /fixmbr switch writes a new MBR (Master Boot Record) to the system partition, the /fixboot switch writes a new boot sector onto the system partition, and the /rebuildbcd switch scans all disks for Windows installations and provides a choice of which entries to add to the BCD store.

Solution 3: Disable Automatic Startup Repair

If the automatic repair couldn’t really repair your PC and just get you stuck in a repair loop, it’s better to disable the automatic startup repair. Type the following command and press Enter:

bcdedit /set {default} recoveryenabled No

disable-automatic-repair

Now you’ve successfully disabled the automatic startup repair feature in Windows.

Solution 4: Restore your Windows registry

A corrupted registry settings can also cause a auto-repair loop. Here is how to restore your registry from the RegBack directory. The RegBack folder is located in :/windows/system32/config, which is used by Windows to hold a recent backup copy of the registry hives.

Assuming your system drive is d:, run the following command to restore Windows registry:

copy d:\windows\system32\config\RegBack\* d:\windows\system32\config

restore-windows-registry

if prompted to overwrite existing files, type All and hit Enter. Type exit and hit Enter to close the Command Prompt window. Restart your computer and most probably, you may able to access your Windows system as before.