Archive for the ‘Windows 8’ category

How to Restore Windows Registry to A Previous State

November 11th, 2014 by Admin

Did you mess up the Windows registry and need to restore it to a previous state? Problems with the Windows registry can cause your computer to freeze, slow down, restart randomly, or be unusable. Luckily, since Windows 7, the system will automatically make a backup of your registry files after a successful boot. Here we’ll explain how to restore your Windows registry to a previous state, in order to fix / repair a corrupted registry.

How to Restore Windows Registry to A Previous State?

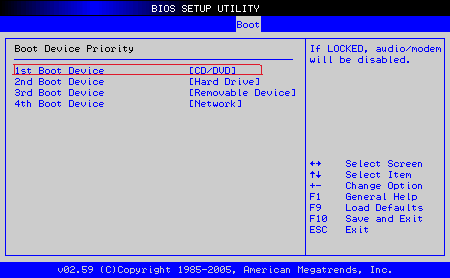
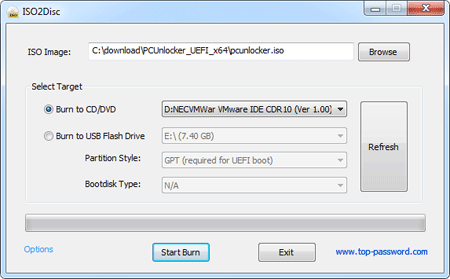
As the registry files are inaccessible while Windows is running, you need to boot your PC from a boot media for replacing the registry. Here we’ll use the PCUnlocker utilty, which comes as a self-extracting zip file containing a bootable CD image. Download the program and unzip it locally. Burn the CD image to a blank CD with your favorite burning program or ISO2Disc.
Boot your computer from the newly burned CD. After booting from the CD, you’ll get to the PCUnlocker program. Despite this program is mainly designed for resetting lost Windows password, it can also be used to backup the files on your computer, including the registry. Click on the “Option” button and select “Launch Command Prompt”.
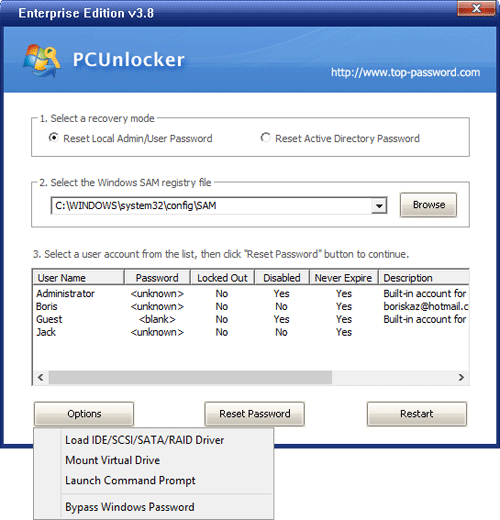
Before restoring, I highly recommend you to take a backup of your current registry files, by typing these commands, one by one, and press Enter after each (Assuming C drive is the driver letter of your Windows installation).

mkdir c:\regbackup
copy c:\windows\system32\config c:\regbackup
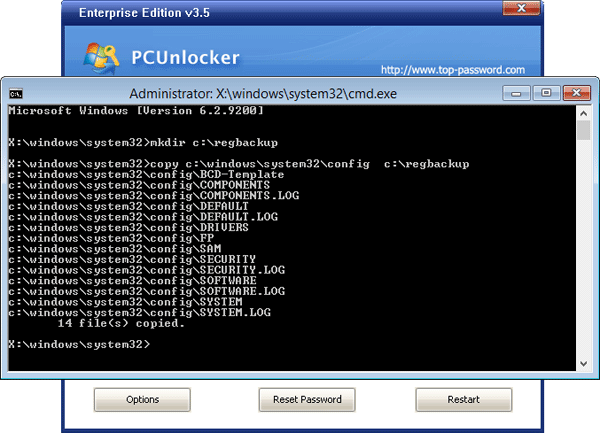
These commands will create a backup folder and copy all your current registry files to that folder.

In Windows 10, 8 and 7, there is a folder called RegBack on your system partition which contains the most recent copy of registry files that were backed up automatically by Windows. Here we need to copy the registry files from C:\Windows\System32\config\RegBack   to C:\Windows\System32\config. To do so type in this command:

copy c:\windows\system32\config\RegBack c:\windows\system32\config
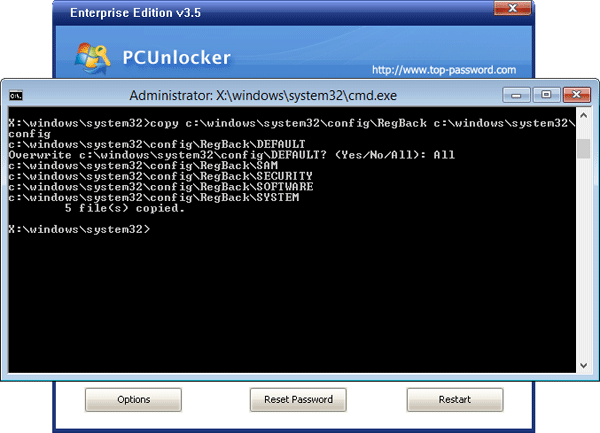
Now you’ve successfully restored your Windows registry files to last known good state. Remove the CD and restart your computer to see if you are able to boot into Windows properly.
How to Hide User Name from Windows Lock Screen

November 1st, 2014 by Admin

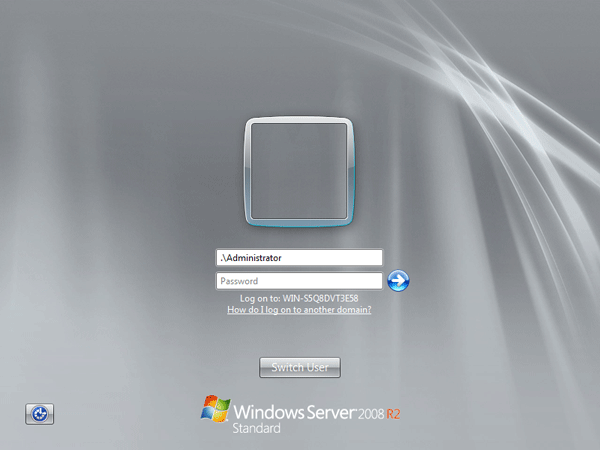
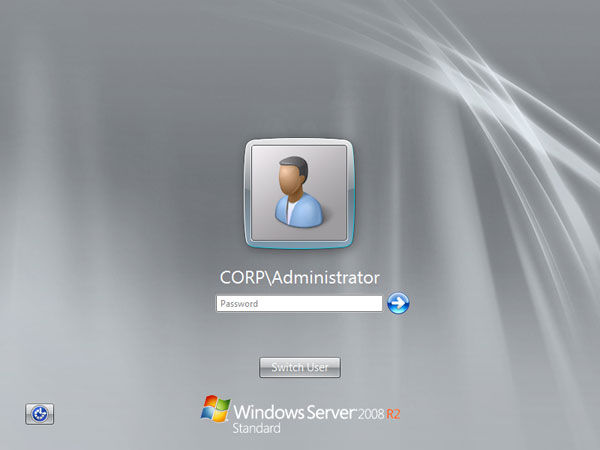
It’s a common security practice to lock your Windows desktop screen by pressing Windows + L keys every time you walk away from your computer. This can prevent other people from accessing your computer in your absence. However, did you realize that Windows will display the user name on the screen while your PC is locked? A user name can be just as sensitive as a password in a lot of scenarios. Luckily there is a simple way to hide your user name from Windows lock screen.

How to Hide User Name from Windows Lock Screen?

  1. Open the Registry Editor by pressing Windows + R keys simultaneously.
  2. Browse down to the following registry key:
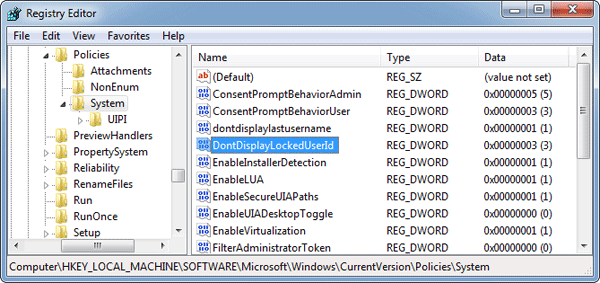
    HKEY_LOCAL_MACHINE\Software\Microsoft\Windows\CurrentVersion\Policies\System
  3. On the right-hand side, create a new DWORD 32-bit value named DontDisplayLockedUserId and give it one of these values:
    • 1 = User display name, domain and user names
    • 2 = User display name only
    • 3 = Do not display user information

    dont-display-locked-user

    If you change this value to 3 then it will remove all user information from your Windows lock screen.

    Note: To prevent the last logged on user to be displayed in the Windows logon screen, also set the dontdisplaylastusername value to 1.

  4. Exit Registry Editor and reboot your computer. The next time you press Windows + L to lock your computer, your user name will not be displayed on the Windows lock screen any longer. User will be required to enter both their user name and password when logging back in from the locked workstation.

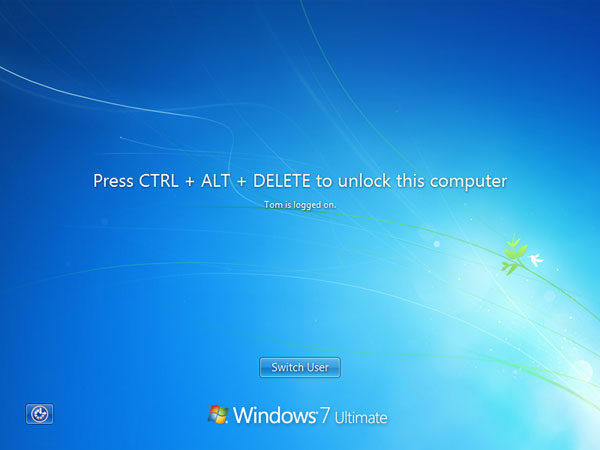
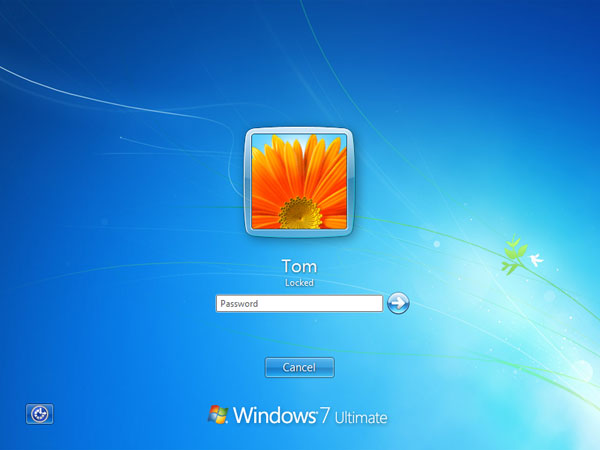
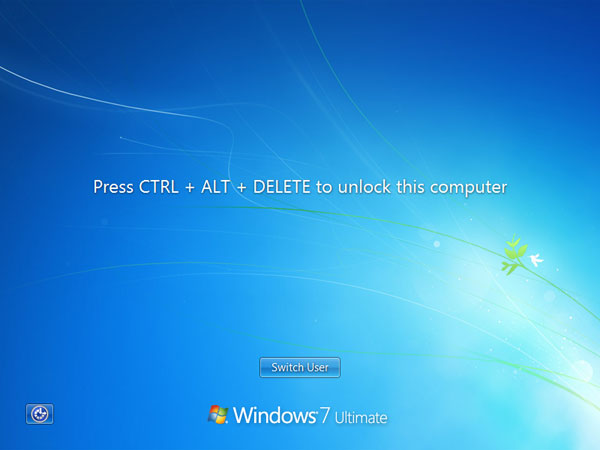
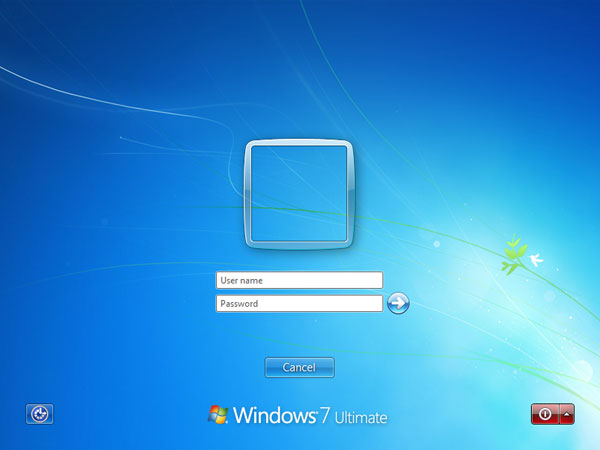
This is how it looks like on a Windows 7 machine.
Before:

press-ctrl-alt-del-2

windows-logon2

After:

press-ctrl-alt-del

windows-logon

How to Disable UAC in Windows 8 and 10

October 31st, 2014 by Admin

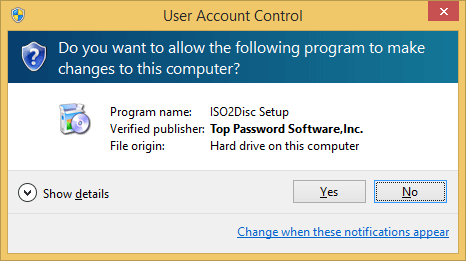
UAC (User Access Control) is a security feature introduced since Windows Vista, which helps prevent unauthorized changes to your computer. When you try to install a program or make changes to Windows settings, the UAC prompt will show up asking for your approval, even though you are already logged on as an administrator.

user-account-control

If the changes are not approved by the administrator, they are not executed and Windows remains unchanged. It is as if nothing happened. However, most of the windows users simply keep it disabled as you have to bear the pop-up and press Yes every time you run an application. Here’s how to disable UAC in Windows 8 and 10.

How to Disable UAC in Windows 8 and 10?

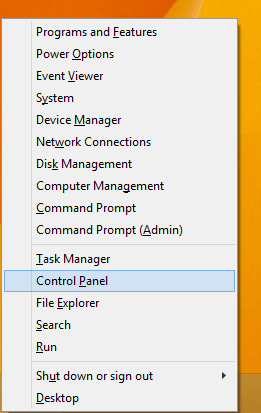
  1. Press the Windows key + X to open the power user menu, and then select Control Panel from the list.

    win+x-menu

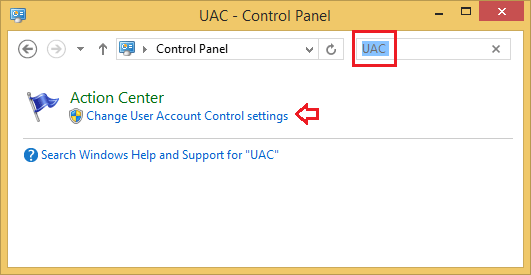
  2. Once Control Panel is launched, type UAC in the search box in the upper right corner of the window. Click Change User Account Control settings in the search results.

    search-uac

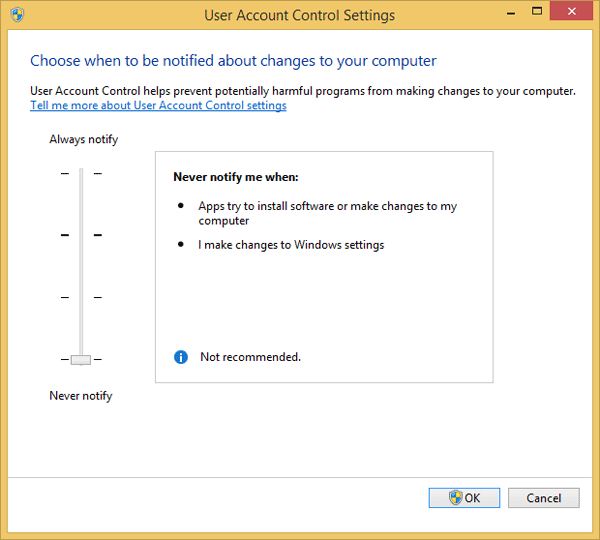
  3. Use the vertical slider to select the desired UAC security level. To turn off UAC entirely, drag the slider down to Never notify, and click OK.

    uac-settings

    You need to reboot the computer before it takes effect.

How to Boot Windows 8 in Safe Mode If Your PC Won’t Start

October 30th, 2014 by Admin

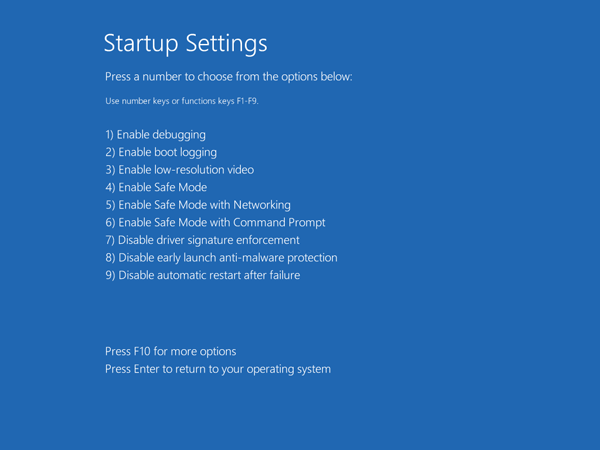
In my previous post I’ve covered the procedure to access the Safe Mode from Windows 8 login screen. But that method won’t work in case your computer is crashed or unable to start. Since Windows 8, the boot process is now so fast that it’s also impossible to access the Safe Mode by pressing the traditional F8 key. So here I’m going to explain another method to boot Windows 8 in Safe Mode if your computer won’t start.
How to Boot Windows 8 in Safe Mode with A Recovery Drive?

  1. Boot your problematic computer from Windows 8 recovery drive. If you don’t have a recovery drive, you can create one on another Windows 8 PC which you can access, by following this guide: How to Create a Recovery Drive in Windows 8.
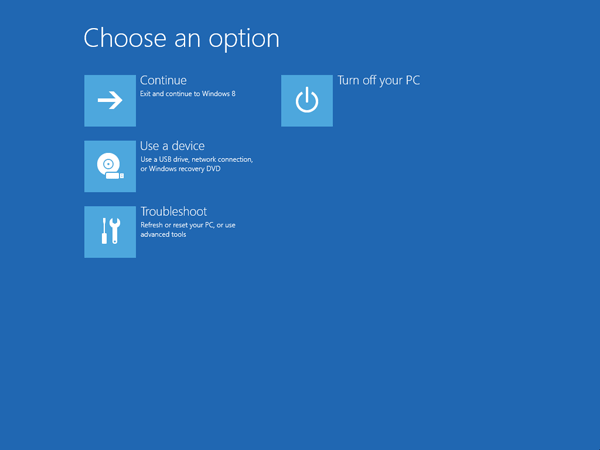
  2. After your computer boots from the recovery drive and you’re presented with the Choose your keyboard layout screen, choose the keyboard layout appropriate for your device. On the next screen, click Troubleshoot.

  3. When you see the Troubleshoot screen, click Advanced options.

  4. On the Advanced options screen, click Startup settings.

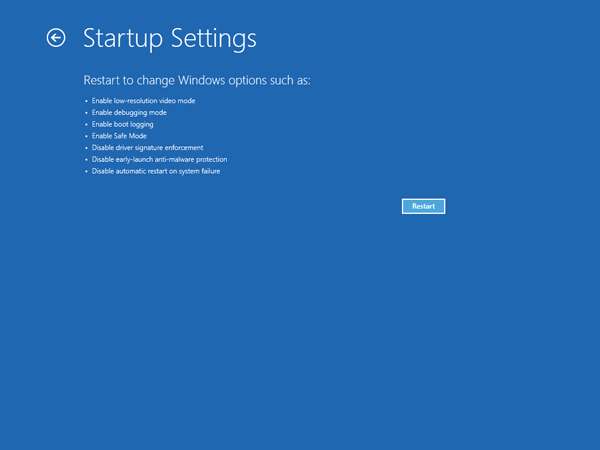
  5. On the next screen, click Restart.

  6. Once the PC has restarted, you will be given the option to boot to Safe Mode by pressing F4.

How to Track User Logon Activity with Logon Auditing

October 29th, 2014 by Admin

Ever wonder how to keep a track of who logged into your computer and when they log in? Or want to find out who is trying to break into your Windows account? Luckily Windows comes with a built-in feature – Logon Auditing, which enables you to record logon, logoff and logon failure events, along with the user information and the time at which the computer was accessed.

In this article we’ll show you how to enable logon auditing to have Windows track which user accounts log in and when. This is particularly helpful in determining and analyzing any attacks on a local computer or over a network.

Part 1: Enable Logon Auditing in Windows

To enable Logon Auditing, we need to configure Windows Group Policy settings. Press Windows + R, type gpedit.msc and press Enter.

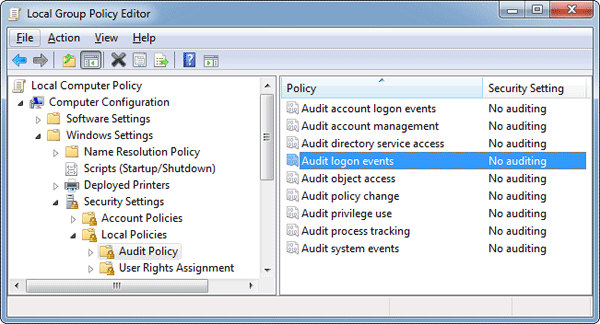
After the Local Group Policy Editor opens up, navigate to Local Computer Policy –> Computer Configuration –> Windows Settings –> Security Settings –> Local Policies –> Audit Policy. Double-click the Audit logon events policy in the right pane.

audit-logon-events

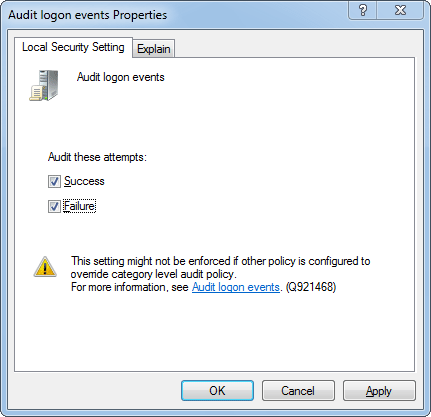
When the logon event property window opens up, check both Success and Failure to audit all types of account logon activities. Click Apply to save your changes.

logon-audit-settings

From now on, every log in, log off and failed log in attempts will be recorded in the Event Viewer.

Part 2: View Logon Audit Events

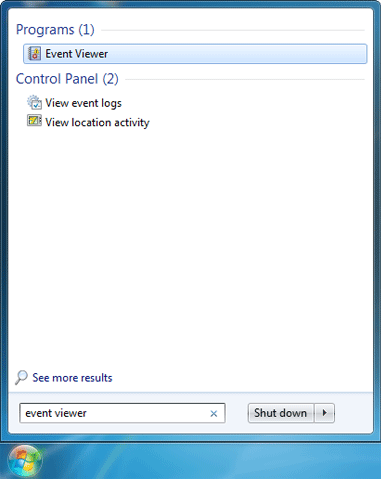
To launch Event Viewer, click Start, type Event Viewer and hit Enter. In Windows 8, you can press the shortcut Windows + W and search for the Event Viewer applet.

open-even-viewer

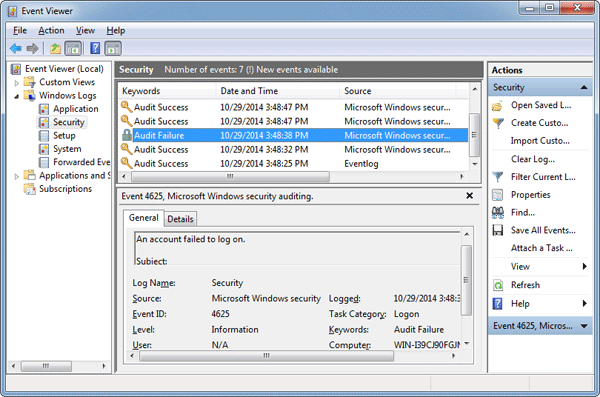
In the Event Viewer window, navigate to the Windows Logs -> Security option to see the logs for both the successful and failed logon attempts.

event-viewer

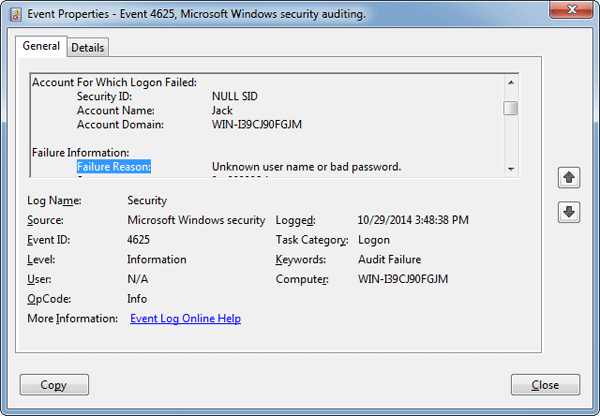
Double click on one of the logon events, you will find out the details like the user that has been logged in or logged out, logon date and time, etc.

logon-failure-event

Conclusion

So that is how you can record and view logon events in Windows 7 Pro. Logon Auditing is also available in Windows 8 (Windows 8 Pro, Ultimate and Enterprise editions) too, although not in all the versions.

Fix: Unable To Execute Files In The Temporary Directory. Setup Aborted

October 27th, 2014 by Admin

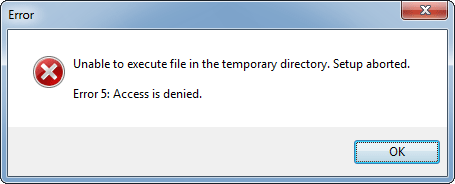
When you try to install a program downloaded from the Internet in Windows 8, 7 or XP, you might receive the following error message:

Unable to execute file in the temporary directory. Setup aborted. Error 5: Access is denied.

unable-execute-file

Right-click your downloaded .exe file and select Run as administrator. This is a temporary fix and Microsoft needs to patch it up in their updates. The problem is with the security permissions on your profile temp folder. Here are step-by-step instructions to fix this error permanently:

Before sorting out this issue, we need to find out where the temp folder is located. This folder is different for each Windows user i.e., each logged-in user gets a separate “Temp” folder. Simply press Windows key + R to bring up the Run box. Type cmd and press Enter.

The Command Prompt will run with permissions of the current logged-on user. Type set TEMP and press Enter. It will display your profile temp folder. By default, the temp folder is stored in C:\Users\{username}\AppData\Local directory in Windows 8/7/Vista, and in C:\Documents and Settings\{username}\Local Settings directory in Windows XP and previous versions.

command-prompt

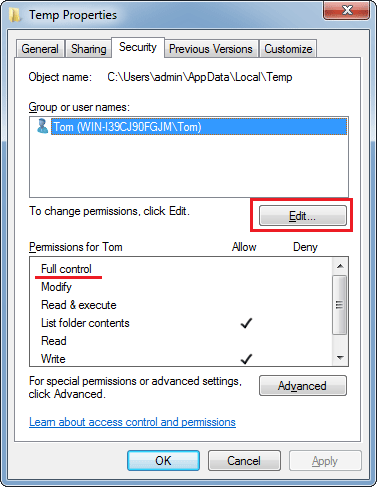
Navigate to your profile temp folder. Right-click on the Temp folder and choose Properties. In the Properties window, click the Security tab, and then click Edit to change permissions.

folder-properties

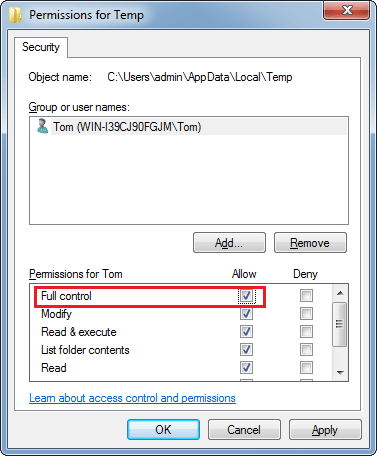
Here select your account from the list and check the Full Control checkbox. When done, hit OK. Note that when you will check the Full Control checkbox, all other permissions will be automatically checked too.

folder-permissions

Now go ahead and you should be able to install your program successfully.

How to Take Screenshots with Freeware Greenshot

October 22nd, 2014 by Admin

There are many programs available for taking screenshots. If you’re looking for a free option, Greenshot is is an excellent and open source screenshot tool for Microsoft Windows. It is free for both personal and commercial use. It’s much easier for a beginner to use than some paid screenshot tools. Here’s how to install Greenshot and use it to take screenshots in Windows 7.

How to Take Screenshots with Freeware Greenshot?

You can grab a free copy of Greenshot from its official website. Compatible with all Windows versions, the downloaded file is sized at nearly 1.3Mb. Double-click the setup file you have downloaded to install it on your computer.

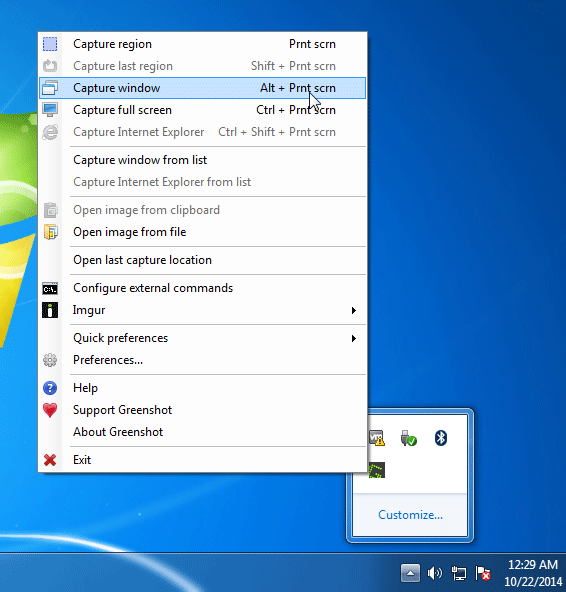
After installation, right-click on the Greenshot icon in the system tray to access the Greenshot menu. Using this menu, you can take different types of screenshots, open an image in the Greenshot editor, set Preferences, and perform several other useful tasks.

capture-window

As an example, we’re going to take a screenshot of the Skype application. Simple select the Capture window from the Greenshot menu, and you can then pick the Skype window to capture with a single click.

skype

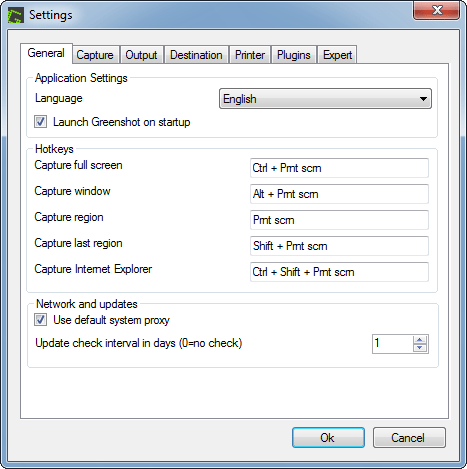
Thankfully, Greenshot also provides a list of keyboard shortcuts that making the jobs easier. If you need to take a screenshot for an active window, simply press the Alt + PrntScr hotkey. While pressing Ctrl + PrntScr you can capture the full screen.

greenshot

Once a screenshot has been captured, a popup menu will display asking what you want to do with the screenshot. We can choose to save it to a folder, or open it in Greenshot’s image editor to add some enhancements to it.

Conclusion

Greenshot may not be the best screenshot-taking program. But it handles most basic screen capture needs easily. If you don’t need to capture video and don’t mind editing captures in another program, it does everything you are likely to need. In fact, Greenshot has become my screen capture program of choice.

Reset Windows 8.1 Password on Lenovo G410/G500/G510/G710 Laptop

October 21st, 2014 by Admin

If you forgot Windows 8.1 password on your Lenovo laptop, it’s no big deal to reset the password with the tool PCUnlocker. This step-by-step guide shows you how to reset lost Windows 8.1 password on Lenovo G series laptops, such as Lenovo G410/G500/G510/G710. PCUnlocker can run from either a boot CD or a USB stick, but I’ll use a CD in this guide.

How to Reset Windows 8.1 Password on Lenovo G410/G500/G510/G710 Laptop?

First, use an alternate PC to download the PCUnlocker software. Unzip the downloaded file and you’ll get a disc image named pcunlocker.iso. Burn the ISO file to a blank CD (or USB stick) with the freeware ISO2Disc.

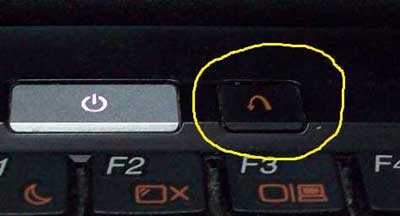
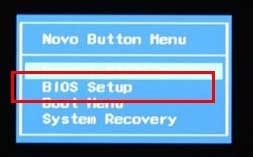
Insert the burned CD to your locked Lenovo laptop. Before getting the laptop to boot from CD, you need to make some changes with the BIOS configurations. When your laptop is powered off, press the Novo button to turn it on.

Novo-button

When the Novo Button Menu screen appears, select BIOS Setup.

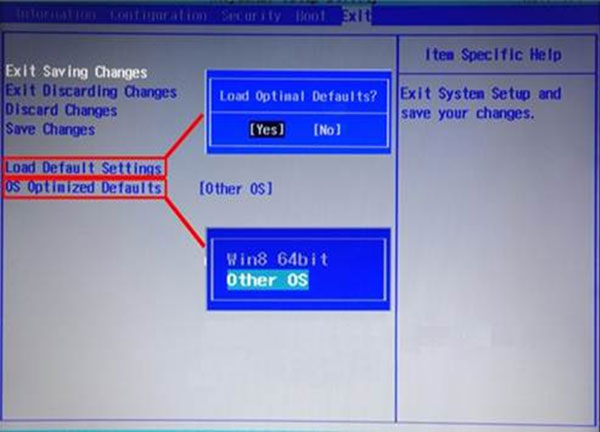
In the BIOS, go to the Exit tab. Set OS Optimized Defaults as Other OS, then Load Default Setting and save. Turn off the machine and then use the Novo button to enter BIOS Setup again.

lenovo-default-settings

Go to the Boot tab, change Boot Mode from UEFI to Legacy Support, and set Boot Priority as Legacy First. Save your changes and exit.

lenovo-boot-mode

Turn off your computer and then press the Novo button again. When the Novo Button Menu is displayed, select Boot Menu. Next choose your CD/DVD drive and press Enter to boot from it.

Your computer will load the contents of the CD drive. When it is finished you will be presented with the PCUnlocker program, which lists your Windows 8.1 user accounts.

Choose the user name for which you want to reset the password, and click on Reset Password button to clear the password.

Congrats! You just reset your Windows 8.1 password. Reboot and take out the CD, and then change the Boot Mode back to UEFI. After that you can log on with a blank password for a local account, or log on with the new password Password123 if you use a Microsoft account as your login method.