Archive for the ‘Windows 8’ category

How to Check if I Have Windows Administrator Rights?

May 7th, 2018 by Admin

Do I have local admin rights? Before you can make system-wide changes to the system, such as install software or run elevated command prompt, you’ll need to log into Windows as a user with administrative rights. Here’s how to quickly check if a user account is an administrator or not in Windows 10 / 8 / 7 / Vista / XP.

Method 1: Check for Administrator Rights Using Control Panel

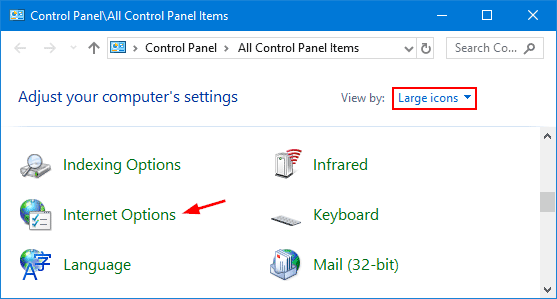
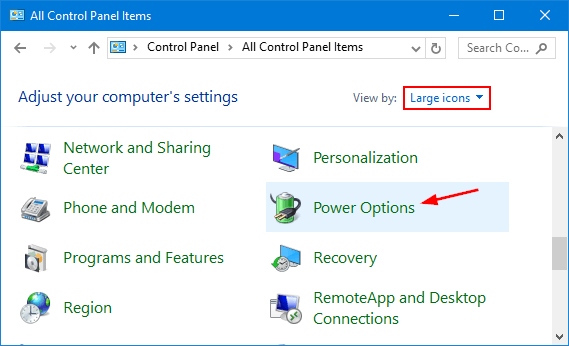
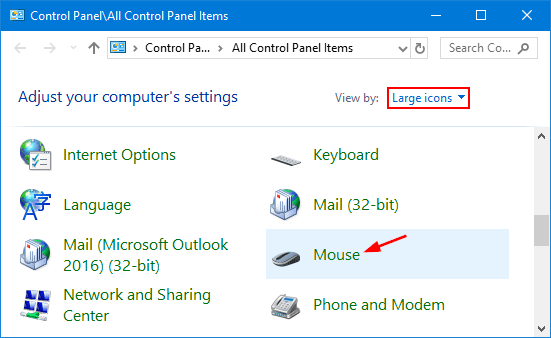
  1. Open the Control Panel in Large icons view, and then click User Accounts.

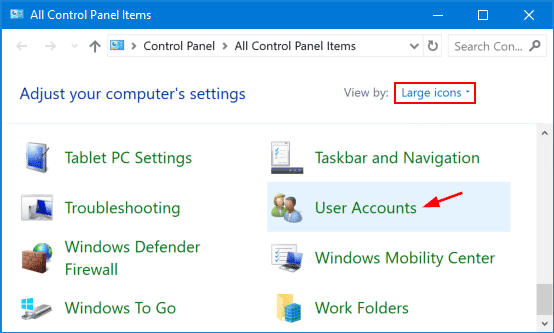
  2. Click the Manage another account link.

  3. You should see all the accounts on your computer. If your account has admin rights, you can see the word “Administrator” under your account name.

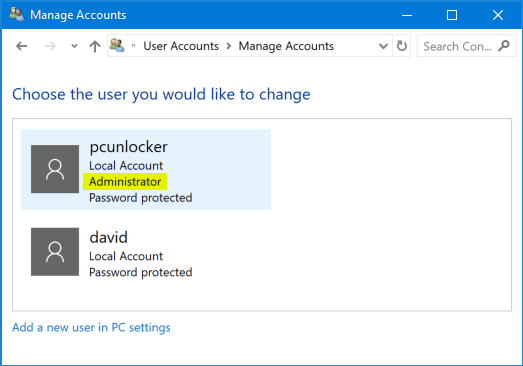
    As you can see from the screenshot above, pcunlocker is an administrator while david is a standard/limited user.

Method 2: Check for Administrator Rights Using Command Prompt

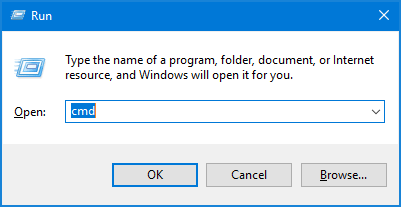
  1. Press the Windows key + R keys on the keyboard to open the Run box. Type cmd and press Enter.

  2. In the Command Prompt, type the following command and hit Enter.
    net user account_name

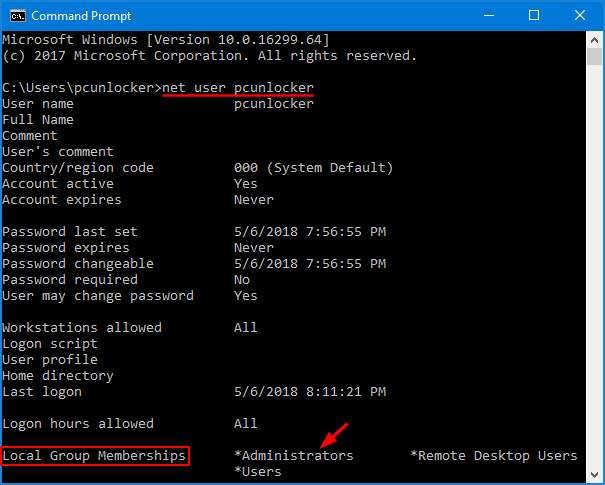
  3. You’ll get a list of attributes of your account. Look for the “Local Group Memberships” entry. If your account belongs to the “Administrators” group, it should have admin rights.

That’s it!

Quick Ways to Open Internet Options in Windows 10 / 8 / 7

May 3rd, 2018 by Admin

Where do I find Internet Options in Windows 10? Internet Options is a Control Panel applet which lets you manage browser security level, control your privacy, block or allow specific websites and so on. In this tutorial we’ll show you 4 quick ways to open Internet Options in Windows 10 / 8 / 7.

Method 1: Open Internet Options from Internet Explorer

Open up the Internet Explorer. Click the Settings icon in the upper-right corner, or click the Tools menu.

Select Internet options from the drop down menu, you can then access Internet Options immediately.

Method 2: Open Internet Options via Run Command Box

Press the Windows key + R to open the Run command box. Type inetcpl.cpl and press Enter.

You can now get to Internet Options.

Method 3: Open Internet Options from Control Panel

Open the Control Panel, and change it to the Large icons view.

Click Internet Options.

Method 4: Open Internet Options via Search

In Windows 10, type “internet options” in the Cortana Search box and you can then access Internet Options from the search result.

If you’re running Windows 7, click the Start button and type “internet options” in the Search box. Click its shortcut and it will open Internet Options quickly.

Disable Beep Sound When Plugging / Unplugging Laptop Charger

May 2nd, 2018 by Admin

Disabling annoying power cord beep? When plugging in or plugging out the power adapter, there will be an annoying beep sound. In this tutorial we’ll show you 2 simple ways to disable beep sound when plugging or unplugging laptop charger.

Method 1: Disable Beep Sound When Plugging / Unplugging Laptop Charger via Device Manager

If you’re running Windows 7:

  1. Press the WIN + R keys together to open the Run box. Type devmgmt.msc and press Enter.

  2. When the Device Manager window opens, click the View menu and then select Show hidden devices.
  3. In the left pane, click on Non-Plug and Play Drivers to expand it, then double-click the Beep device.

  4. Switch to the Driver tab. Set Startup type as Disabled.

    Click Apply and reboot your computer.

If you’re running Windows 10 or Windows 8, you have to disable the System Speaker device instead:

  1. Press the WIN + R keys together to open the Run box. Type devmgmt.msc and press Enter.
  2. In the left pane of the Device Manager window, Expand “System Devices“. Right-click on System Speaker and select Disable.
  3. Reboot your computer.

Method 2: Disable Beep Sound When Plugging / Unplugging Laptop Charger via BIOS

  1. Press a specific key (F2, F12, DEL, ESC, etc) repeatedly after restarting your laptop to access the BIOS Setup utility.
  2. Use the arrow keys to navigate through BIOS settings to look for “Power Beep“, “Power Control Beep” or a similar option, and set it to Disabled.

  3. Save your changes and exit BIOS.

How to Stop Laptop from Sleeping / Shutdown When Lid is Closed

April 25th, 2018 by Admin

how do I stop my Windows laptop from shutting down when I close the lid? By default, Windows will go into sleep mode when you close your laptop’s lid. If you want Windows to keep running even when your laptop’s lid is closed, here’s how to customize the default action to take when you close the lid.

How to Stop Laptop from Sleeping / Shutdown When Lid is Closed?

  1. Open the Control Panel in Large icons view. Click Power Options.

  2. Click the “Choose what closing the lid does” link in the left side panel.

  3. If the options are grayed out, you have to click the “Change settings that are currently unavailable” link at the top.

  4. Open the drop-down list next to the “When I close the lid” option. Select “Do nothing” under both “On battery” and “Plugged in“.

  5. Click Save changes. Now, when you close the laptop lid, Windows will still keep running, without losing any unsaved work or suspending your downloads.

How to Create Keyboard Shortcuts for Any Windows Application

April 8th, 2018 by Admin

Is there a way to create your own keyboard shortcut to launch the apps you use most often? This feature is built into Windows for quite a long time, but many people don’t even know it existed. In this tutorial we’ll show you how to create custom keyboard shortcuts to launch any application in Windows 10 / 8 / 7, without using third-party programs.

How to Create Keyboard Shortcuts for Any Windows Application

  1. Right-click on the shortcut to the app you need a keyboard shortcut for, and then select Properties.

    If you can’t find a shortcut, right-click on the relevant executable file and choose New -> Shortcut.

  2. In the Properties window, go to the Shortcut tab. Click in the Shortcut key box and type a letter or number. This character is appended to Ctrl+Alt, so you’ll end up with something like Ctrl+Alt+F.

  3. Click OK to save your change. When asked for administrator permissions, click on Continue.

    You can then launch your application using the keyboard combination: CTRL + ALT + a letter / number. That’s it!

If you want to delete the keyboard shortcut later, just open the Properties window again and click in the Shortcut key box and press the Backspace key to delete the shortcut.

How to Open Print Management in Windows 11 / 10 / 8 / 7

March 29th, 2018 by Admin

Print Management missing from Windows 10 Administrative Tools? Print Management is a Microsoft Management Console (MMC) snap-in that enables you to install, view, and manage the printers. In this tutorial we’ll show you the easiest ways to open Print Management in Windows 11 / 10 / 8 / 7.

Method 1: Open Print Management via Run Command

Press the Windows key + R to open the Run command box, type printmanagement.msc and hit Enter.

This will launch the Print Management console immediately. Expand the Print Servers node on the left, you can add / delete the printers and drivers, view printer queue, configure the printer port, print test page, etc.

Method 2: Open Print Management via Control Panel

Open the Control Panel and select Large icons under the View by drop-down list. Click Administrative Tools.

You can find the Print Management shortcut.

Can’t Find Print Management in Windows 10/8/7 Home?

Print Management is not available in the Home edition of Windows. However, you can find an alternative Control Panel applet that can help manage the printers connected to your computer. Follow these steps:

Open the Control Panel in Large icons view. Click Devices and Printers.

In the Devices and Printers window, you can see the connected printers, scanners, Bluetooth and other external devices. Right-click on your printer and you can see how many documents are in the printing queue, set the default paper size for printing, manage the printer properties.

Click the “Print server properties” in the toolbar area and it lets you configure available printer forms and printer ports, add and remove printer drivers, etc. That’s it!

How to Change Mouse Sensitivity and Pointer Speed in Windows 10 / 8 / 7

March 27th, 2018 by Admin

Mouse cursor moving extremely slow? The cursor lag could make you mad especially when you’re playing games. In this tutorial we’ll explain how to change mouse sensitivity and pointer speed in Windows 10, 8 and Windows 7.

How to Change Mouse Sensitivity and Pointer Speed in Windows

  1. Open the Control Panel in Large icons view, click the Mouse option.

  2. In the Mouse Properties window, go to the Pointer Options tab. Under the Motion section, move the slider toward Slow or Fast until you achieve the desired mouse sensitivity.

  3. To make the pointer work more accurately when you’re moving the mouse slowly, select the Enhance pointer precision check box as well.
  4. Click OK to save your changes.

If you are a gamer with a gaming mouse, you might know what the DPI is. DPI is the standard used to measure the mouse sensitivity, expressed as the number of DPIs (dots per linear inch) that a device can detect. You can often change the DPI settings with the software created by your mouse’s manufacturer.

How to Disable SuperFetch in Windows 10 / 8 / 7

March 21st, 2018 by Admin

Superfetch causing high disk or memory usage? SuperFetch, previously known as Prefetch, is a Windows service that makes your frequently-used programs load faster by preloading them into RAM. However, Superfetch can sometimes take up too many system resources (such as CPU, memory and storage). Here’s how you can disable Superfetch in Windows 10 / 8 / 7.

Method 1: Disable Superfetch Using Windows Services App

  1. Press the Windows key + R to open the Run prompt, then type services.msc and click OK.

  2. In the Services window, scroll down to find the Superfetch service. Double click on it to configure its properties.

  3. Click the Startup type drop-down list and select Disabled, then click OK and restart your computer.

If you don’t want to permanently disable Superfetch, you can stop the service temporarily by running the following command at the Command Prompt:
net stop superfetch

Method 2: Disable Superfetch Using Registry Editor

  1. Press the Windows key + R to open the Run prompt, then type regedit and press Enter.

  2. Browse to the following registry location using the left sidebar:
    HKEY_LOCAL_MACHINE\SYSTEM\CurrentControlSet\Control\Session Manager\Memory Management\PrefetchParameters

    Then double-click the 32-bit DWORD value EnableSuperfetch in the right pane. If it doesn’t exist, you have to create it.

  3. To disable SuperFetch, change Value Data to 0 and click OK.

    Once you reboot, Superfetch will stay inactive.

If you want to enable SuperFetch later, just restore the value of EnableSuperfetch back to 3 and you’re done!

Find Location of Mouse Pointer Using Ctrl Key in Windows 10 / 8 / 7

March 12th, 2018 by Admin

Mouse cursor has disappeared after upgrading to Windows 10? This may happen irrespective of whether you use a wireless or a wired mouse. In this tutorial we’ll show you how to enable Windows to show the location of mouse pointer when pressing the Ctrl key.

How to Find Location Of Mouse Pointer Using Ctrl Key in Windows?

Press Windows key and R key at the same time. When the Run box appears, type main.cpl and hit Enter.

In the Mouse Properties dialog, select the Pointer Options tab at the top. Check the box “Show location of pointer when I press the CTRL key” and click OK.

From now on, you just need to press the CTRL key to find and show the pointer location on the screen.

How to Open Mouse Properties in Windows 10 / 8 / 7

March 12th, 2018 by Admin

If you want to change mouse sensitivity or customize mouse cursor in Windows, you have to access the Mouse Properties dialog. This tutorial will show you the easiest ways to open Mouse Properties in Windows 10 / 8 / 7.

Method 1: Open Mouse Properties via Run Command

Hold down the Windows Key and Press R on your keyboard. Once you’ve got the Run command box open, type main.cpl and press Enter.

This will open the Mouse Properties dialog immediately.

Method 2: Open Mouse Properties via Control Panel

Open the Control Panel in Large icons view, and then click the Mouse option.

Method 3: Open Mouse Properties via Settings App in Windows 10

Open the Settings app in Windows 10, and click the Devices category.

Select the Mouse tab, then click the Additional mouse options link on the right side.

Now you can access the Mouse Properties window.