Do you want to customize your desktop icons and make your PC uniquely yours? Or all desktop icons were messed up and want to restore them to default? In this article we’ll show you how to change or restore desktop icons (such as This PC, Network, Control Panel, Recycle Bin, and your user profile icon) in Windows 10.
![]()
Part 1: Change Desktop Icons in Windows 10
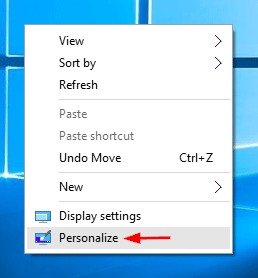
- Right-click on any empty place of your desktop. Select Personalize from the context menu.
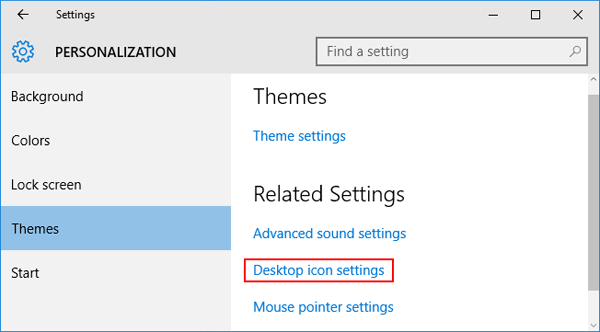
- From the Personalization window, select the Themes tab on the left-side menu, and then click Desktop icon settings.
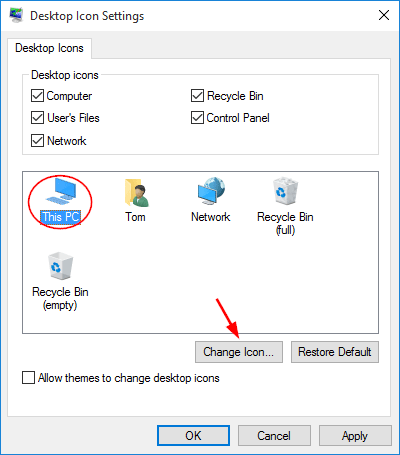
- Select the icon you wish to change. As shown in the picture below, I want to customize the icon for “This PC” shortcut, so I choose the This PC icon and click the Change Icon button.
- In the Change Icon window, you can see a list of built-in system icons. If you don’t like them, you can click the Browse button to find the icon you’ve downloaded or created by yourself. Click OK once choosing your new icon.
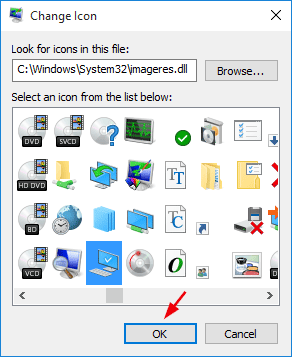
- Click OK and then Apply. You will see the new desktop icon that you have chosen on the desktop.
Part 2: Restore Desktop Icons to Default
- Right-click on any empty place of your desktop. Select Personalize from the context menu.
- From the Personalization window, select the Themes tab on the left-side menu, and then click Desktop icon settings.
- Select the icon you wish to restore, and click the Restore Default button. Here you can restore all your desktop icons one by one.
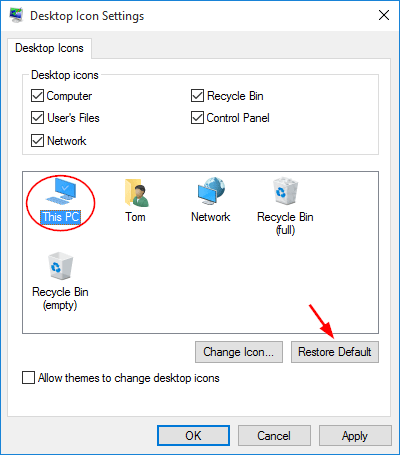
- When it’s done, click OK and then Apply. Now you’ve successfully reset your desktop icons to default.