When you right-click on a folder or file in Windows Explorer, you’ll see the Send To menu in the context menu. If you need to send your files to a particular destination or application regularly, you can just add a shortcut item to this Send To menu. In this tutorial we’ll show you how to customize the Send To menu in Windows 10, by adding / removing or renaming the items.
How to Customize the Send To Menu in Windows 10?
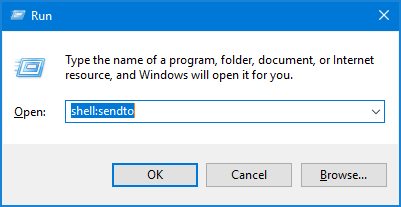
- Press the Windows key + R to open the Run command box. Type shell:sendto and press Enter.

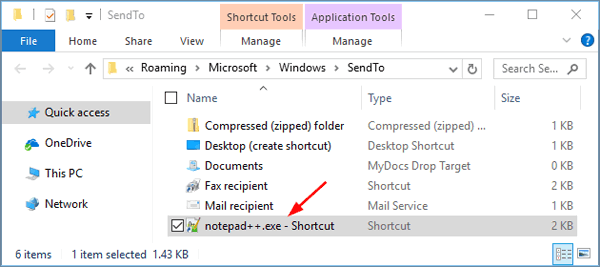
- This will open the following path in Windows Explorer:
C:\Users\user_name\AppData\Roaming\Microsoft\Windows\SendTo - Look at the screenshot below and you’ll see a list of items that you usually see in the Send To menu. To add a item, just copy its shortcut into the SendTo folder. For example, I like to open files with the text editor program – Notepad++, so I copy the shortcut to this location.

- If you want to rename an item in your Send To menu, just rename the shortcut in the SendTo folder. To remove an item that you never use from the Send To menu, just delete its shortcut in the SendTo folder.
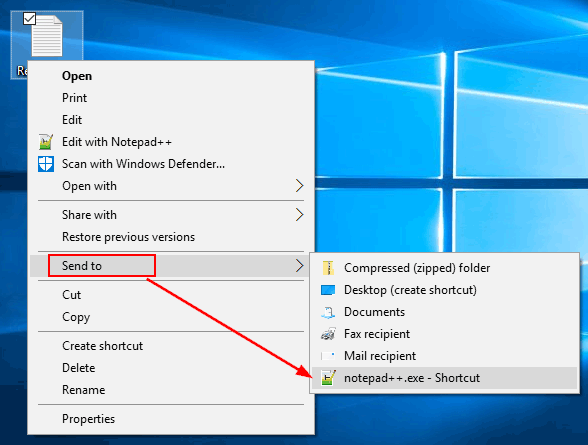
- After customizing, right-click on a file/folder and choose Send to, you’ll see the items you’ve added and the unwanted items you removed don’t show up.
