How can I uninstall or remove Windows 11 themes at once? A different theme can be applied to change your desktop appearance including wallpaper, colors, icons and so on. There are thousands of themes available in Microsoft Store, so it’s natural to try some out. After you find the right one, you may want to delete all of the other installed or even built-in themes. In this tutorial we’ll show you 3 easy ways to delete and remove either installed or default themes in Personalization on Windows 11.
Method 1: Delete A Theme in Personalization on Windows 11
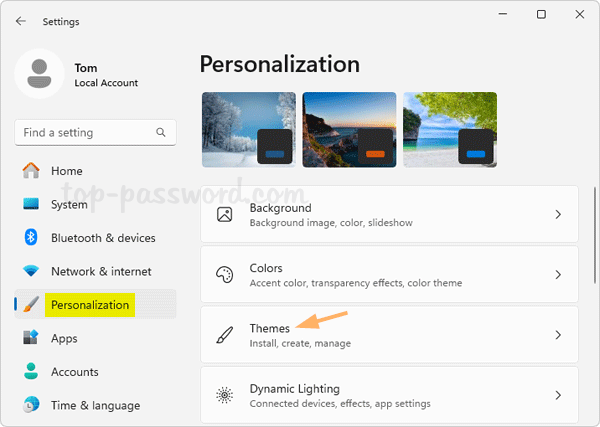
- Press the Windows key + I at the same time to open Settings. Choose Personalization on the left side, and click Themes on the right pane.
- Right-click on each theme and you’ll see the “Delete” button, which allows you to delete a theme at one time. If the “Delete” button is greyed out, it indicates that theme is a default theme pre-installed on Windows 11 or it is the currently active theme.
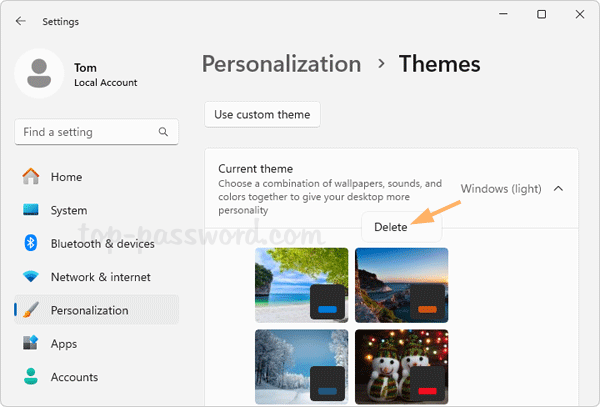
- You can repeat the same steps to delete other themes you’ve installed.
Method 2: Delete All Installed Themes at Once on Windows 11
- Press the Windows key + R together to bring up the Run box, type the following and press Enter.
%LocalAppData%\Microsoft\Windows\Themes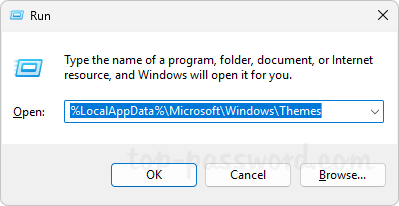
- In the pop-up File Explorer window, you’ll see individual folders for each theme which you have ever downloaded and installed from Microsoft Store.
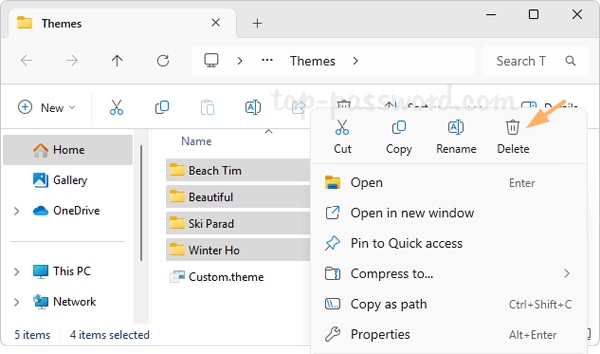
- To delete all installed themes, just select all of those folders, right-click on them and choose Delete. This method can also delete a theme that is currently active on your system.
Method 3: Delete Built-in Themes on Windows 11
- Open File Explorer and browse to:
C:\Windows\Resources\Themes. Each theme is represented by a file with the extension “.theme. You can double-click one of them to apply the theme immediately.
Windows (light): aero.theme Windows (dark): dark.theme Windows Spotlight: spotlight.theme Glow: themeA.theme Captured Motion: themeB.theme Sunrise: themeC.theme Flow: themeD.theme 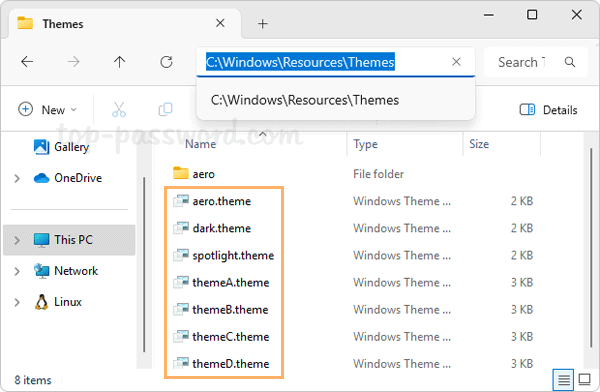
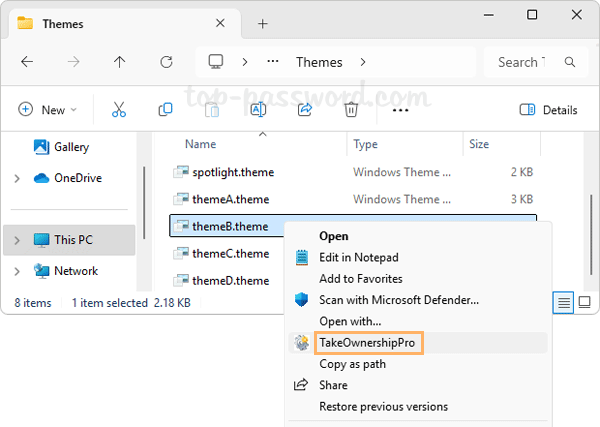
- By default, those .theme files can’t be deleted directly. You need to grant full permissions to your current Windows account firstly. To simplify this process, you can take use of the freeware TakeOwnershipPro. After installing, just right-click on those .theme files and select “Show more options” -> “TakeOwnershipPro“.
- Then you can delete the .theme files as usual.
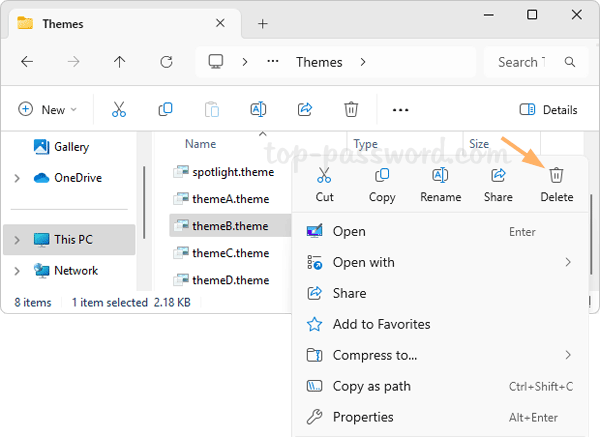
Note that this method can also be used to delete your current active default theme. Whenever you need to delete the high contrast themes, just go to the location:
C:\Windows\Resources\Ease of Access Themesand repeat the above steps.
That’s it!